
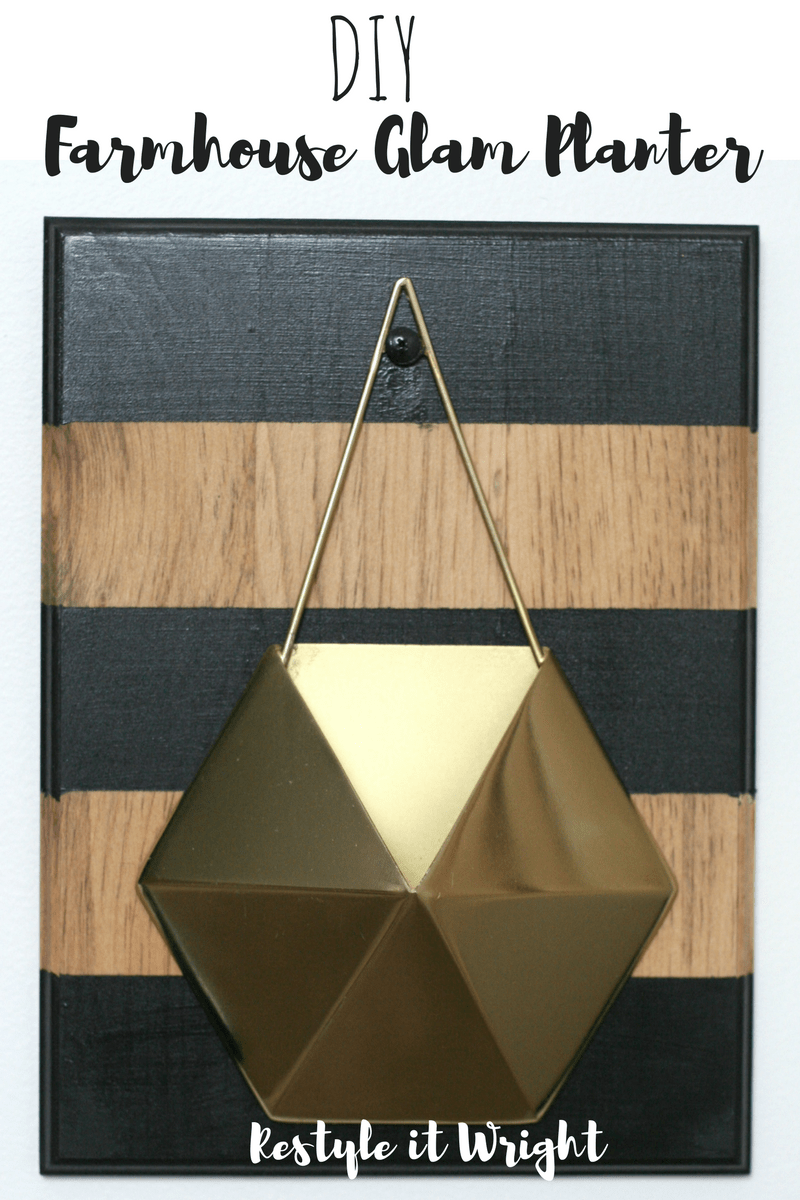
DIY Farmhouse Glam Wall Planter
Turn a regular planter into a farmhouse-glam wall planter with this DIY project! This DIY wooden wall planter is modern and stylish.
Hello, friends! I have something SO exciting to share with y’all today.
Today, my bloggy friend Colette from Restyle it Wright has stopped by. She is seriously SO funny (I’m constantly laughing when I read her posts) and she has the most beautiful style. I absolutely love this project she made; it’s the perfect marriage of our two styles.
I hope you enjoy it!!
Hi friends! I’m SO excited to be guest posting for you today on Sarah’s little happy place, a.k.a Making Joy and Pretty Things!
Sarah and I have been blog friends for what feels like forever, and I feel so honored to be here with you all. Sarah does some AMAZING farmhouse decor, so I thought I’d try and find a way to merge our two styles together into something fabulous.
I live life on the glam side — I love gold, glitter, pink, and all the fancy things I can find. While I totally appreciate the farmhouse style, I prefer a more glammed-up version for my own home.
So, with a healthy balance of stained wood, painted stripes, and some shiny gold, this farmhouse glam wall planter came to life!
I hope you love it as much as I do! Let’s dive right in, shall we?
This wall planter was SUPER easy and I tackled it between house cleaning, a hockey party we hosted, and visiting with my parents.
So, definitely a quick weekend project! It was also very budget-friendly thanks to having many of the items on hand but let’s get to the nitty-gritty!
This post contains affiliate links. Please, click here to read my disclosure policy.
How to Make a Glam DIY Wooden Wall Planter: Step-by-Step Tutorial
Supplies Needed to Make a Farmhouse Glam Wooden Wall Planter:
- Wall Planter, similar
- Pine Board -11×14
- Painter’s Tape
- Sandpaper
- Paint
- Stain
- Foam Paint Brush
- Paint Brush
- Polycrylic
- Faux Plant/Greenery, similar
- Sawtooth Comb or Picture Hanging Strips (for hanging)
Aside from the wall planter, pine board, and faux plant, I had everything else which was great!
Here’s how this little project came to be…I was wandering through the clearance section at my local Anthropologie and spotted these fun little geometric gold wall planters.

And get this! They were on sale for $7.95 marked down even 40% more off that…so basically free.
I snagged two of them with no clue on how I was going to make them work in my home – but I HAD to have them!
So, until this little DIY they sat in a bag. Now they are the shining star of this DIY wooden wall planter!
I was able to find some very similar ones, so you can grab your own (also at a great price!)
Step 1: Sand and smooth wood boards.
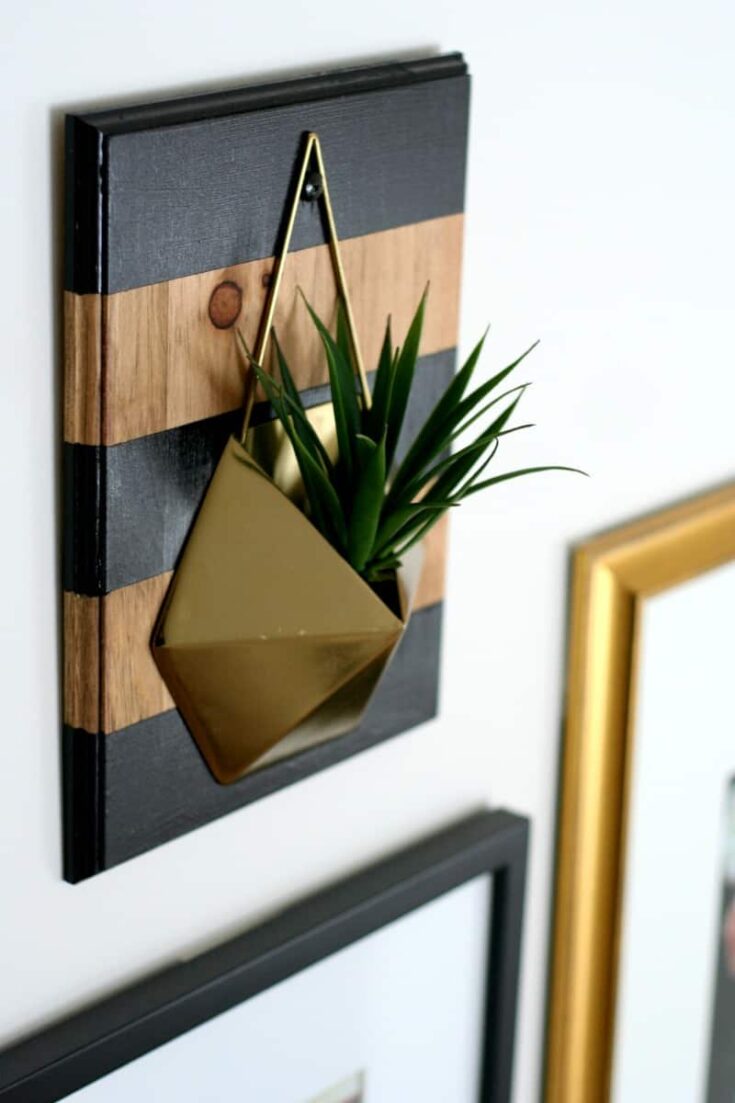
I decided I wanted to attach the geometric wall planter to some stained wood as a fun way to add in some warm wood tones to our home while still keeping the glam look.
I found this 11×14 pine board with just enough detail.
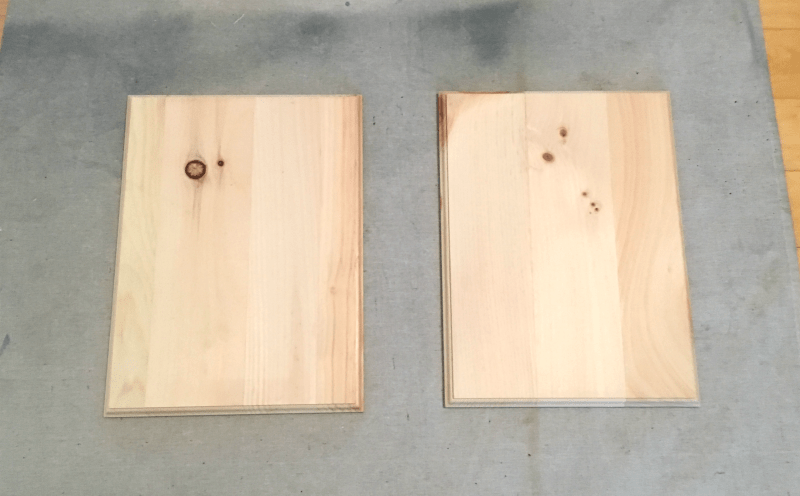
So I gave them a quick sanding to smooth them.
Step 2: Stain the wood boards.
I had a bunch of stain leftover from various projects so I selected Minwax “Special Walnut”.
It’s a great “goes with anything” stain color. I threw my gloves on and got to staining with a foam brush!
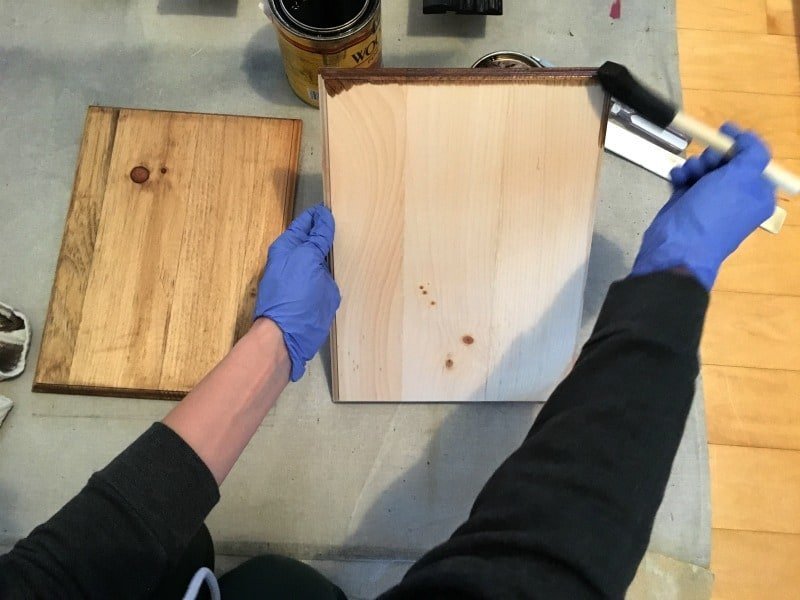
You know the drill… stain – wipe off the excess – dry and repeat for a second coat.
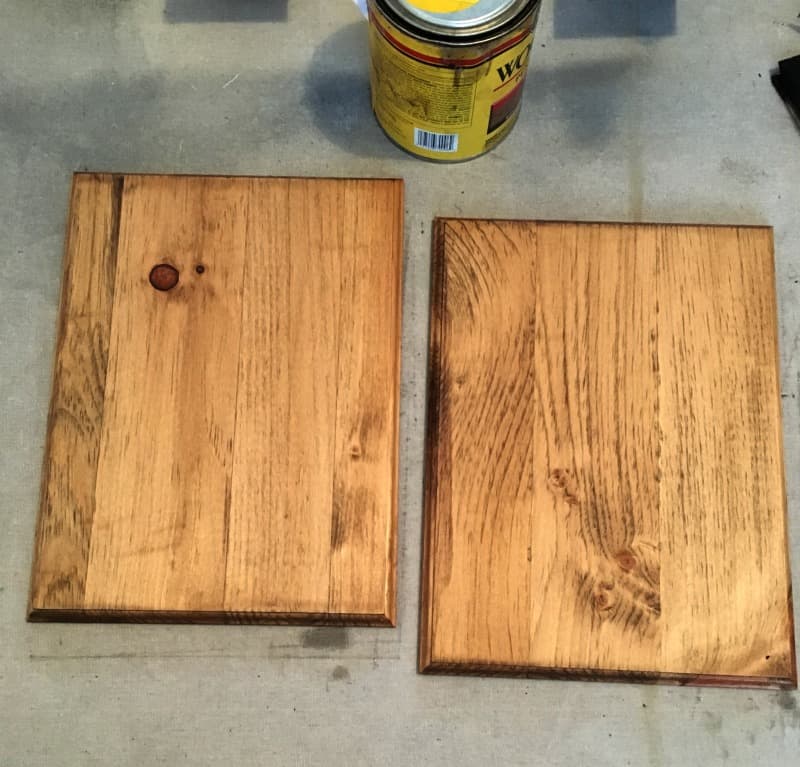
So after two coats of stain, the pine board looked like this.
Step 3: Paint stripes on the wood boards.
Once the wood was dry it was time to bring in reinforcements.
I really want to do a little something extra so I decided to do some bold stripes.
My husband is a professional stripe taper (is that a thing?) and I needed his help in figuring out how wide my stripes should be. After much deliberation, I went with a 5 stripe look.
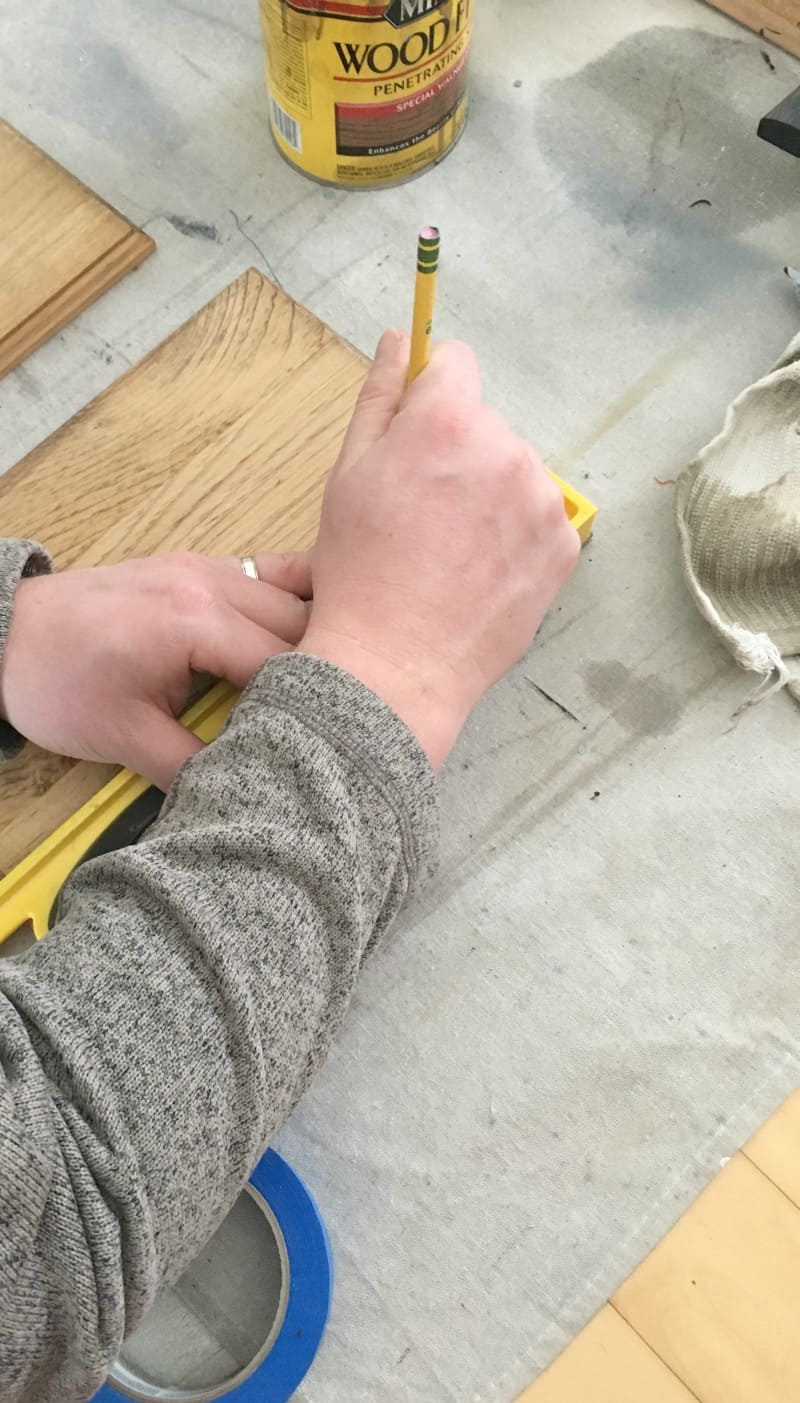
The husband measure the face of the board and it was 29 cm. So he divided that by 5 and that left each stripe to be 5.8 cm wide. With a level, he marked 5.8 cm from the top down across the board. Then he placed a line of tape that was 5.8 cm thick.
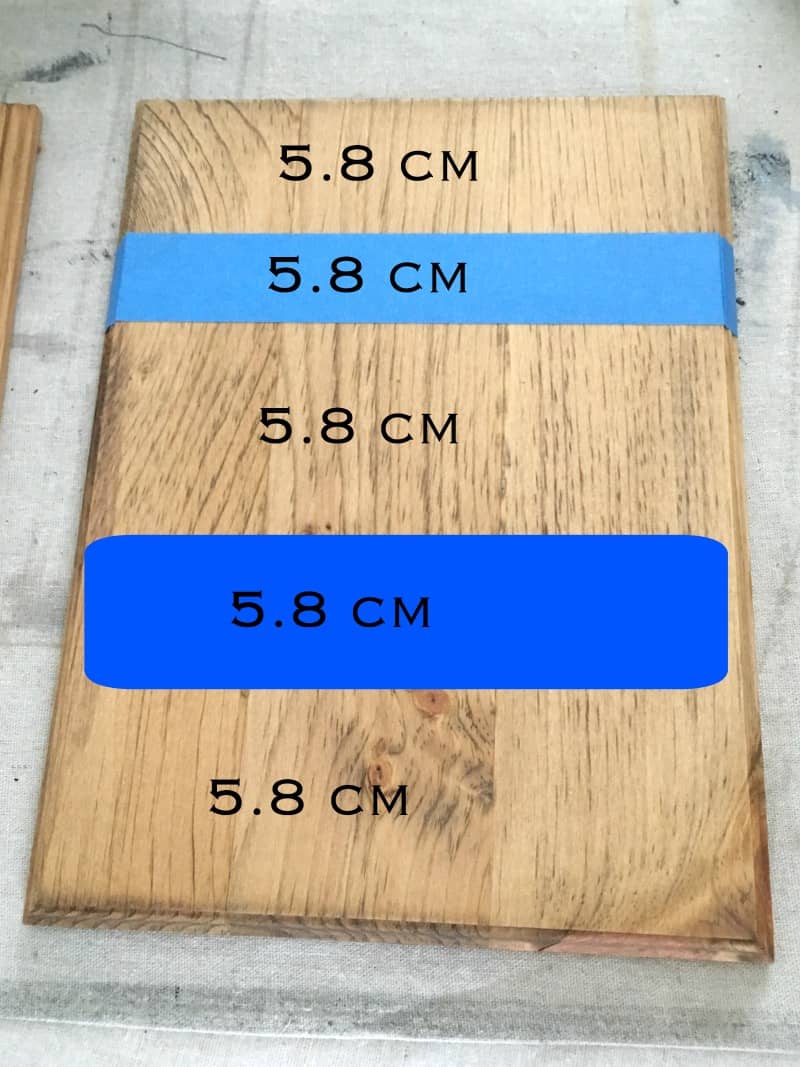
The bad blogger in me forgot to photograph the board with all the tape so I added in a faux stripe to give you an idea. Now the boards are ready for paint!
I had some black enamel paint left from when I painted our railing so that’s what I used. But, honestly, you need such little paint for this job a can of sample paint would work great.
Ensure your tape has a nice seal to the wood before you paint to avoid it bleeding through.
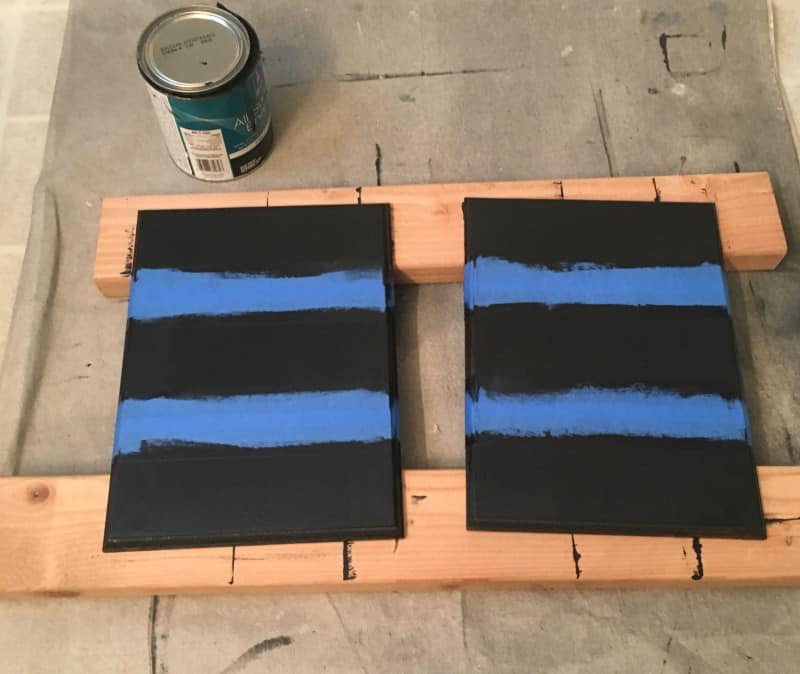
I recommend two coats (especially if painting on a lighter color) just to ensure coverage over the stain.
SUPER IMPORTANT: Once you apply the second coat of paint, it’s time to remove the tape very carefully. You want to do it when the tape is wet to avoid the tape peeling off the paint once dry. Learned that one the hard way from previous projects…
Once the tape is removed you’re left with this!
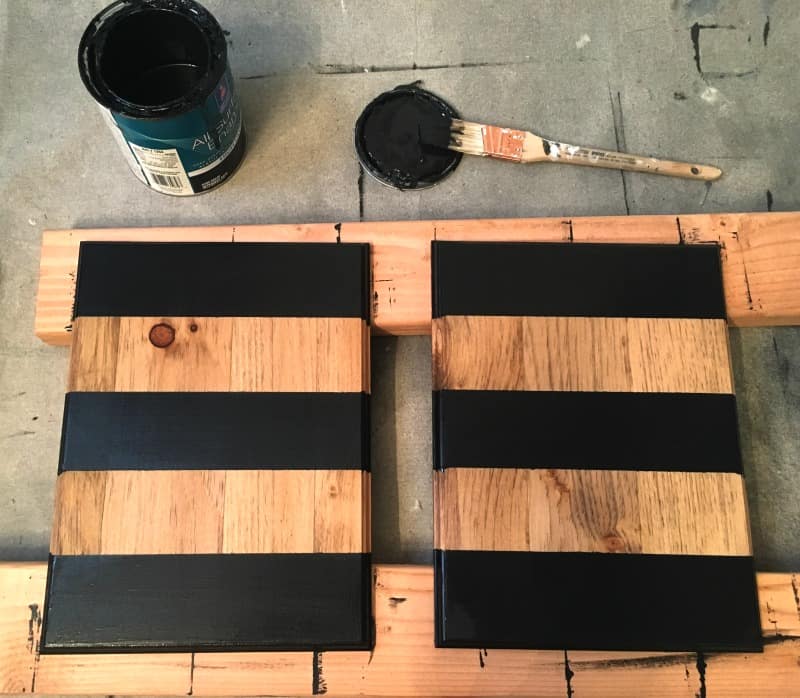
Cue the oohhhhhhhhs and aaaahhhhhhhhs
It was starting to look so fabulous!
Once dry, I threw on a quick coat of Polycrylic to protect it.
Step 4: Attach the gold planter to the wood boards.
Once they were dry it was time to add the gold planters. I decided where I wanted them placed on the board and got to work pre-drilling the hole where the screw would go.
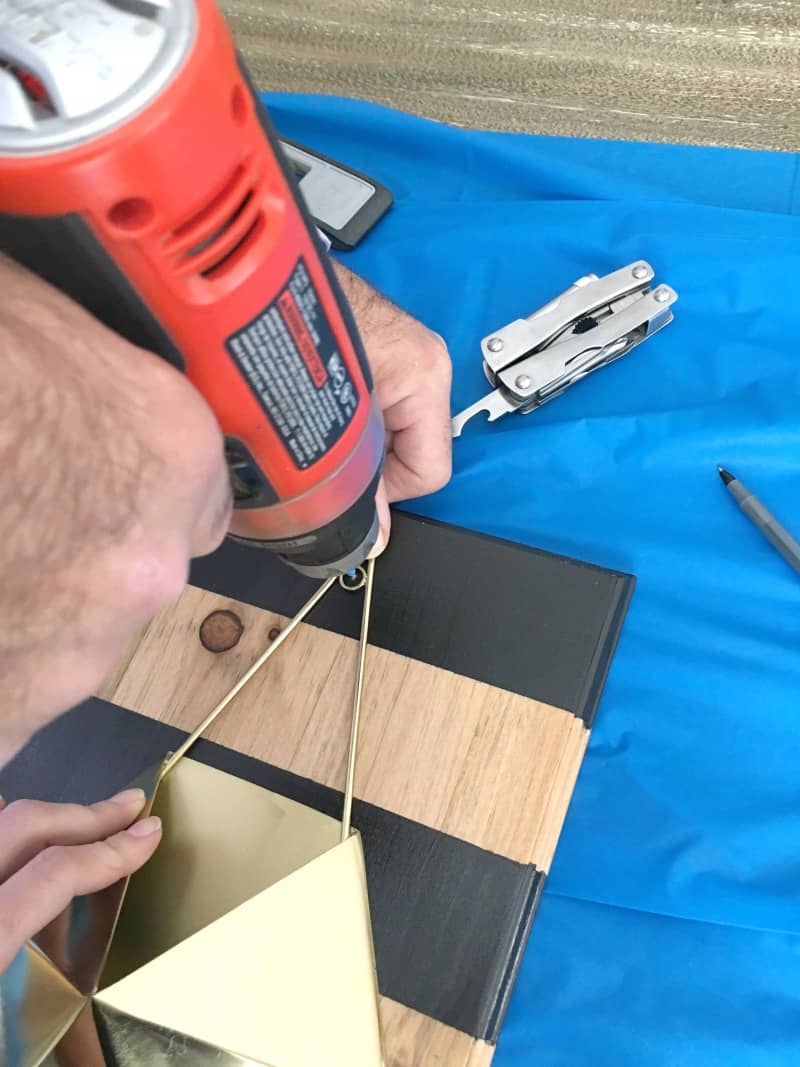
(Thanks Dad for the help!) I then attached a 5/8″ long screw to secure the wall planter to the board.
Sadly, the screw was silver. So, I threw some black paint on it so it would blend into the stripe but you could also spray it gold.
Oh, and I attached a little saw tooth hook on the back of the board to hang on the wall but you could also use command strips to avoid holes.
Then…it was complete!
The Finished Product: A Glam Farmhouse-Style Gold and Wood Wall Planter
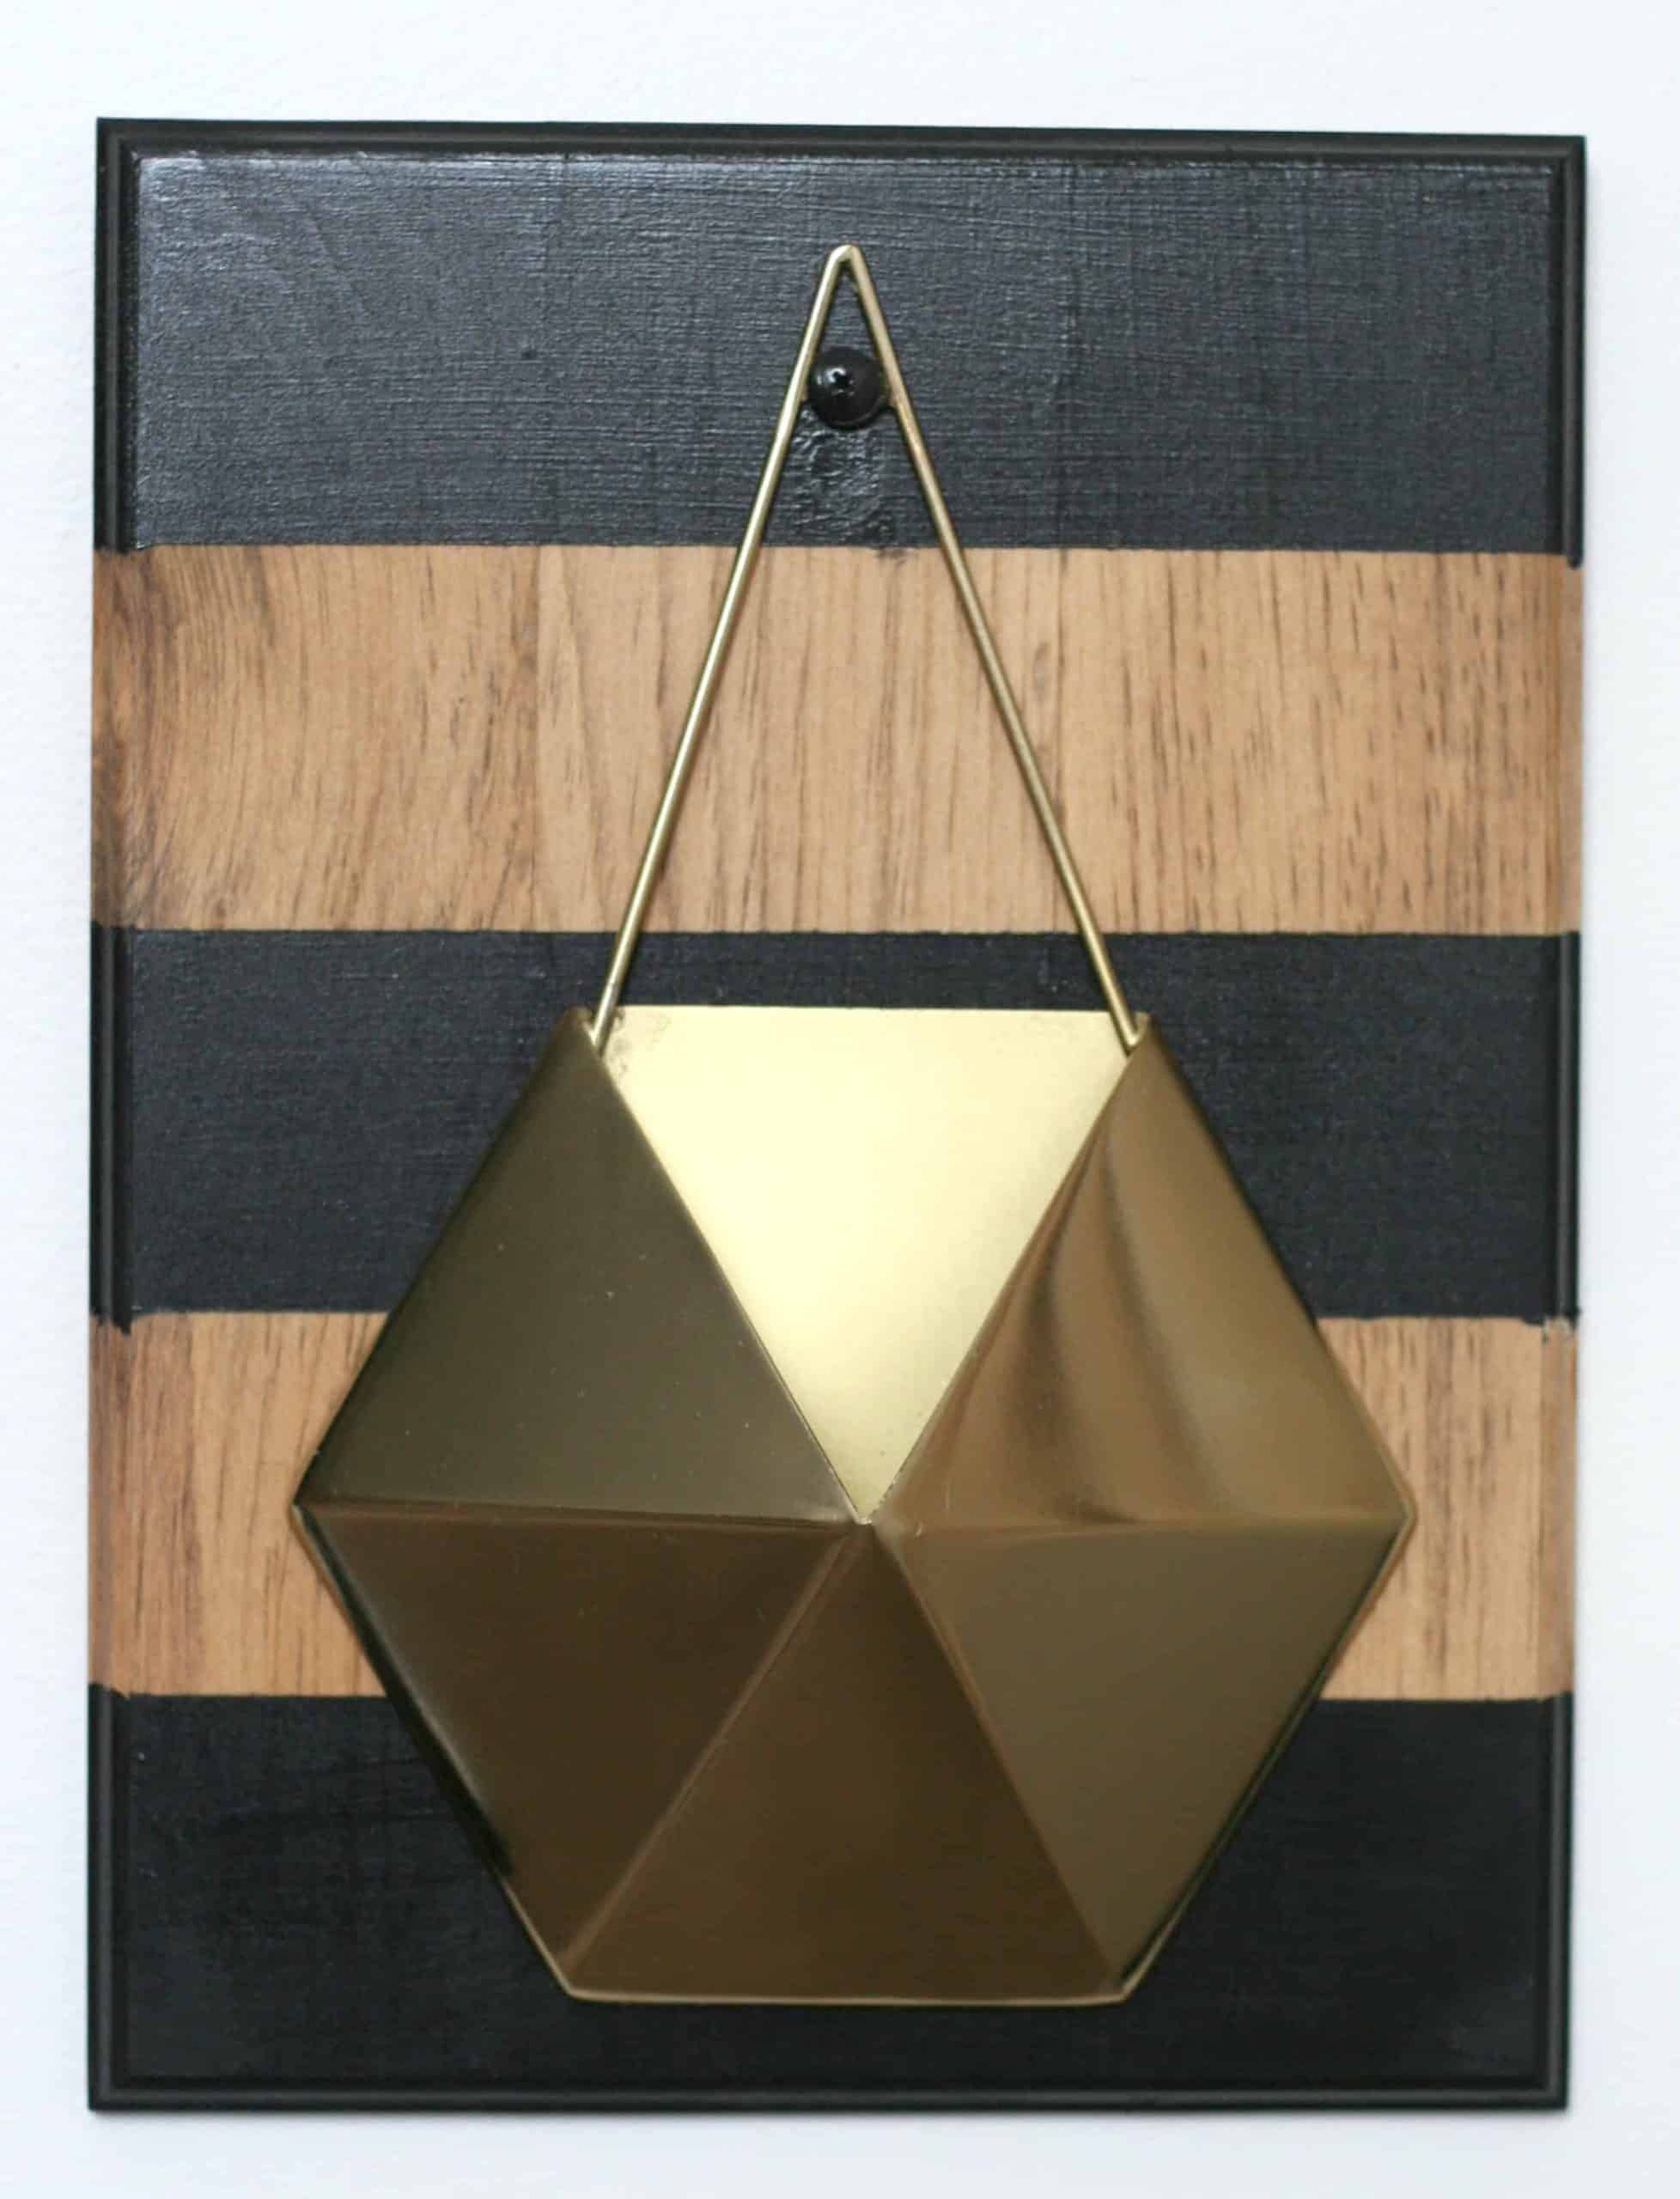
It turned out even better than I had hoped! But of course, I had to put something in those fab planters so I played around with a few options.

A more modern look with a faux aloe.
And for a festive holiday look :
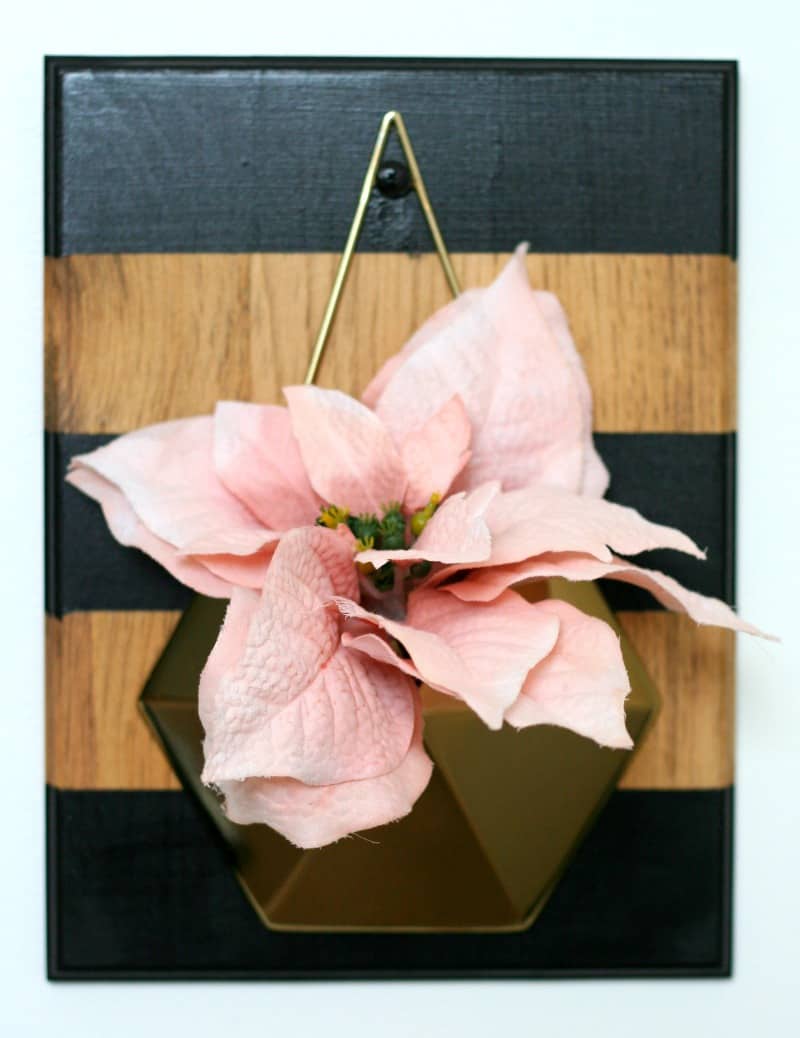
That’s what is so great about this DIY wooden wall planter…the possibilities are endless.
And they go with almost any decor style! Glam, Farmhouse, Modern, or a combination of all of the above.
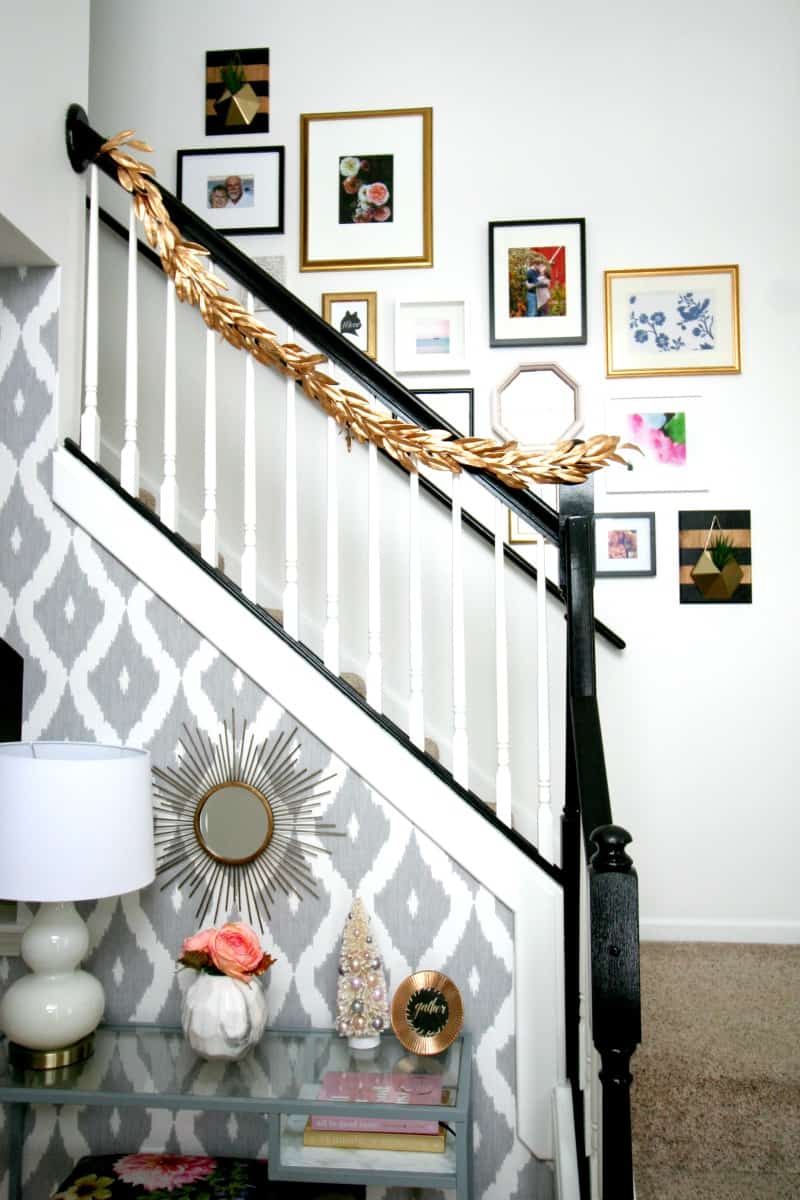
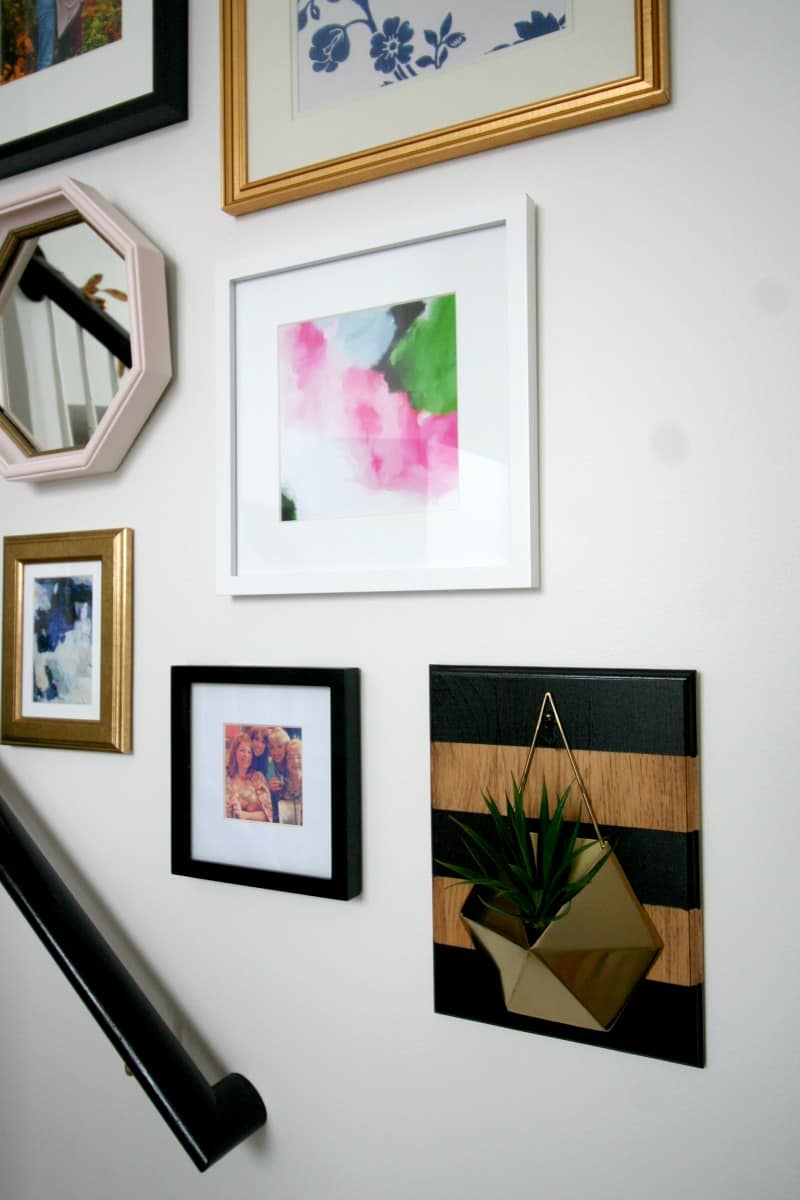
They are now living happily on our gallery wall.

And that’s a wrap!!I hope you enjoyed this fun little DIY!
Be sure to check out some favorite Restyle it Wright projects too!
One Room Challenge Formal Living Room 

Thanks again Sarah for having me!
I hope you all have a wonderful holiday!
Colette
DIY Wooden Wall Planter: Farmhouse-Glam Style
If your style is the perfect mix of farmhouse and glam, this DIY wooden wall planter is a must-have! Made with a stylish golden geometric planter and a pine board, this easy DIY planter is a fast and easy craft.
Materials
- Wall Planter
- Pine Board -11×14
- Painter's Tape
- Sandpaper
- Paint
- Stain
- Paint Brush
- Polycrylic
- Faux Plant/Greenery
- Picture hanging strips
Instructions
- Sand and smooth the wood boards using sandpaper.
- Next, stain the pine boards. Stain, wipe, and dry, then repeat for a second coat.
- After the stain is dry, measure out the stripes. I used painter's tape and measured out two 5.8 cm stripes; these will be the natural wood stripes, and the other three will be painted black.
- Paint the stripes. Apply two coats for full coverage. Make sure the painter's tape has a good seal to avoid bleeding. Then remove the painter's tape before the black paint is dry, then allow it to dry completely.
- Use a drill to attach the gold planter to the wood board. If you want, you can paint the screw to match the painted stripe. I also attached a saw tooth hook on the back of the planter for wall-hanging.
- All your faux flowers or greenery, hang on the wall, and you're done!


Very pretty, Colette! I love that you merged Sarah’s farmhouse with your Glam 🙂