
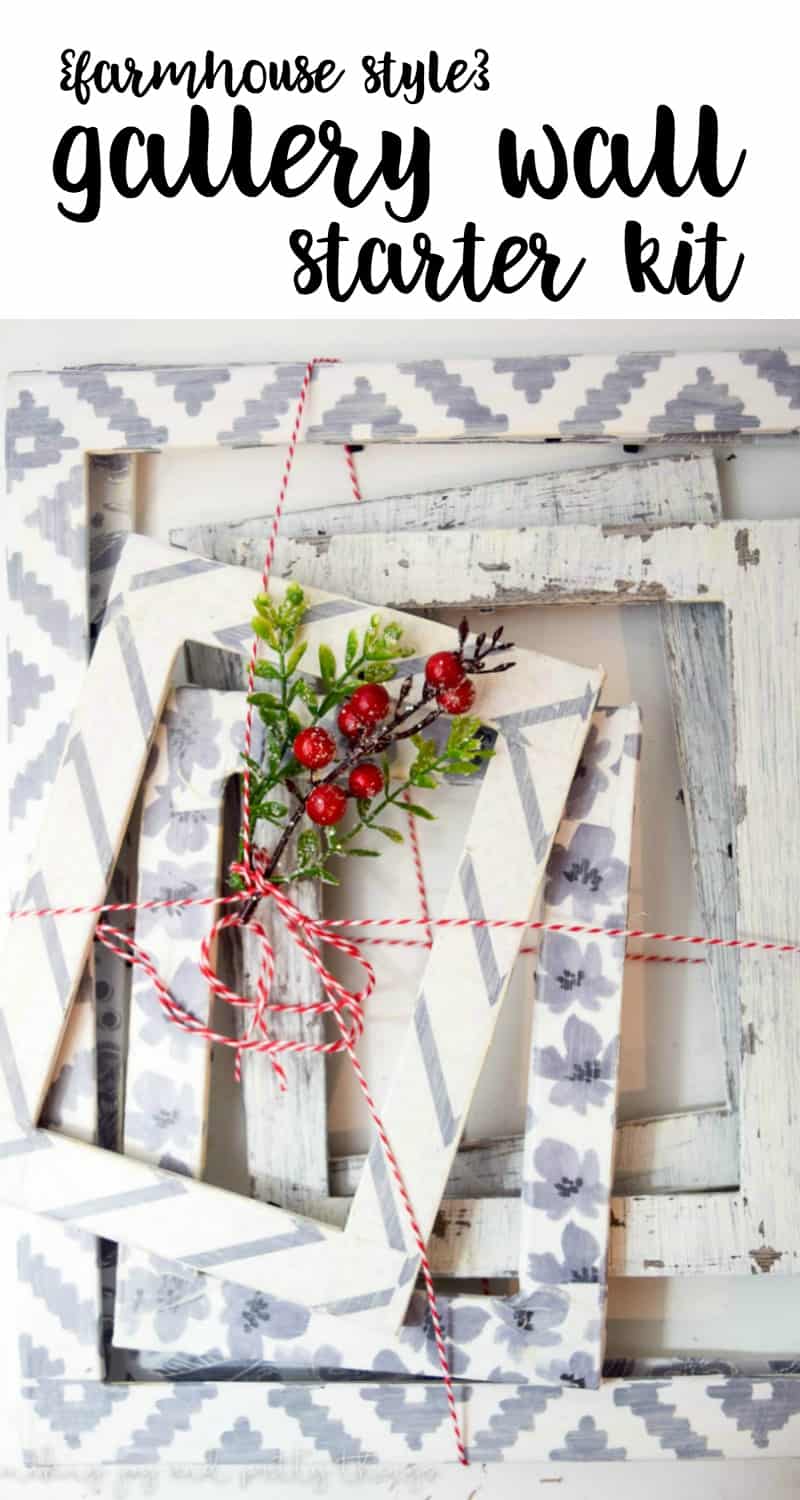
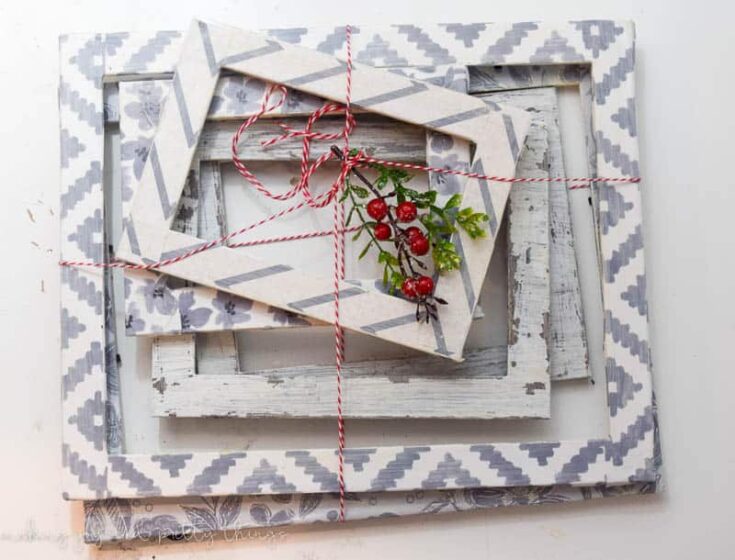
DIY Farmhouse Picture Frames: Gallery Wall Starter Kit
Want to start a gallery wall, but don’t know where to begin? These DIY farmhouse picture frames make it easy! A pack of farmhouse-style frames makes the perfect gallery wall starter kit to add to your farmhouse-style home decor.
On the 2nd day of Craftmas, we bring to you a Farmhouse Style Gallery Wall Starter Kit.
12 Days of Craftmas
Hello, and welcome back for the 2nd day of Craftmas!
If you saw yesterday, you’ll know that I am so excited to be participating in a fun little series called the 12 days of Craftmas with 3 of my blogging friends.
Throughout the first 12 days of December, we will share a DIY or craft each day that would be perfect as a gift this Christmas.
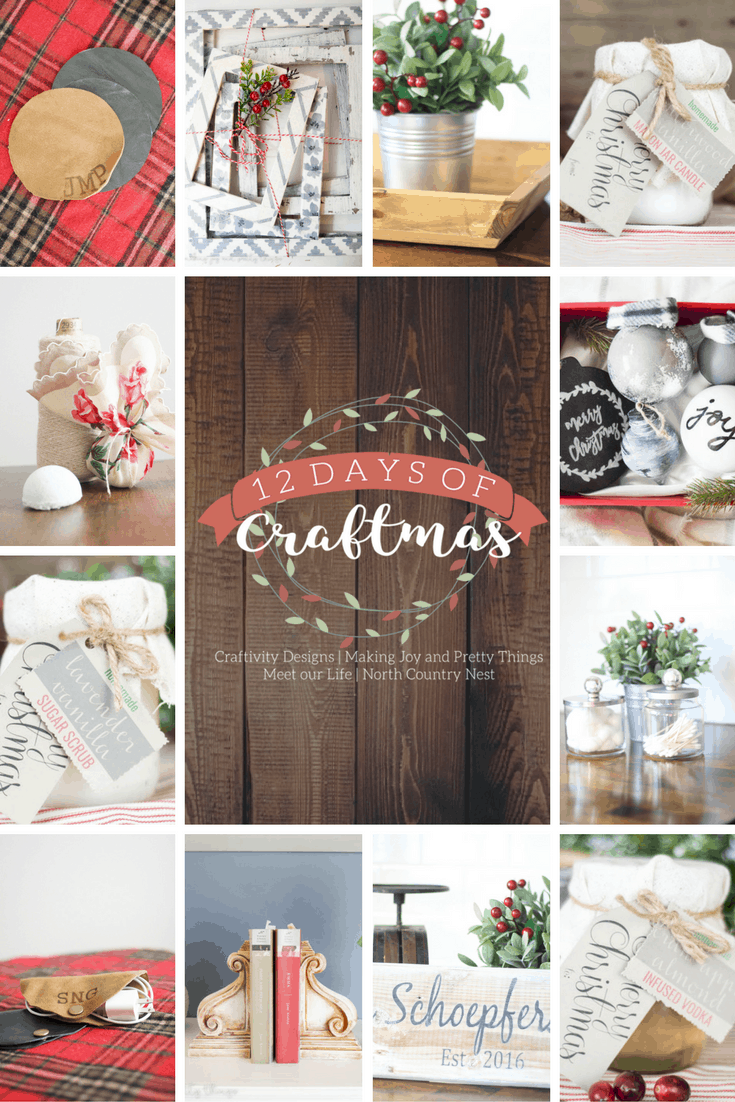
Here’s what we have shared so far:
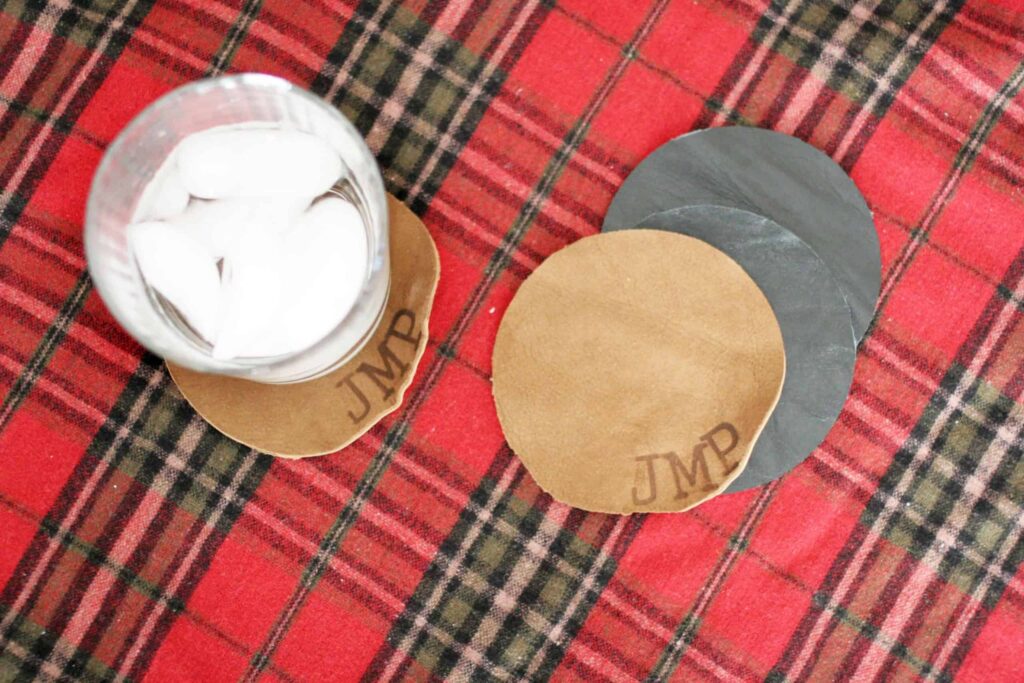
DIY Personalized Leather Coaster Set – The 1st Day of Craftmas
DIY Farmhouse Picture Frames for a Gallery Wall: Step-by-Step Tutorial
It’s my turn today to share a DIY craft/gift, and I chose something farmhouse themed (shocking, I know!).
I hear people saying they want to make a gallery wall all the time, whether that be above their couch, in their hallway or bedroom.
It’s easy to pop on Pinterest and see beautifully styled and magazine-worthy gallery walls that oftentimes leave you wondering if you could ever make something look like that (happens to me ALL the time!).
The hardest part about making a gallery wall is just getting started. There are a trillion frame options out there. Where do you start? What do you buy first? How do I make sure they all fit together in a cohesive theme?
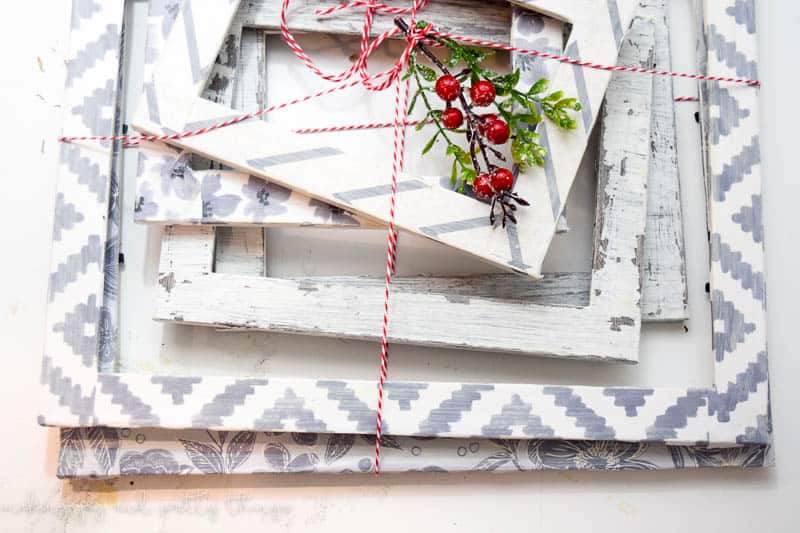
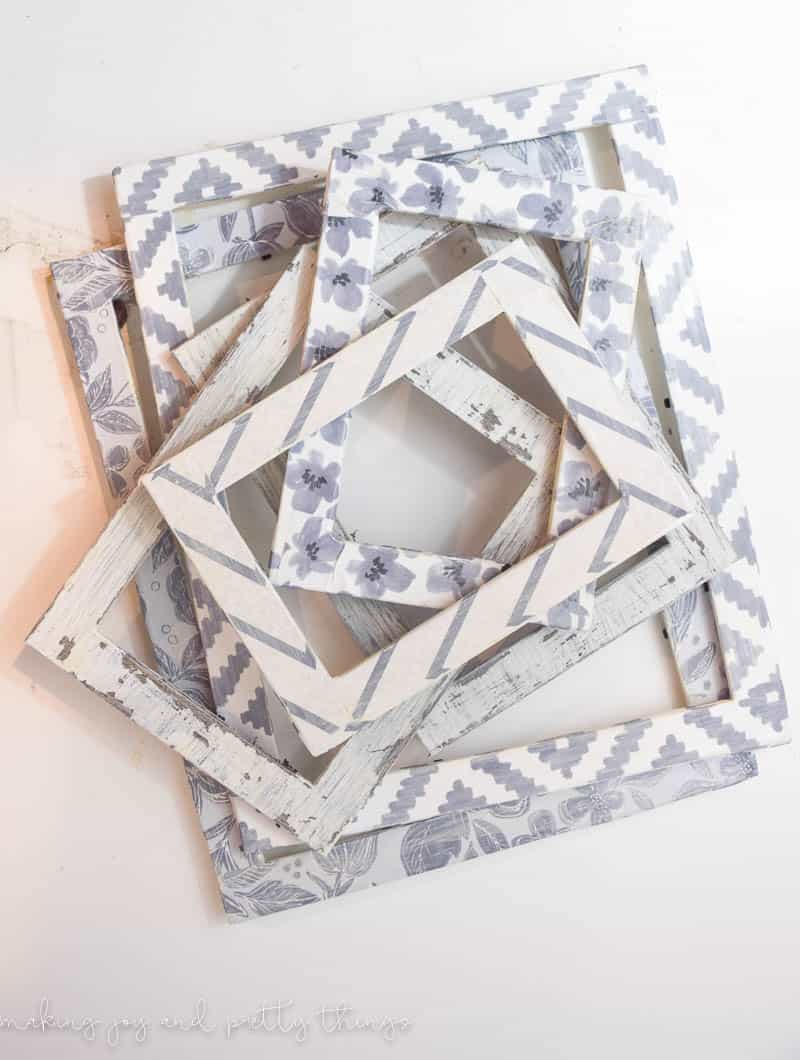
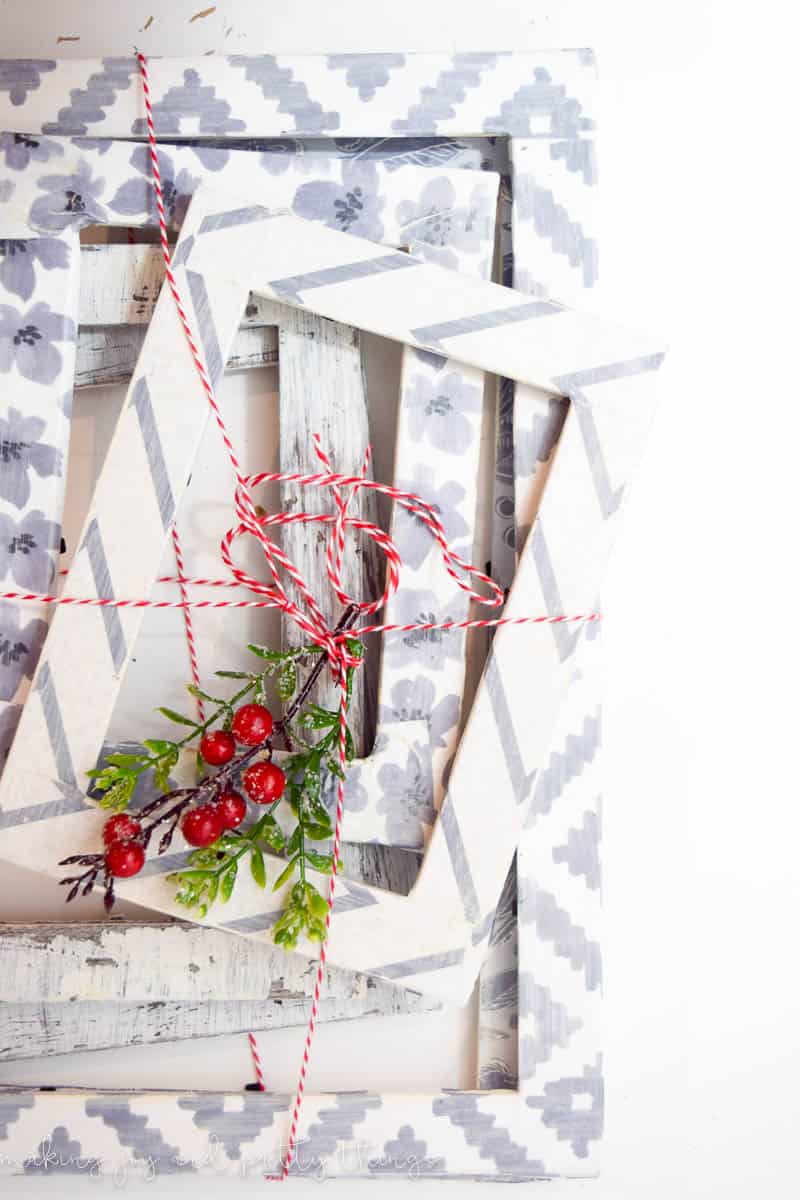
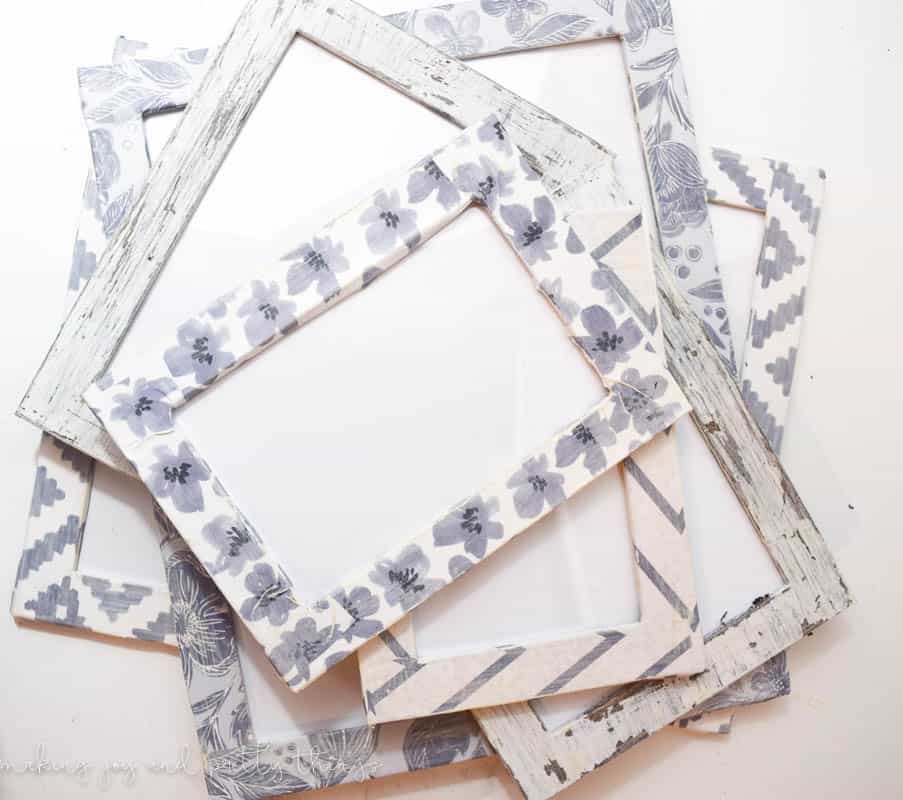
Well, I’m taking the guesswork out of creating a gallery wall by making a farmhouse-style gallery wall starter kit! There are a total of 6 frames here, which is the perfect number to form a gallery wall base with plenty of room to grow.
This post contains affiliate links. Please, click here to read my disclosure policy.
Supplies for DIY Farmhouse Picture Frames
- 6 frames (2-4×6, 2-5×7, and 2 8×10)
- I picked up some cheap frames from Michaels. They come in a 2 pack and were BOGO-free during a huge sale. Total for all the frames cost me <$20!
- Matching set of craft paper
- Mod podge
- Paint Brush
- Credit Card or ModPodge Tool
- Brown Paint or Dark Stain
- Chalked Paint in Linen White
- Sandpaper
- White Wax
I decoupaged 4 of the frames (both 4×6 and 8×10) and painted and distressed both 5×7 frames.
How to Decoupage Farmhouse Style Picture Frames
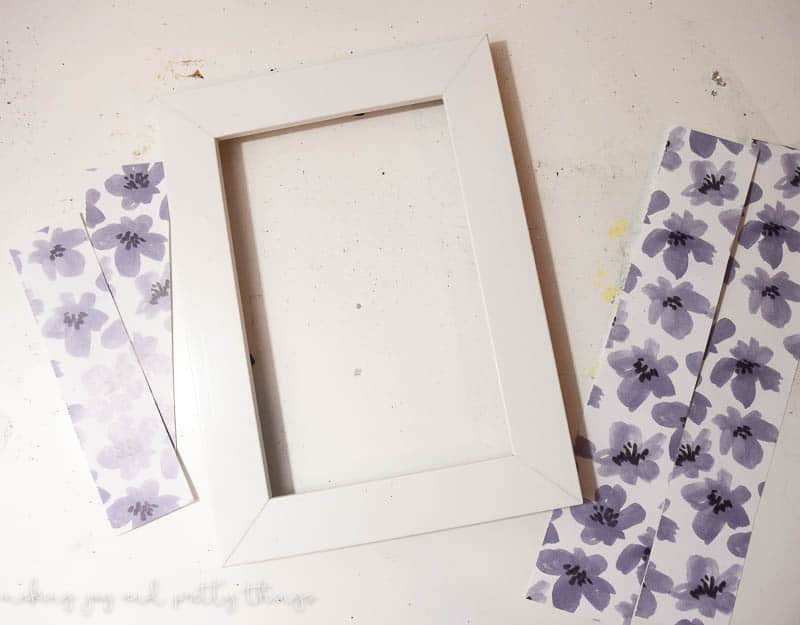
Step 1. Choose paper
First, I picked out 4 different pieces of craft paper from the scrapbooking paper set that I thought looked like they went together.
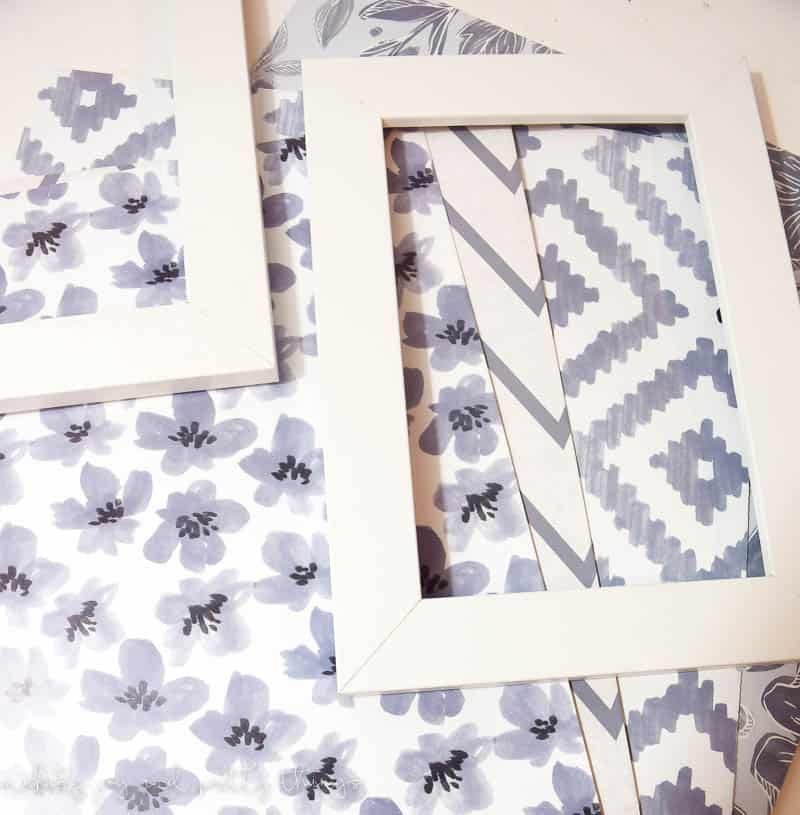
Step 2. Cut paper
After removing the glass and back from the frame, I cut each piece of paper into 4 strips roughly the size of the frame.
Step 3. Use Mod Podge to add paper to the frames
I applied Mod Podge to the frame using a paintbrush, placed the pieces of paper over the frame, and liberally applied Mod Podge over the paper.
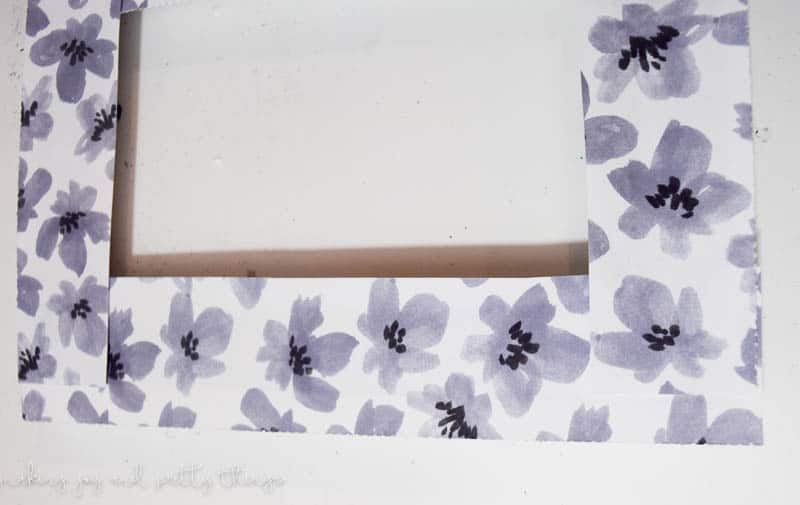
Then, using a Mod Podge smoothing tool or a regular ole’ credit card, smooth out any bumps and bubbles in the paper.
I used my fingers to press the paper around the edges and corners so that there wasn’t any excess hanging over it.
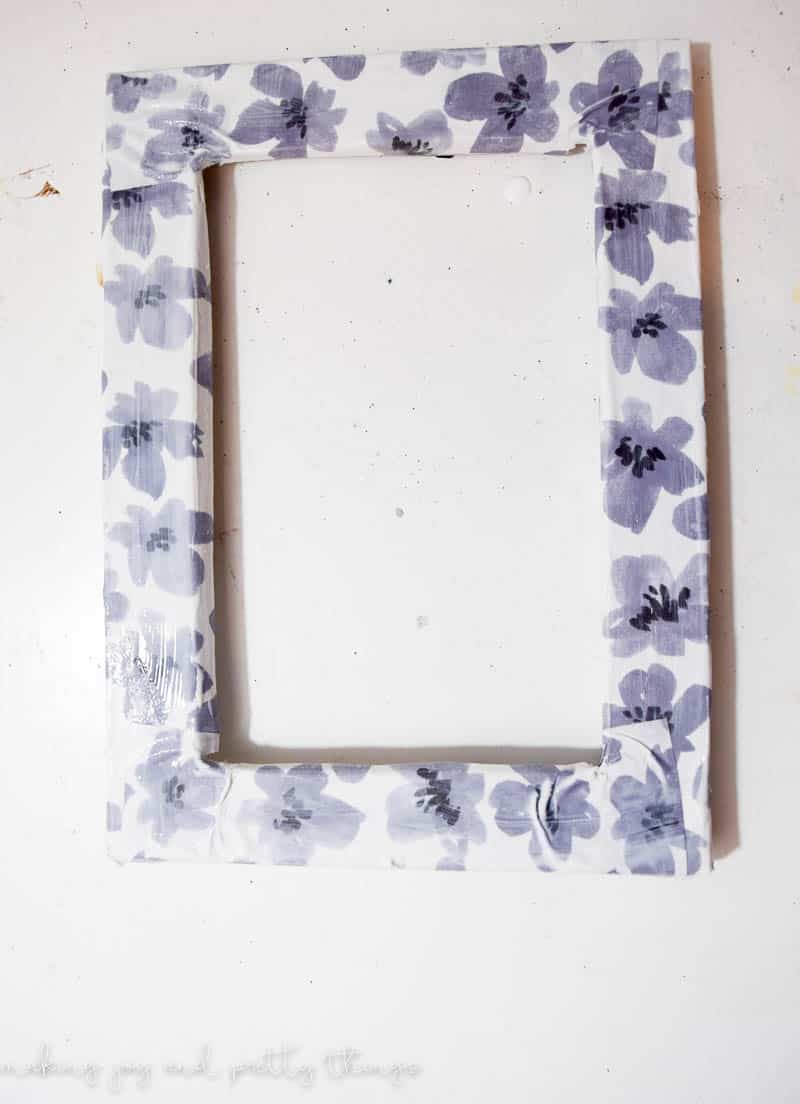
Step 4. Distress with sandpaper & wax
Once dried, I used sandpaper to distress the paper a bit.
Last, I used a paper towel to apply some of the white wax over the paper and used another paper towel to wipe off any excess. The white wax basically gives a whitewashed look to the frames.

How to Chalk Paint Picture Frames
Step 1. Paint with brown paint
For the other two frames, I painted them in brown paint to start. This gives you a dark base that will show through.
Step 2. Add white chalk paint
Next, you’ll apply white chalk paint over the top once the brown has dried.
I wanted to stain the frames, but because they were plastic, the stain just beaded on top and didn’t actually stick. Bummer.
Step 3. Distress with sandpaper & wax
Once both coats of paint were dry, I used the same sandpaper from the other frames to distress the white top coat and expose some of the brown paint beneath.
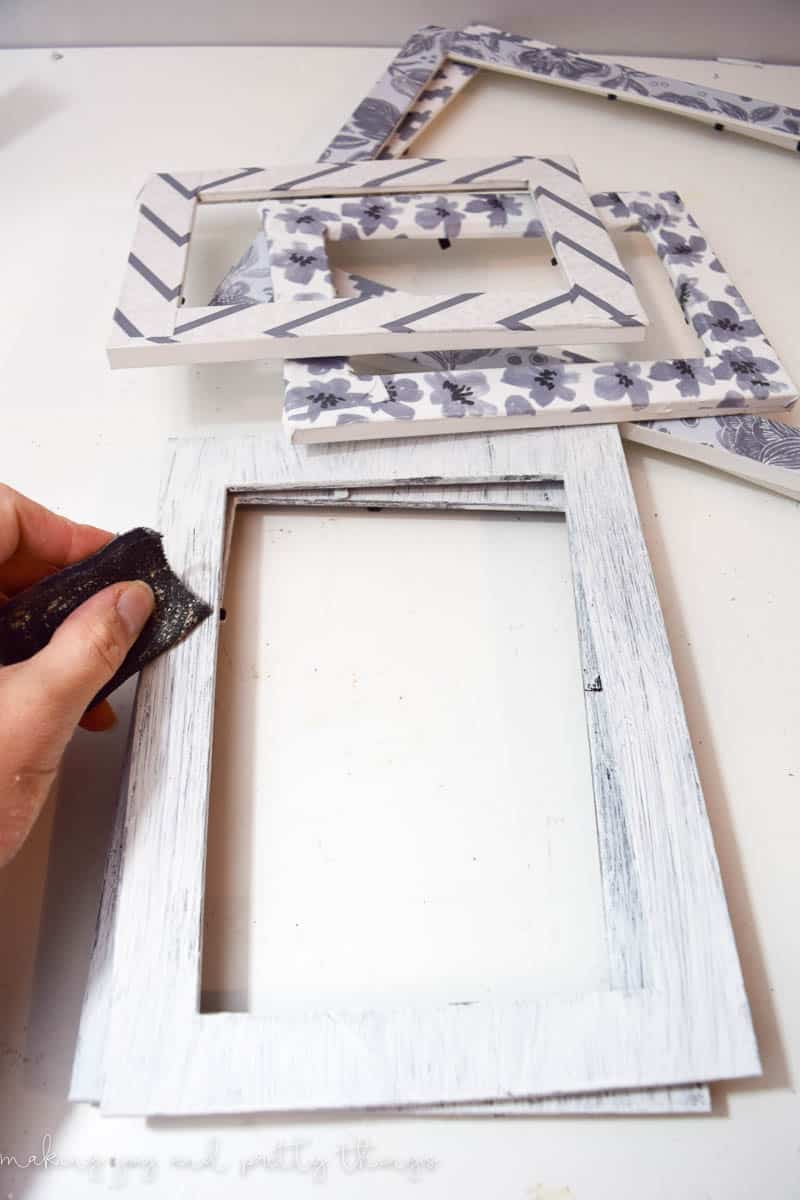
I also applied the same white wax from the decoupaged frame (in the same manner) so that all of the frames, while looking different, had the same top coat. This gives them a unified look.
And, that is it! Now you have a pretty set of frames that would be perfect to start your gallery wall!
The Finished Product: A Perfect Set of DIY Farmhouse Picture Frames for a Gallery Wall!
Do you think you could make a similar set? Does it make you feel more confident if you’re trying to start your own gallery wall?
Well, friends, that’s all for the 2nd day of Craftmas! Remember to stop by tomorrow for another fun DIY/craft!
DIY Farmhouse Picture Frames
Start your very own gallery wall with this set of DIY farmhouse picture frames! You only need a few supplies to create easy rustic picture frames with the perfect touch of farmhouse style.
Materials
- 6 frames (2-4×6, 2-5×7, and 2 8×10)
- Craft paper set
- Modpodge
- Paintbrush
- Credit Card or ModPodge Tool
- Brown Paint or Dark Stain
- Chalked Paint in Linen White
- Sandpaper
- White Wax
Instructions
How to Modpodge Farmhouse Picture Frames
- Decoupage 4 of the frames (both 4×6 and 8×10) and paint and distressed both 5×7 frames.
- Pick out matching craft paper sets for each of the frames.
- Remove the glass from the frames and cut the craft paper into strips that will fit each side of the frame.
- For the modpodged frames: apply modpodge to the frames using a paintbrush, place the pieces of paper over the frame, and liberally apply modpodge over the paper.
- Use a Modpodge smoothing tool or a regular ole’ credit card to smooth out any bumps and bubbles in the paper.
- Once dry, use the sandpaper to distress the paper slightly.
- Then use a paper towel to apply the white wax over the frames to give the frames a whitewashed look.
How to Chalk Paint Farmhouse Picture Frames
- Paint the frames with the base color - the brown paint. Wait for that to dry completely.
- Once the brown paint is dry, apply the white chalk paint.
- Once all paint is dry, use the sandpaper to slightly distress the frames just enough for the brown paint to show through.
- Finally, apply the same white wax to the tops of the frames so the whole set has the same top coat.
Find all the 12 Days of Craftmas crafts here:
- 1st Day of Craftmas – DIY Personalized Leather Coaster Set
- 2nd Day of Craftmas – DIY Farmhouse Picture Frames: you are here!!
- 3rd Day of Craftmas – Rustic Wood Tray
- 4th Day of Craftmas – Mason Jar Candle
- 5th Day of Craftmas – Vintage Linen Wrapped Bath Bombs
- 6th Day of Craftmas: DIY Farmhouse Style Ornaments
- 7th Day of Craftmas – Rustic Bathroom Container
- 8th Day of Craftmas – Mason Jar Sugar Scrub
- 9th Day of Craftmas – DIY Leather Cord Keeper
- 10th Day of Craftmas: DIY Rustic Corbels for Bookends
- 11th Day of Craftmas – Wooden Personalized Sign
- 12th Day of Craftmas – Mason Jar Infused Alcohol
Wishing you a joyful day!


This is such an amazing idea and I love how easy and simple it is. What a beautiful gift this will make!
Thanks, Sabrina! It turned out better than I had hoped – I’m so glad you like it!
Starting the gallery wall is often my problem, too. I see so many amazing ideas and wows, but it usually takes me a while to figure it out and then I want to make it all in one day. I kind of like a coordinated look and usually have to shop around hoping to find pieces to match that I could not find all in one place. Your idea of DIY-ing this set in various sizes is amazing. They are lovely!
Sounds EXACTLY like the problem I have with gallery walls, that and staying on budget. It’s so hard to start a gallery wall, especially with all the “pinterest” perfect photos you see around. I’m so glad you like my little farmhouse gallery wall 🙂
Great tutorial Sarah! I put off our gallery wall forever and finally bit the bullet a couple years ago. I love our gallery wall and it adds so much to our home.
Thanks so much Shani!! I feel like just starting a gallery wall is the hardest part! I wanted to take the guess work out of that. So glad you love your gallery wall!
The is a really clever idea! I’ve never been able to make mod podge look very good — but I’m wondering if it is because I wasn’t sanding afterward! What a difference that step made. These are really pretty!
Thanks so much Lora!! I’m honestly not great with mod podge, I think it’s a “practice makes perfect” scenario. I can’t ever make it completely smooth without bubbles so the sanding helps distress it AND remove those wrinkles/bubbles 🙂
What a great idea for a gift!! Such a cool series, too!
Thanks Jenny!! I’m so happy with how the farmhouse gallery frames came out!
What a great idea! I love how they all look different, yet match perfectly for the gallery wall. Fantastic!
XO! Vanessa
Thanks Vanessa!!! That was the idea for the gallery wall – have matching frames that look different. I’m glad you like them!