
How to Make a DIY Shadow Box
I’m so excited to share today how we made a DIY Shadow Box for our girl’s farmhouse nursery! If you’re looking for DIY shadow box ideas you are gonna love this tutorial!
Hello, friends!
Today I’m back to share one of my favorite DIYs from our farmhouse girl’s nursery!
This post contains affiliate links. Please, click here to read my disclosure policy.
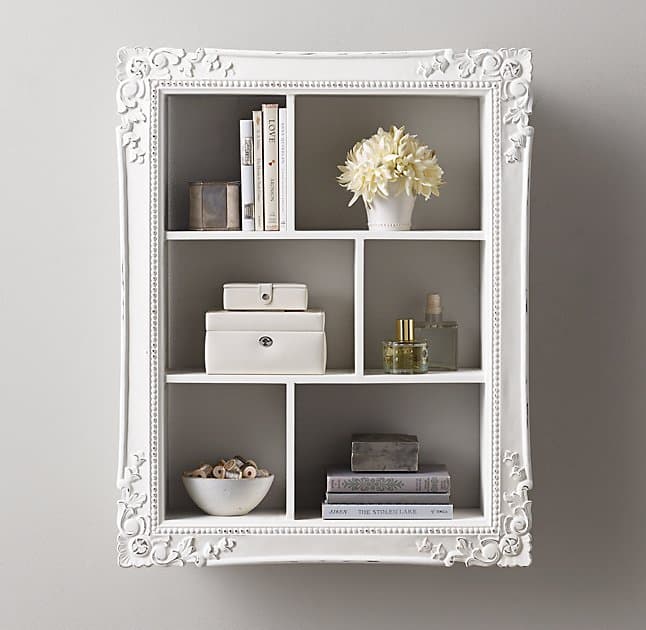
If you remember way back in the day when I shared my original design plan for the space, I stumbled upon a lovely shadow box that I was dying to get. One problem, I couldn’t justify the cost ($249!!!!)
Well, that’s when I enlisted my husband to build one for me! And boy did he really exceed my expectations with this one!
I had an older open frame I bought who knows when that was perfect for the shadow box. I tried to find it online but I think it’s been over 5 years since I had purchased it (from Hobby Lobby)! Something like this would be perfect!
But, any frame will do. Plain or ornate, as long as it has a relatively large opening (our was 11×14) it will work!
Now, here’s my husband to explain how he made it 🙂
How to build a DIY shadow box
Hi everybody! This is TJ, Sarah’s husband, here to talk about how to build a relatively simple shadow box to show off…I dunno, your favorite small LEGO sets? Vintage G.I. Joe action figures? Your collection of old personal tech gadgets? Really, whatever you’re into…
Getting serious, this is a relatively simple project. You’ll only need a few supplies and a few tools:
DIY Shadow Box Materials:
- A picture frame
- 1×4 pine boards
- 1/4 x 4 pine boards
- Wood glue
- Construction adhesive
DIY Shadow Box Tools:
- A saw (I used a 16v Ryobi Circular Saw and a compound miter saw)
- Palm sander (again, I used a 16v Ryobi palm sander)
- Pin nailer/Compressor (alternatively you could use a hammer and nails and wood glue)
- Combination Square
Step 1. Cut down the wood for your DIY shadow box
The first step is measuring the opening of the frame you’re going to use. The idea is to have the box you build exactly the same size as the opening of the frame. Once you have your measurements you can get ready to cut your wood.
I knew I didn’t want to get fancy and do any mitered joints…partially because I knew nobody was going to see them, and partially because I am AWFUL at getting mitered joints to line up and join properly.
I like to blame it on my hand-me-down miter saw, but the reality is it’s probably just me.
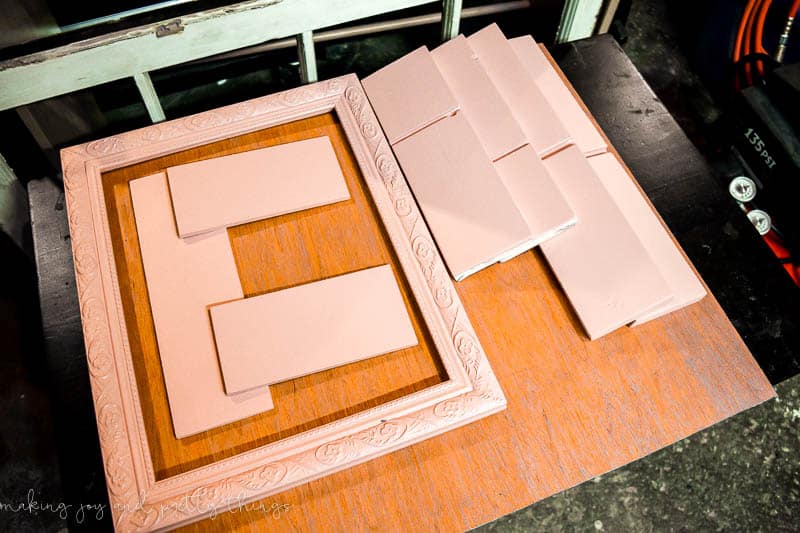
Anyway, I knew I needed a box with an opening of 11″ x 14″, so I cut two pieces 1×4 11″ long, and two pieces 15.5″ long.
Step 2. Use a rabbit cut to join wood on the DIY shadow box
Once the sides of the box were cut, I needed to figure out how to lay out the 1/4-inch pieces of wood to divide the box into cubbies. You gotta have the cubbies otherwise it’s just a box…no shadows…right?
Alright, so I had been looking for an excuse to use a technique called a rabbit which is basically putting a little groove in a piece of wood, in which you insert another piece of wood to join the two pieces together. With that (hopefully) explained, I knew I needed to determine where the rabbits would go.
Sarah wanted a shelf in the middle of the opening, and two vertical dividers off-center in the top and bottom sections. That meant I needed rabbits in the middle of the 15.5″ boards, and about 1/3 from opposite ends of the 11″ boards.
I used the Ryobi circular saw set to a 1/4″ depth to cut the rabbits. I needed them to be as wide as the boards, so I made multiple passes with the saw blade.
It’s not a perfect method, but it does the job without having to buy specialized tools. I was pretty happy with it.
Now I had the pieces for the box and the rabbits. Next, I needed to actually cut the divider pieces.
Step 3. Sand and paint interior dividers for the shadow box
For the center shelf, I cut the board to 14.5″. That’s 14″ for the opening and 1/4″ for each of the rabbits.
The vertical pieces were cut with only one rabbit to consider because the center shelf was too thin to cut a rabbit. I’ll explain how I attached the dividers to the shelf later.
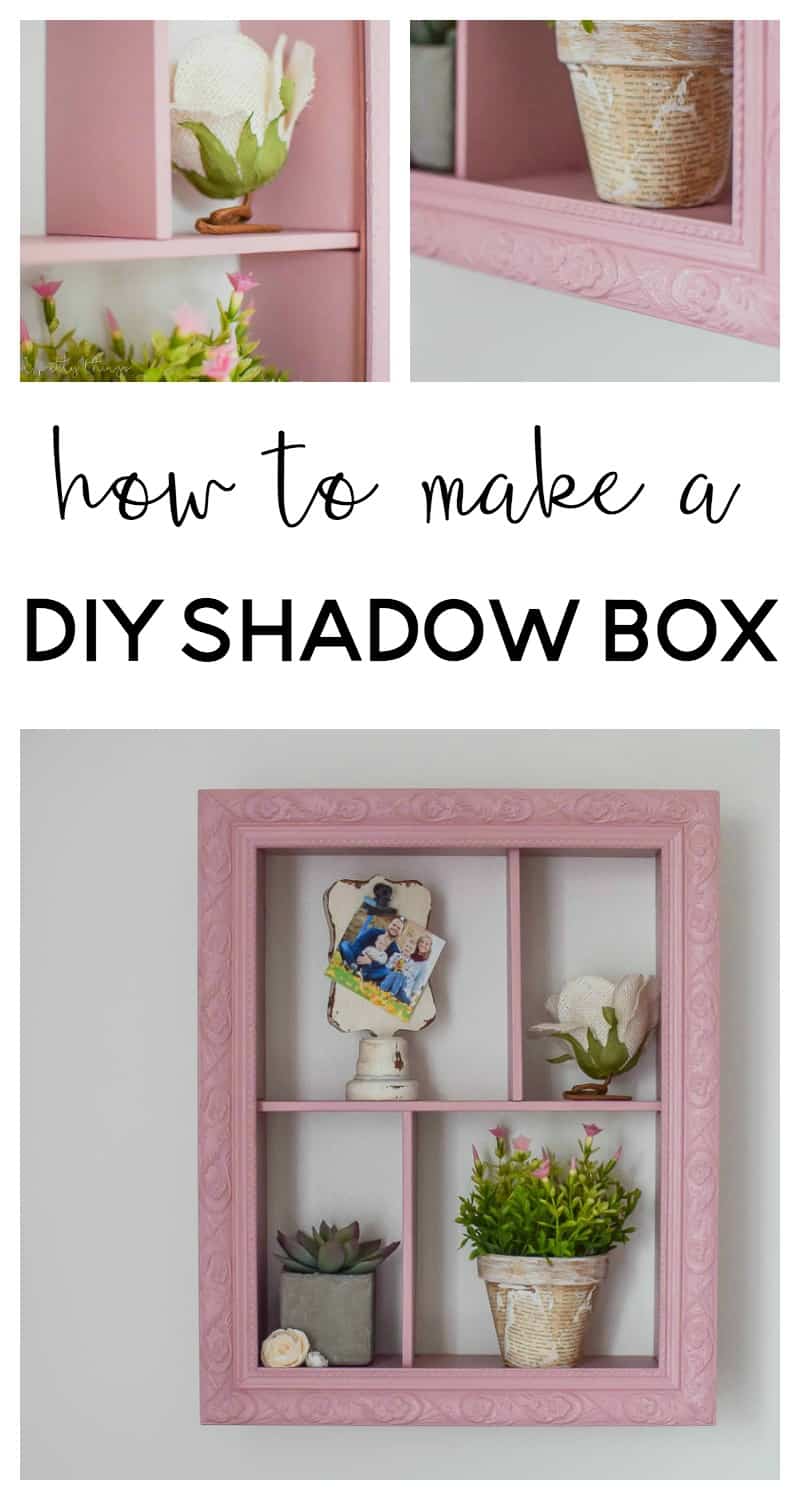
Once all the pieces were cut, I sanded everything with the palm sander and painted everything a pretty pink color (Rose Embroidery by Sherwin-Williams) that we thought would go perfectly in Evelyn’s room. (spoiler alert: it goes perfectly in Evelyn’s room).
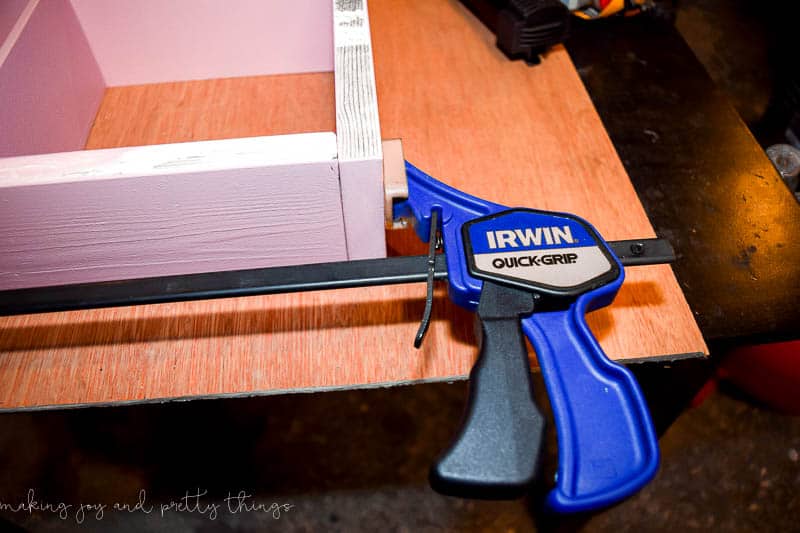
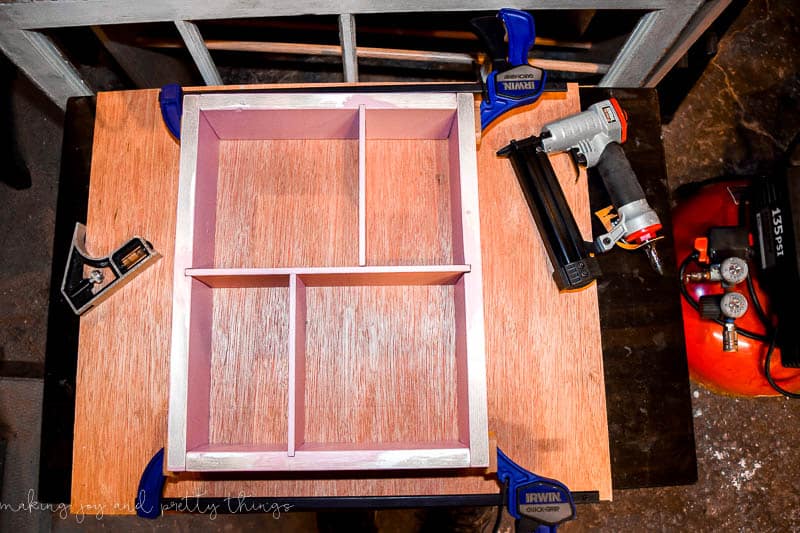
After the paint was dry, the next step was to assemble the box. I squared everything up and held it in place with clamps, then used the pin-nailer to secure the pieces together.
The pin nailer was quick and easy, and I didn’t have to worry about it splitting the wood – especially the 1/4″ pieces.
Step 4. Assemble the DIY shadow box with a pin nailer
With the box assembled, I moved on to the interior dividers.
The shelf in the center slid into the rabbits fairly easily. I secured it with wood glue in the groove and pin nails from the outside.
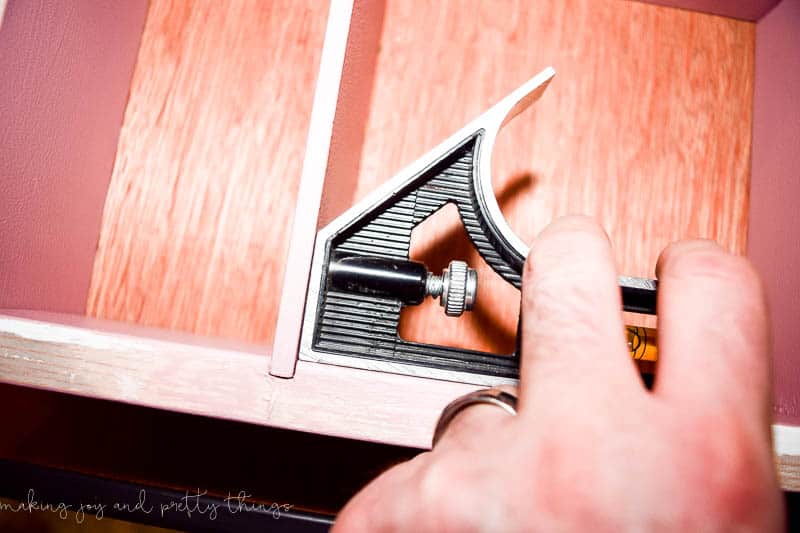
Next, I used the small piece of a Combination Square to square up the vertical dividers once they were slid into the rabbits on the top and bottom of the shadow box.
I used pin-nails from the opposite end of the center shelf to secure the vertical dividers in place, as well as glue and pin-nails through the rabbited side.
Here’s how it looked at this point:
Step 5. Attach the picture frame to the DIY shadow box
Now that the shadow box was assembled, I had to attach the frame.
I squeezed a bead of construction adhesive around the shadow box and then placed the frame over top of the box, being careful to line everything up.
I then used foam and cardboard to pad the frame and used ratchet straps and clamps to hold everything together until the adhesive dried.
Once dry, I added a keyhole hanger to the back of the box, and it was ready to hang on the wall. Here are several pictures of the completed shadow box, beautifully styled by my wife:

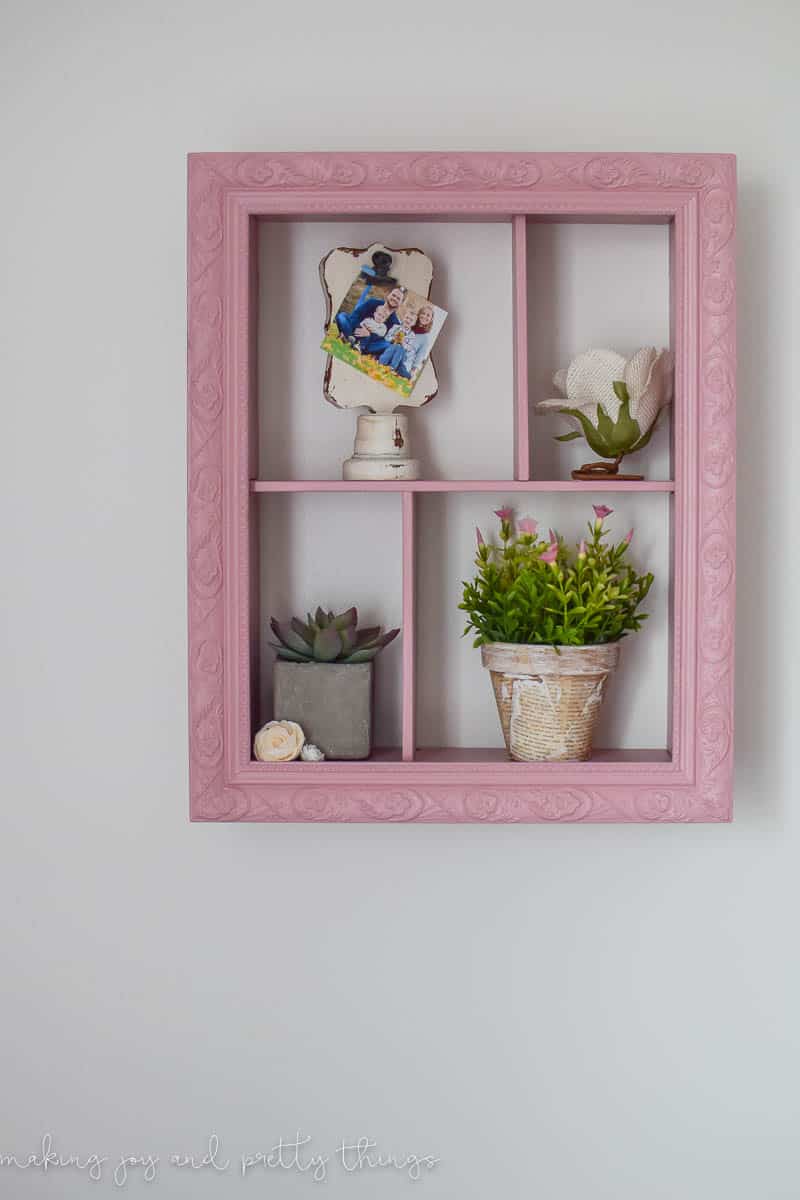
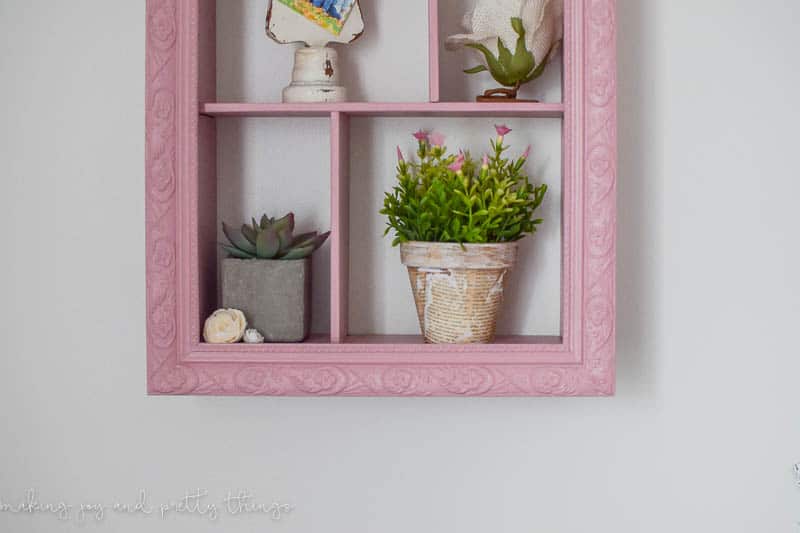

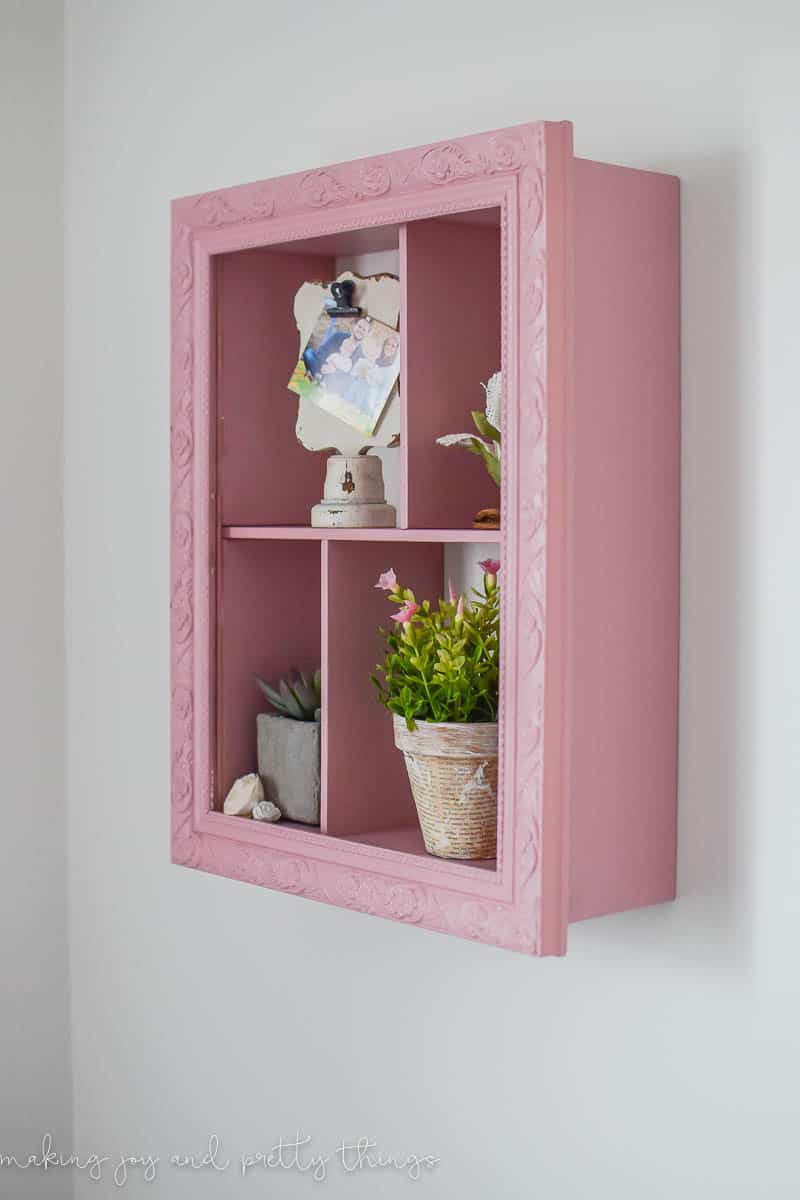
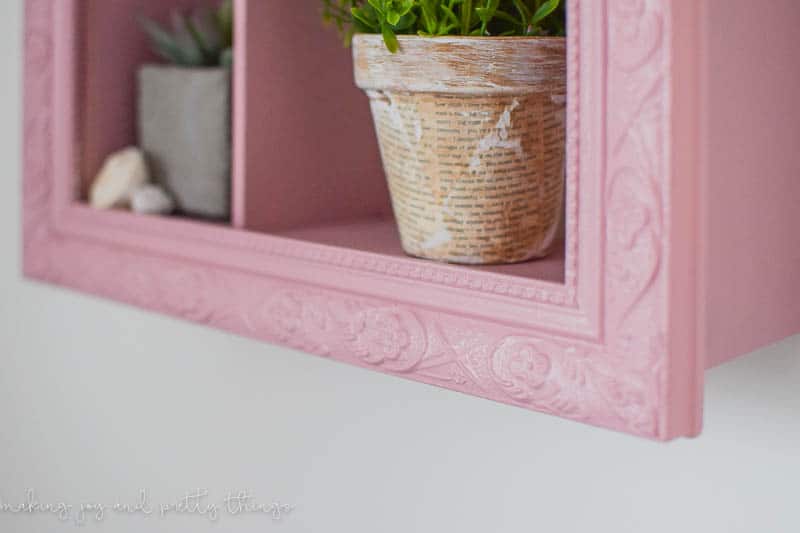
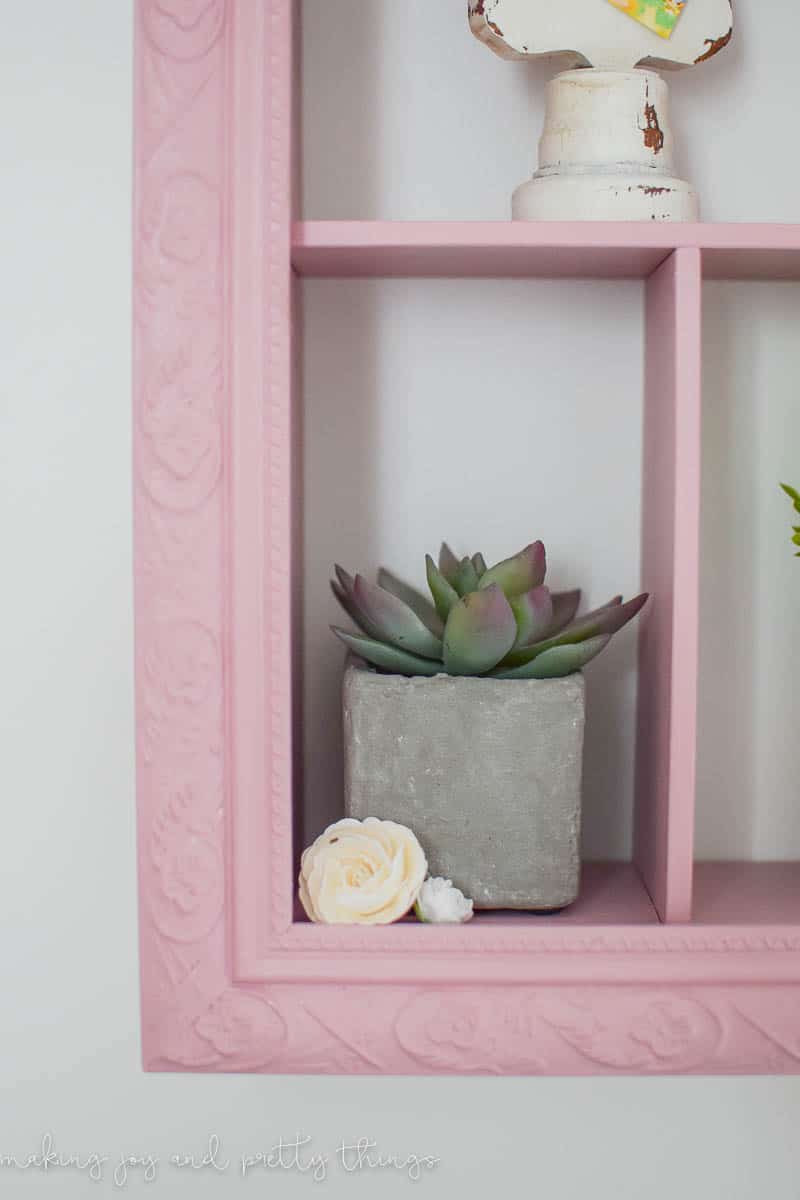
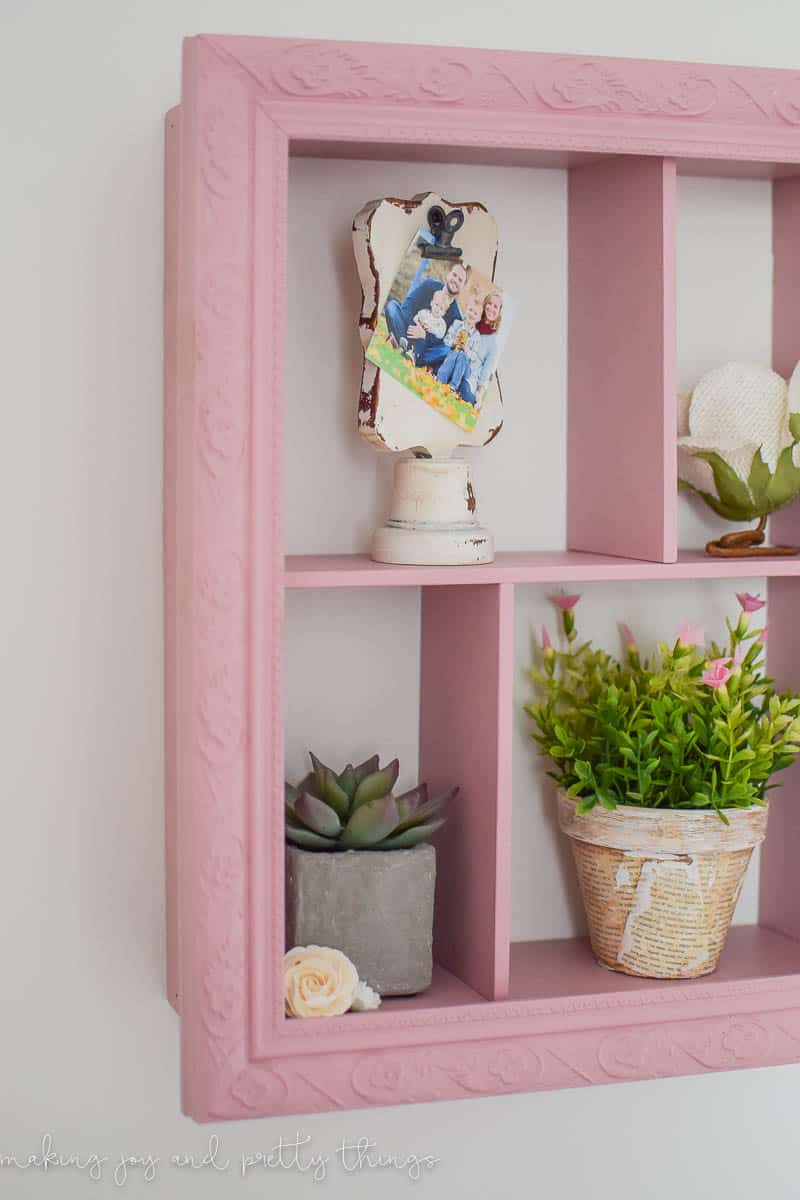
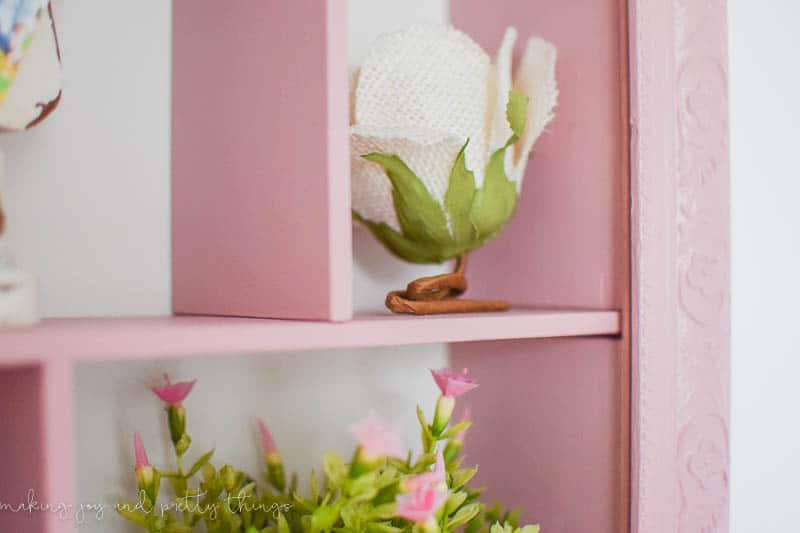
So, do you love it as much as I do?? The pretty pink color just goes so well in her nursery. I loved styling it with pretty girly touches, too. After looking over so many different DIY shadow box ideas I was so excited to finally have this one done.
If you are looking for other DIY shadow box ideas don’t forget to look at this amazing shadow box that our friends over at Making Manzanita made. I absolutely adore it!
Remember to check out the full nursery reveal. I also have everything listed in that post for what I used to style the shadow box.
Wishing you a joyful day!
Want to see more of our farmhouse girl’s nursery?
- Farmhouse Girl’s Nursery: The Design Plan
- Farmhouse Girl’s Nursery: Week 1 Progress
- Farmhouse Girl’s Nursery: Weeks 2 and 3 Progress
- Farmhouse Girl’s Nursery Week 4 Progress
- A Farmhouse Nursery Dresser Makeover
- Personalized Nursery Wood Slice Name Sign
- Floral Wallpaper Ideas for Girl’s Bedrooms and Nurseries
- Lazy Girl’s DIY Typography Art
- DIY Wood Block Candle Holders
- How to do an Old Curtain Rod Update
- How to Make a DIY Triangle Shelf Planter
- How to Make a DIY Shadow Box
- Monthly Baby Photos: How to Make a DIY Letterboard
- How to Make a Wood Bead Chandelier
- Simple Floral Farmhouse Wreath
- Rustic DIY Planter using Book Pages
- How to Make Your Own Rustic String Art
- DIY Fabric Flower Garland
- DIY Wood Bead Hearts
- Farmhouse Girls Nursery Reveal!!

DIY Shadow Box

Make your own DIY shadow box using wood and a picture frame. This easy DIY project can be used in any room to display all your favorite things.
Materials
- A picture frame
- 1x4 pine boards
- 1/4 x 4 pine boards
- Wood glue
- Construction adhesive
Tools
- A saw (I used a 16v Ryobi Circular Saw and a compound miter saw)
- Palm sander (again, I used a 16v Ryobi palm sander)
- Pin nailer/Compressor (alternatively you could use a hammer and nails and wood glue)
- Combination Square
Instructions
- Measure your frame. The box should be the same size as the opening of the frame.
- Cut your wood for the shadow box.
- Cut rabbits into the pieces that will hold the dividers.
- Once all the pieces are cut, paint in the color of your choice.
- Assemble the box.
- Add the dividers by sliding them into the rabbits and secure them using wood glue and pin nails.
- Attach the frame using adhesive glue. Clamp to the box and allow to dry.
- Add a keyhole hanger to the back and hang on the wall.

hey girl- love the shadow box! so pretty!
thank you SO much Shawna!!
It looks beautiful:-)
Thank you <3 <3
Unbelievable that the inspiration shadow box was over $200! Yours is just as cute and for a fraction of the cost. Way to DIY!
Aww thanks so much!!! I couldn’t believe how much the inspiration shadow box was – only one choice, to DIY 😉
Oh my gosh, I just love them!
Thanks so much!!
really pretty Sarah! love the pink!!!
Thank you Tara!!
Such a pretty and functional pier for little Miss’s room, Sarah! Love the color!
Thanks so much Kendra!!
I think every little girl would love that in her room. So pretty
I love your pink version of the shadowbox! Thanks for sharing at Merry Monday! Can’t wait to see what you link up next week! Roseann from This Autoimmune Life
I wanted to let you know I am featuring this great project at #merrymonday this week. I hope you will check it out when you have a chance! Hope you will link up with us again! https://ourcraftymom.com/15-quick-and-easy-diy-projects-to-refresh-your-home/
I like this cushion, it looks like a farmhouse!
Very nice!
I tried to subscribe, but it wouldn’t take my email
Thanks sharing this article about the shadow box this is help us information