
Monthly Baby Photos: How to Make a DIY Letterboard
Never forget to track your little one’s growth with this DIY letterboard. This will create memories for years to come.
Looking back on monthly baby photos from their first year of life is so special. Learn how I made a DIY Letterboard to mark each month of our sweet little girl’s first year.
Making the First Birthday Special
One of my absolute favorite parties to have or attend is the big “first birthday”! That sweet little baby goes from totally helpless to semi-less helpless in just a year and their little personality starts to shine through.
They are covered in baby fat rolls and sticky food and they love you endlessly. Most importantly, they sleep through the night 😉
Either way, I found the one-year-old version of my babies to be one of my favorite times. I love to look back on their first year and watch how drastically they changed.
When you’re in the moment, in the thick of sleepless nights and whining, in the long days where you count down the seconds until bedtime, you don’t see how they change. I mean, you SEE it, but it’s not the same as looking back at each month.
For Liam and Charlie’s first birthdays, I made a monthly photo display out of an old frame. Look at how little they were!!! (Cue the hormonal tears!)

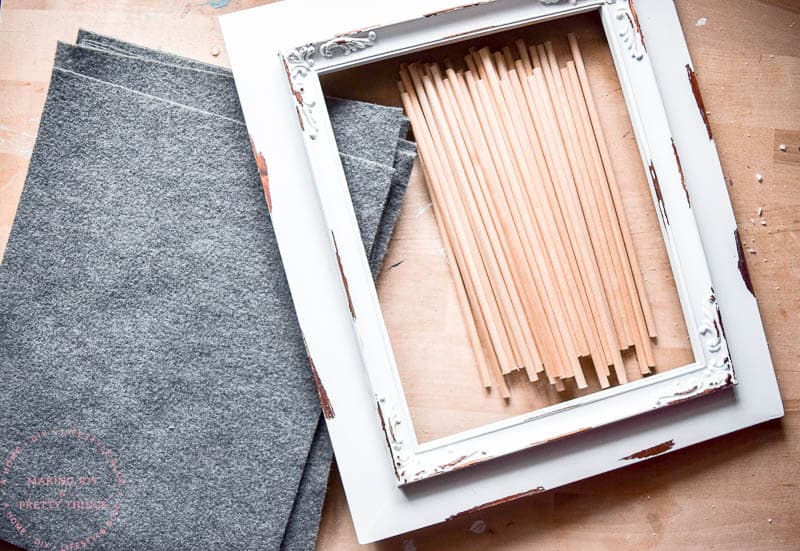
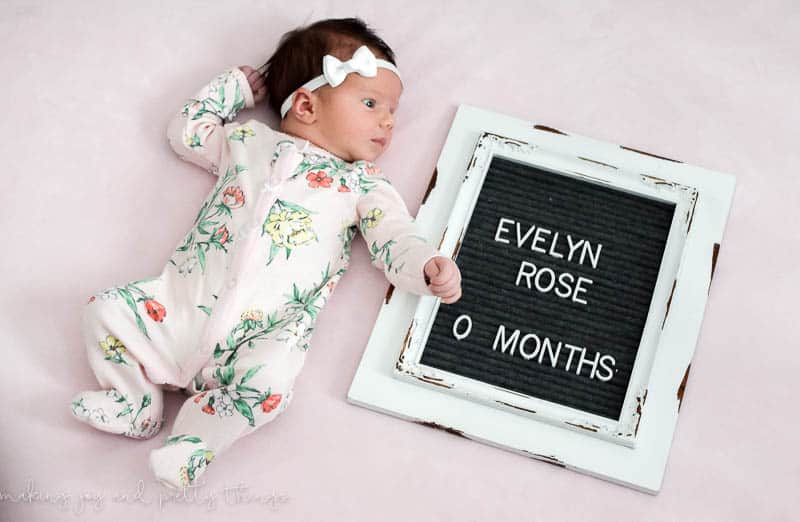
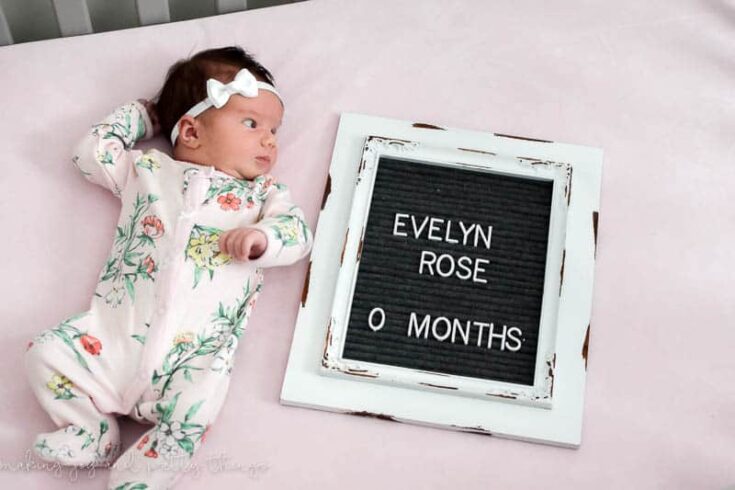
For Evelyn, I of course needed something new and more girly.
I had my eye on letter boards for a while but couldn’t justify the cost. So, naturally, I decided to make my own!
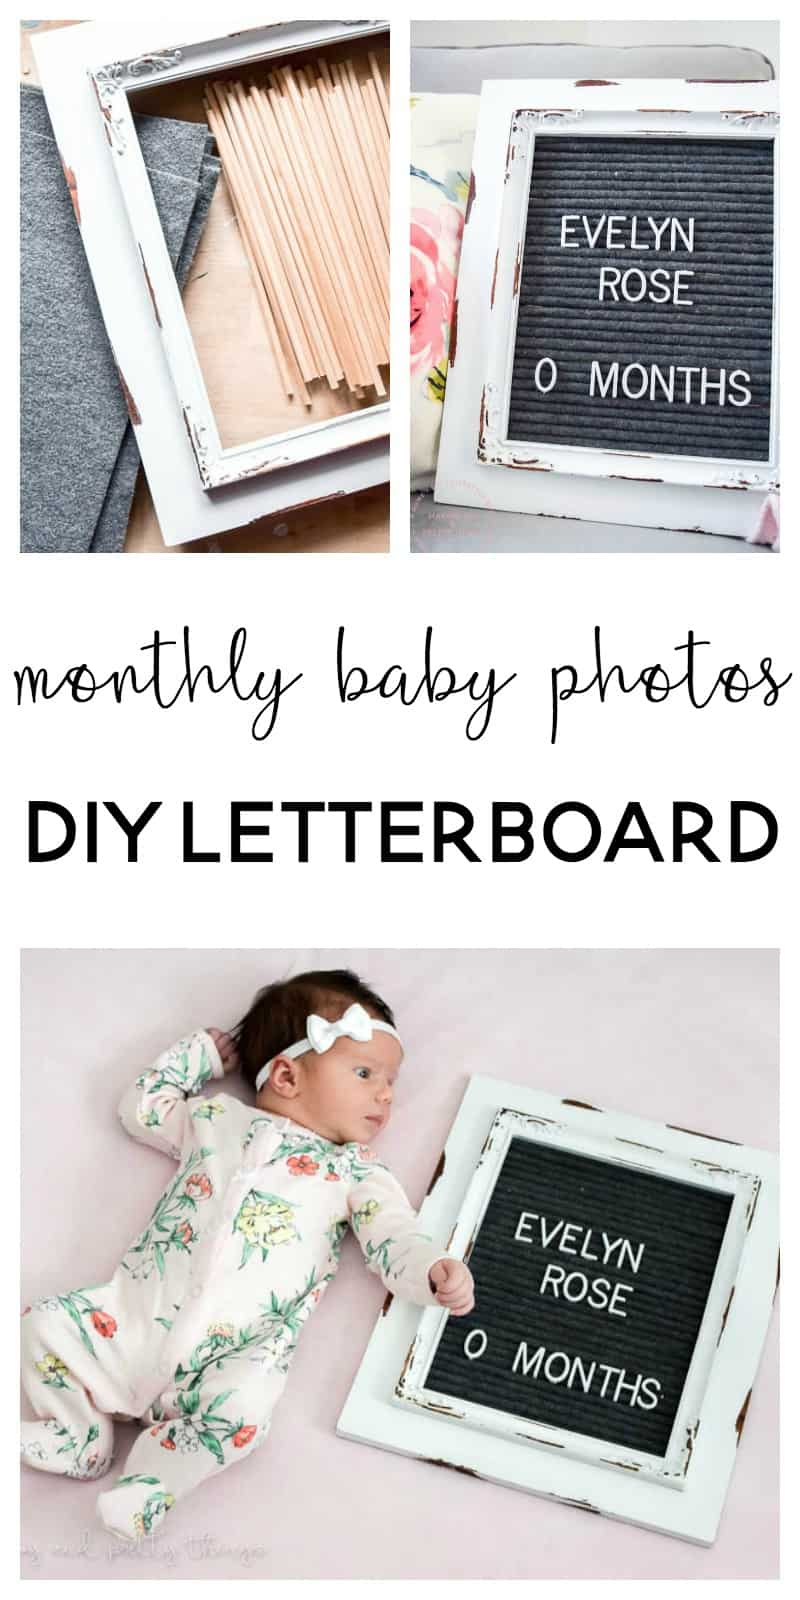
Supplies for DIY Letterboard
- Frame (mine had an 8×10 opening)
- Wooden dowel rods
- Felt (use whatever color you want! I used a dark gray)
- Glue gun
- Scissors
- Letterboard letters
Step 1. Prepare the Frame for DIY Letterboard
First, remove all the backing and glass from the frame. Then, cut your dowel rods down to the width of the frame’s opening. We eyeballed the cut (big surprise we didn’t measure, huh?!).
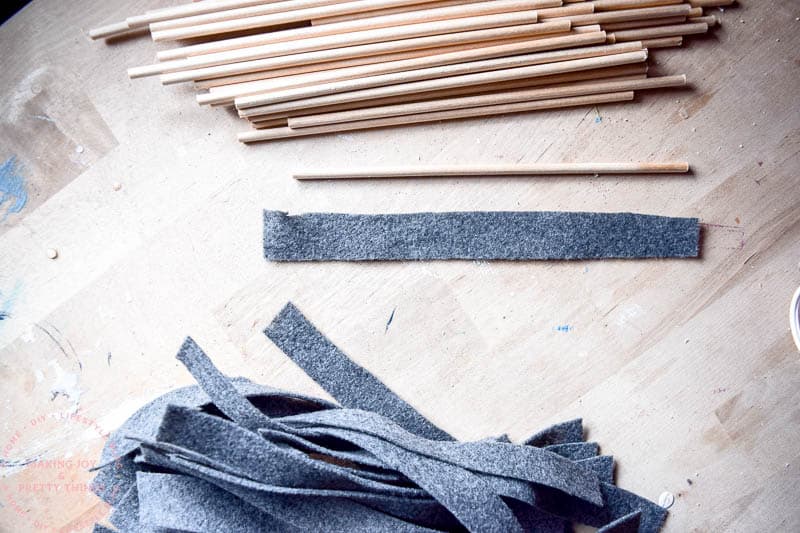
Step 2. Cut Down Felt to Wrap Dowels
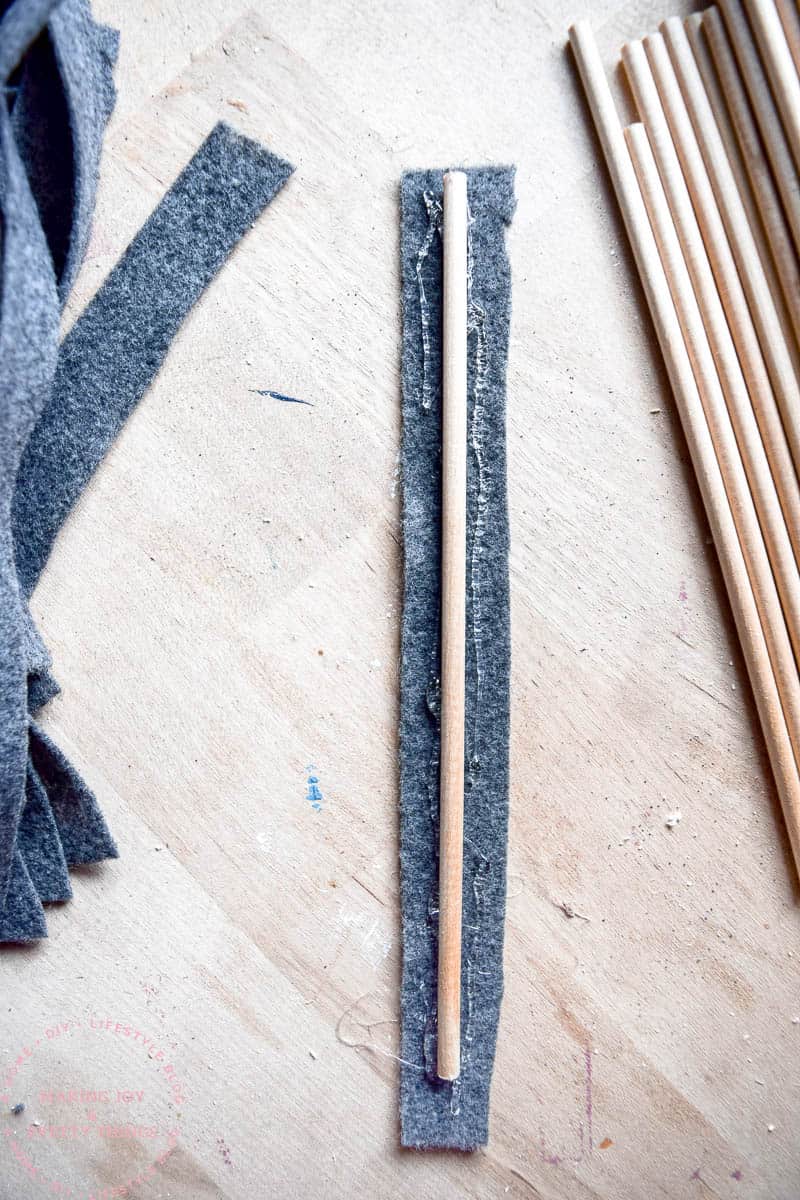
Next, cut down the felt into strips. You want the strips to be wide enough to wrap almost the entire way around the dowel rod.
I didn’t end up cutting any length off of the felt until after I had glued it to the dowel rod. (Because I only needed to cut just a little bit off, it was easier to do once it was attached to the dowel rod).
Then, apply some glue from the glue gun to the cut felt strip.
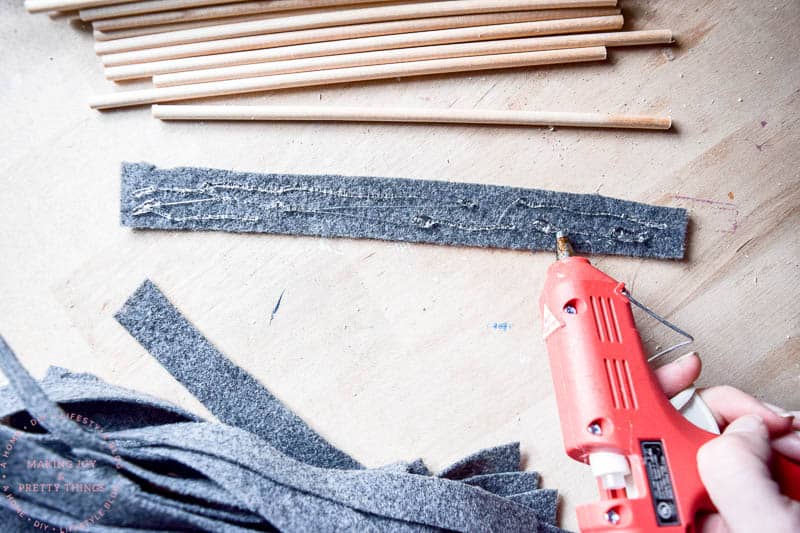
Step 3. Use Hot Glue to Secure the Felt
Last, place one wooden dowel rod into the center of the felt strip and carefully press either side of the felt around the dowel rod. (Seriously be careful. That glue is hot!)
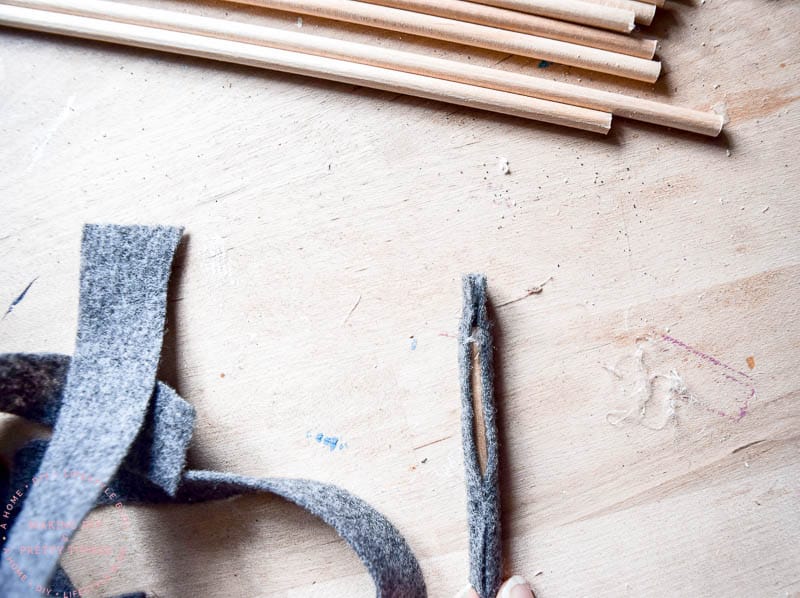
Then you keep doing that until you have enough dowel rods to fill the entire opening of the frame!
A note about the spacing of the dowel rods: you want them to be close together but not too close. The best way to judge if you have correct spacing is to take some of the letter board letters and push them into the letter board as if you were going to spell out a word.
So, if the letter stays put, you have the correct spacing. If it keeps popping out when you push it in, they are too close together. If you can see through the letter board, they are too far apart.
Step 4. Attach Rods to Frame for DIY Letterboard
It takes a bit of trial and error to get the dowel rods properly spaced. I made sure to check the spacing after every 5 rows or so.
Fill up the frame with the dowel rods and you’re done!
It’s such a fun way to document each month of your baby’s first year!
Though, I also love the witty sayings I see all over Instagram, too 😉
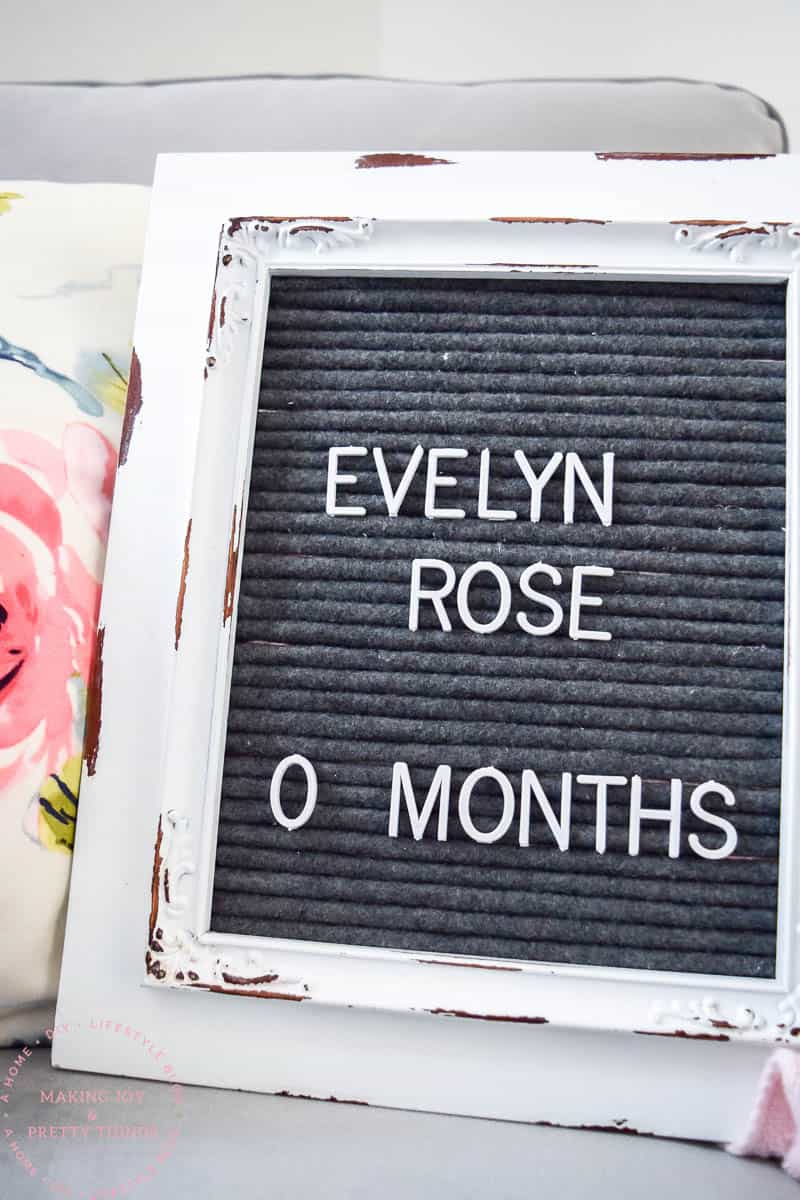
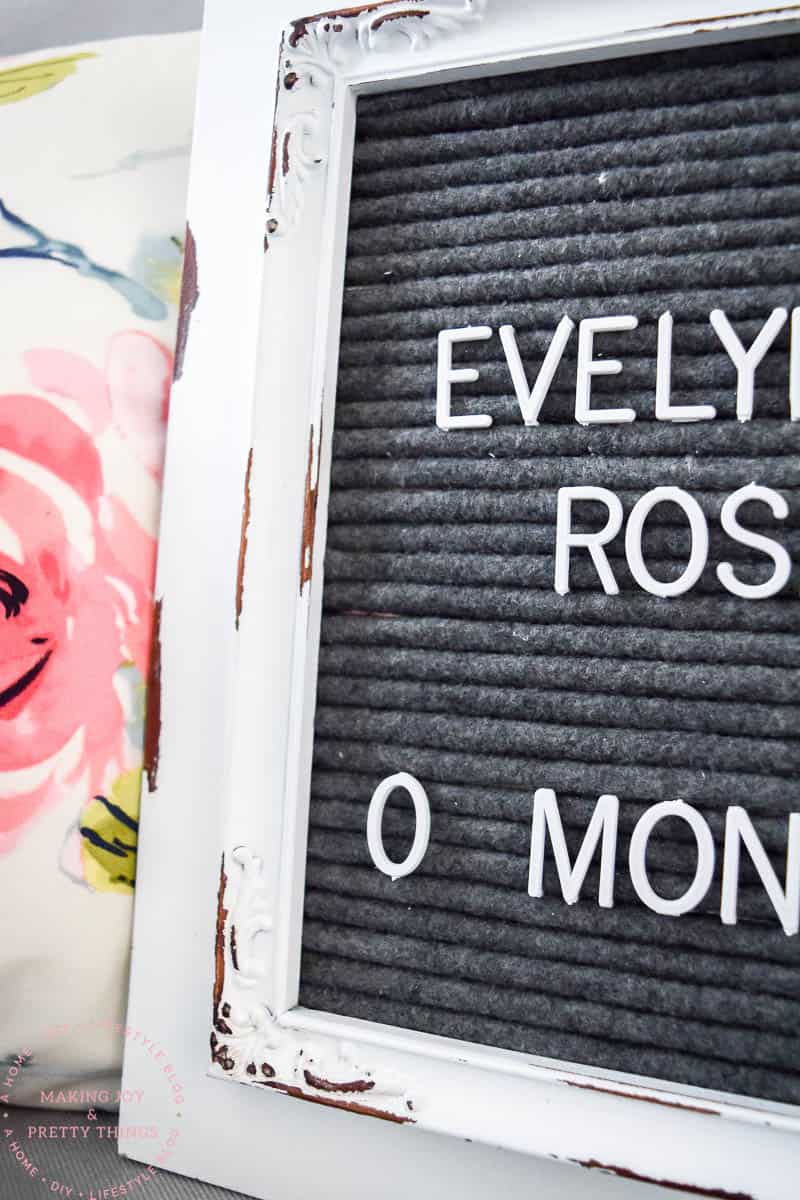
And here’s my sweet girl! Not gonna lie, she’s actually a week and a half old in this picture. Oops! Hoping to actually get the monthly photos on the correct date from here on out. But, I wouldn’t count on it!
Time flies incredibly fast and I just love this letterboard as a reminder to slow down and enjoy those moments before they are gone. I love the way you can capture an exact moment in time with this DIY letterboard.
Wishing you a joyful day!
Want to see more of our farmhouse girl’s nursery?
- Farmhouse Girl’s Nursery: The Design Plan
- Farmhouse Girl’s Nursery: Week 1 Progress
- Farmhouse Girl’s Nursery: Weeks 2 and 3 Progress
- Farmhouse Girl’s Nursery Week 4 Progress
- A Farmhouse Nursery Dresser Makeover
- Personalized Nursery Wood Slice Name Sign
- Floral Wallpaper Ideas for Girl’s Bedrooms and Nurseries
- Lazy Girl’s DIY Typography Art
- DIY Wood Block Candle Holders
- How to do an Old Curtain Rod Update
- How to Make a DIY Triangle Shelf Planter
- How to Make a DIY Shadow Box
- Monthly Baby Photos: How to Make a DIY Letterboard
- How to Make a Wood Bead Chandelier
- Simple Floral Farmhouse Wreath
- Rustic DIY Planter using Book Pages
- How to Make Your Own Rustic String Art
- DIY Fabric Flower Garland
- DIY Wood Bead Hearts
- Farmhouse Girls Nursery Reveal!!

How to Make a DIY Letterboard
Keep track of those moments when they are young with this DIY letterboard. Life gets busy this will help remind you to slow down and enjoy the time we have with them as they grow
Materials
- Frame (mine had an 8x10 opening)
- Wooden dowel rods
- Felt (use whatever color you want! I used a dark gray)
- Letterboard letters
Tools
- Glue Gun
- Scissors
Instructions
- Prepare the Frame for DIY Letterboard
- Cut Down Felt to Wrap Dowels
- Use Hot Glue to Secure Felt
- Attach Rods to Frame for DIY Letterboard

hey girl- great post! love the pics of the kiddos!! so cute!
aww thank you Shawna!!
This is SUCH a creative idea! What a great way to mark the months as Miss E grows!
Thank you SO much Kristi!
What a great DIY! And your little girl is A-DOR-ABLE!! Soak up the baby snuggles! And give yourself a lot of grace!
thank you SO much Chelsea!!
This is an adorable idea! For Mother’s Day, a few of my kids got together and had a group picture taken and then they printed the picture and had it framed. In probably the same exact frame! It’s full of chippy goodness. I love this idea, too. I think it would make an especially fun DIY gift. And, of course, your model is precious!
Gotta love a good chippy frame 😉 Thank you!!
Making a DIY letter board has never even crossed my mind! So genius. She is so adorable 🙂
I couldn’t justify buying one so that’s when I decided to DIY 🙂 Thanks so much!
I love this! I was just standing in front of the letterboards at Hobby Lobby last night, mourning how expensive they are. Definitely giving this one a try. I may even have most of the supplies already!
Thanks so much Meredith!!!
Adorable!!!!! How did you finish off the back of it?