
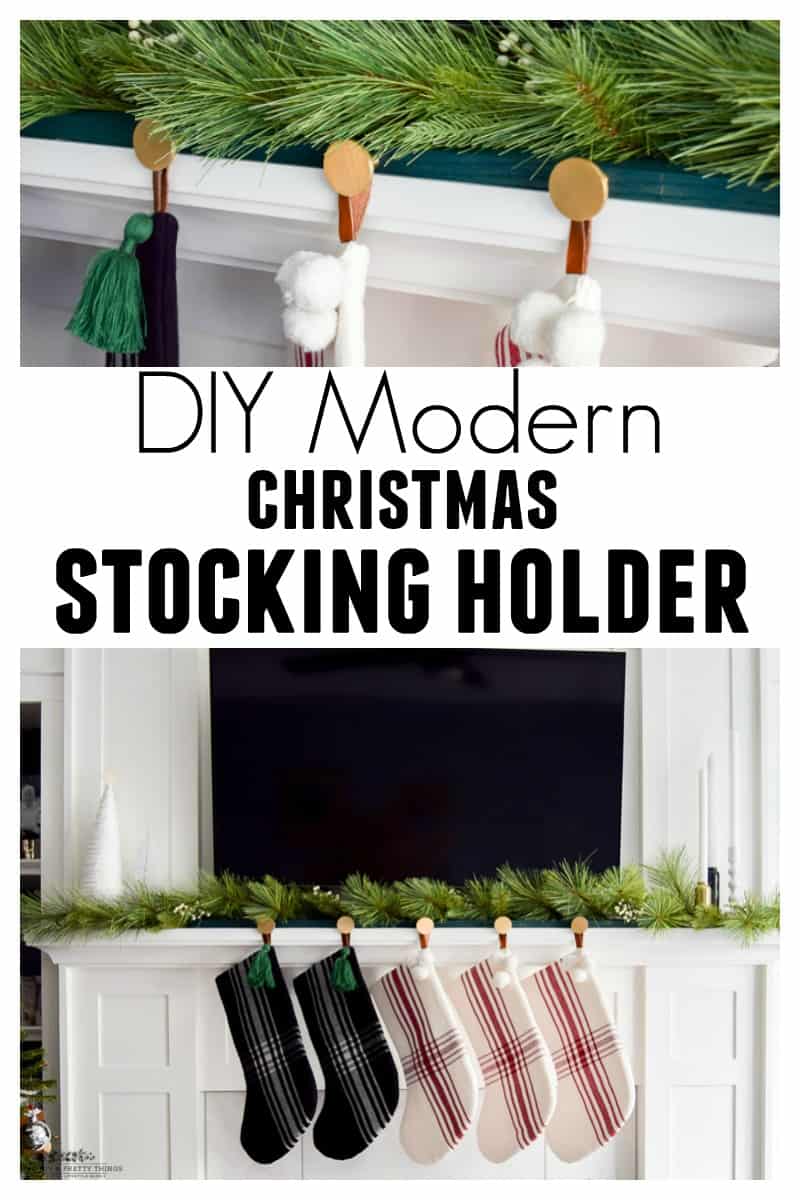
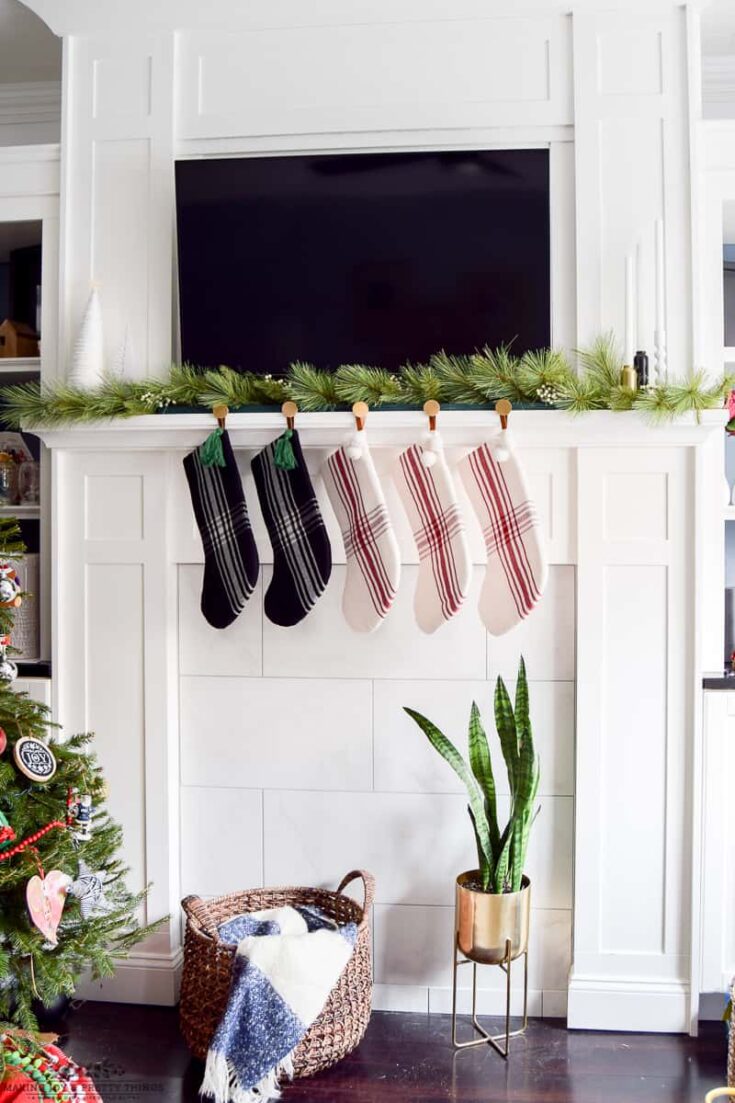
How to Make a Modern Christmas DIY Stocking Holder
See how I used some modern and stylish round brass drawer knobs to make a modern Christmas DIY stocking holder!
One DIY on my to-do list this year was a new DIY stocking holder! This is Evie’s first Christmas, so we had to get her a stocking holder anyway.
I can’t believe Christmas is less than 2 weeks away! And, yes, we are STILL decorating. Oops.
This post contains affiliate links. Please, click here to read my disclosure policy.
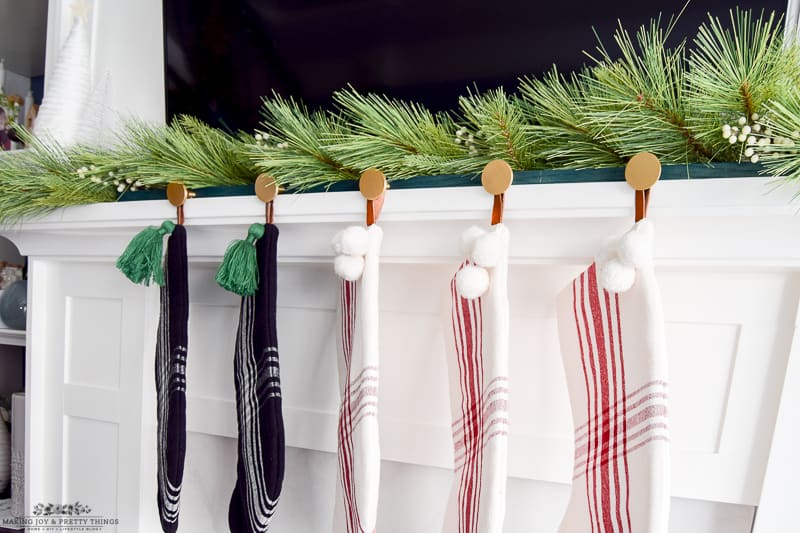
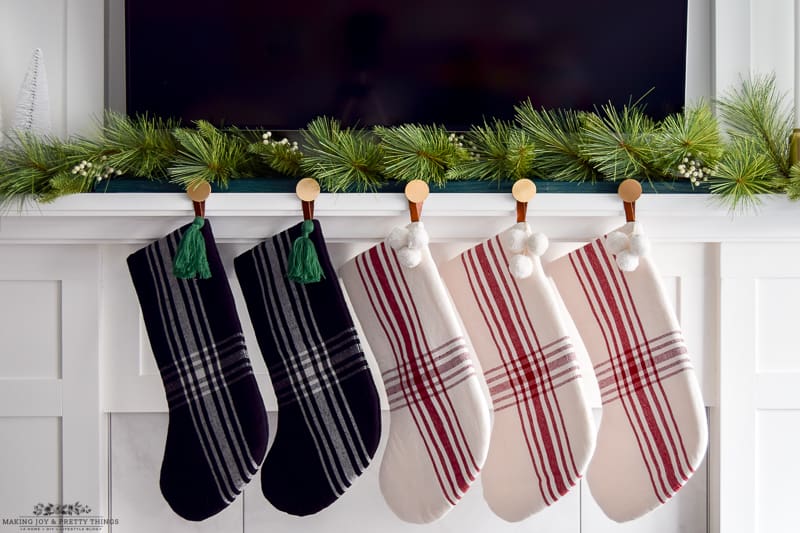
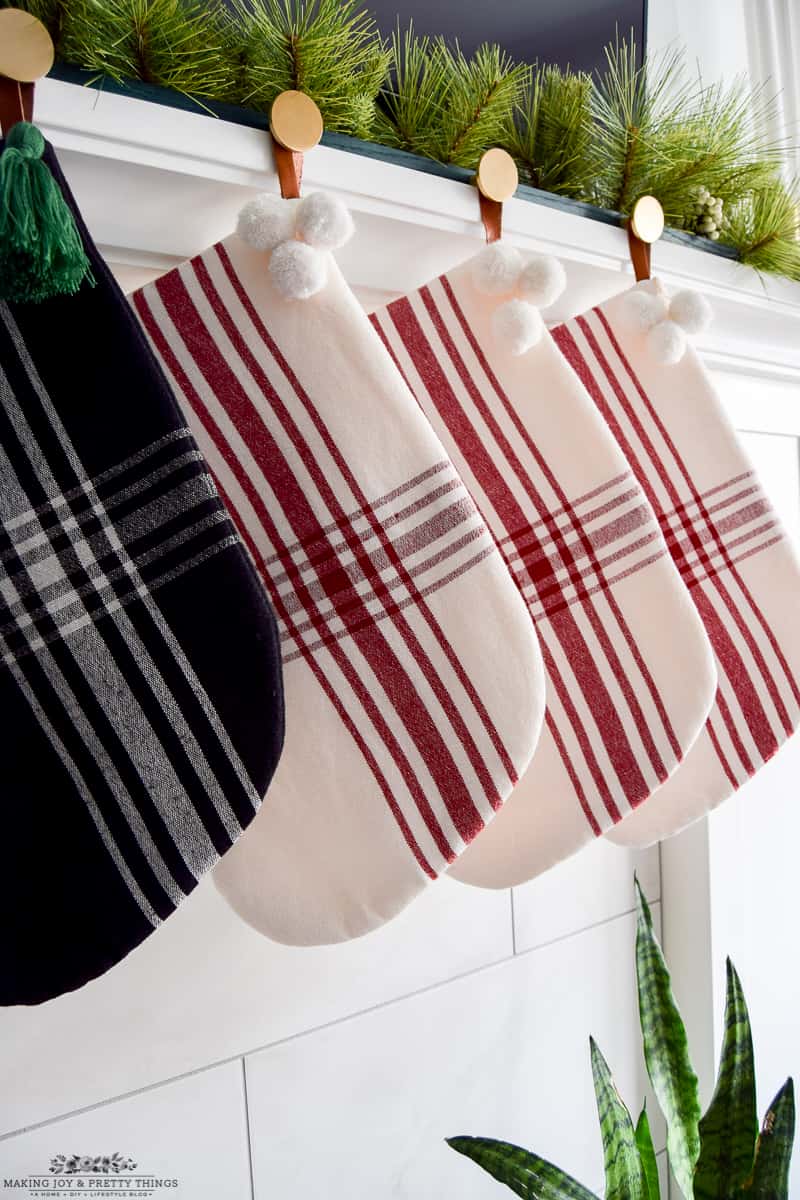
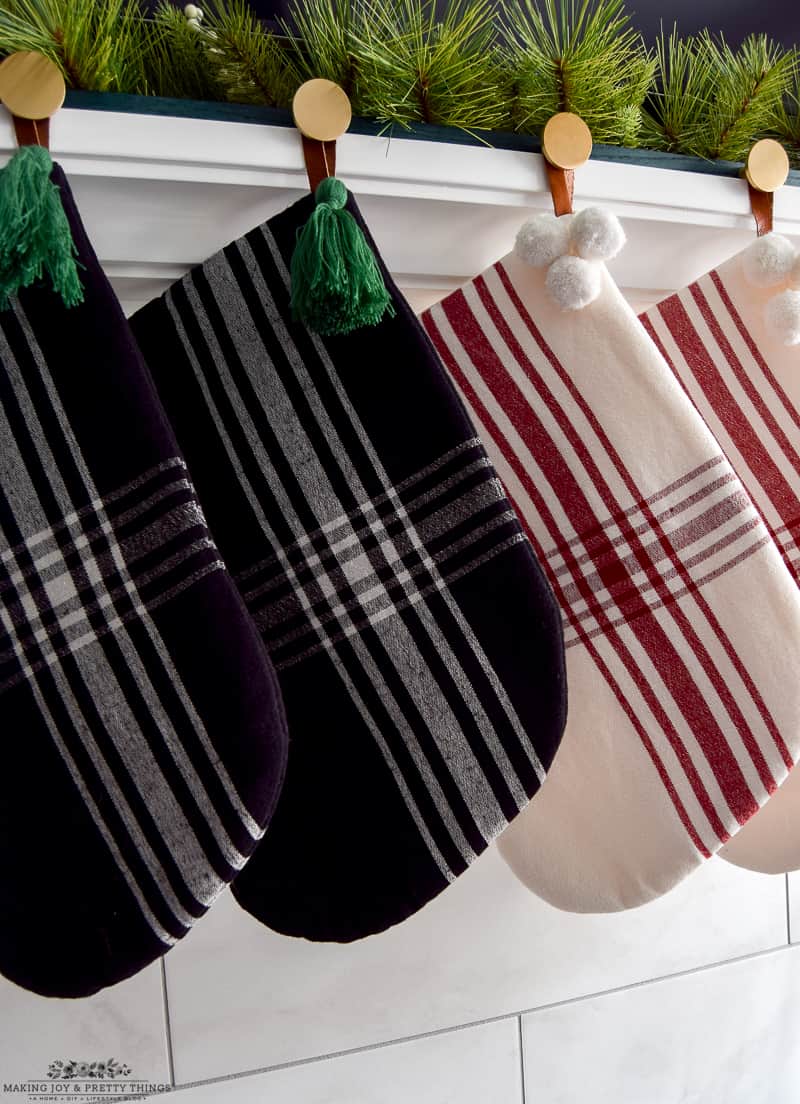
My husband and I have matching stocking holders and the boys each have their own. It was really a hodge podge of stocking holders on the mantel. And, for that matter, a random assortment of stockings, too!
Of course, you don’t know in advance how many kids you’ll have so you can’t prepurchase matching stockings and holders.
Making a Sturdy and Stylish DIY Stocking Holder
But, the biggest reason to make a new stocking holder (you know, besides because it’s pretty), is Charles. I can realistically imagine him pulling down one of our stocking holders and stabbing himself in the eye.
Those things are massive and not even remotely kid-friendly. Even though we 3M strip them to the mantel, when there’s a will there’s a way for that little boy.
Since my overall style is evolving, I wanted to make a more modern stocking holder. That, combined with traditional stockings, is the perfect marriage (I think) and the perfect illustration of what my style is now.
Modern traditional. Maybe “trendy”, too.
Anyway, it was so easy to make!!
Supplies for DIY Stocking Holder
- 1×2 Oak Board
- Drill (11/64″ drill bit)
- Brass Knobs
- Screws
- Screwdriver
- Paint
- 3M Strips
- Stockings, no longer sold (similar options here)
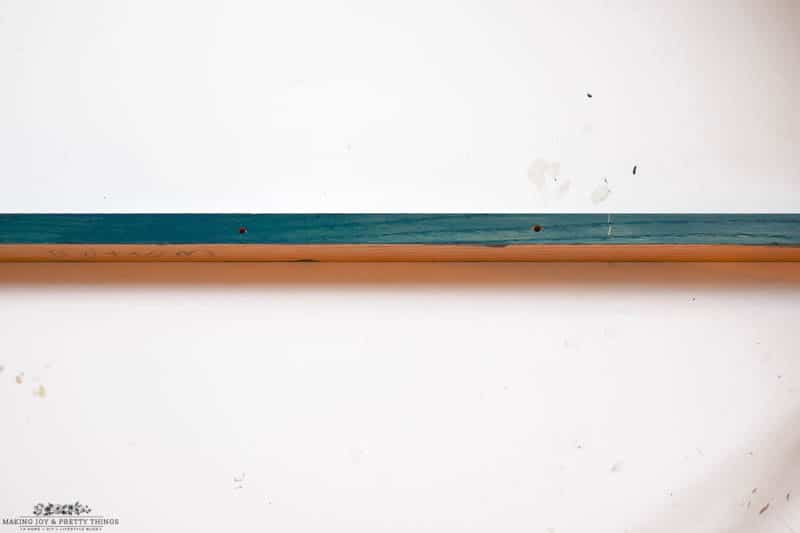
Step 1. Cut the Oak Board
First, we cut down the board to 42″ long. Then, we evenly spaced out 5 holes and drilled all the way through the board. Use the smallest drill bit to allow the screws to fit through the hole (we used 11/64″).
If you’re not sure what size to use, start smaller and you can always use a bigger one if needed. We used a bit that was too big at first and had to get a new piece of wood and start over. If there are any rough spots after drilling the holes, you can lightly sand those.
Step 2. Paint the DIY Stocking Holder
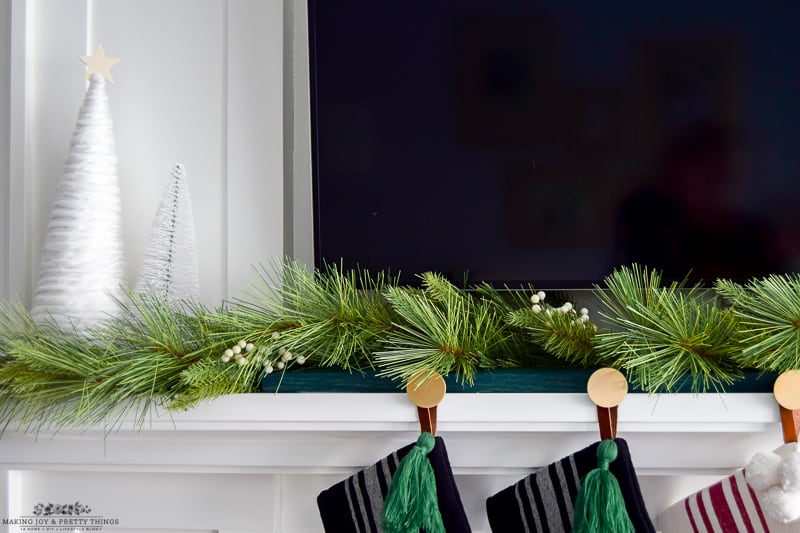
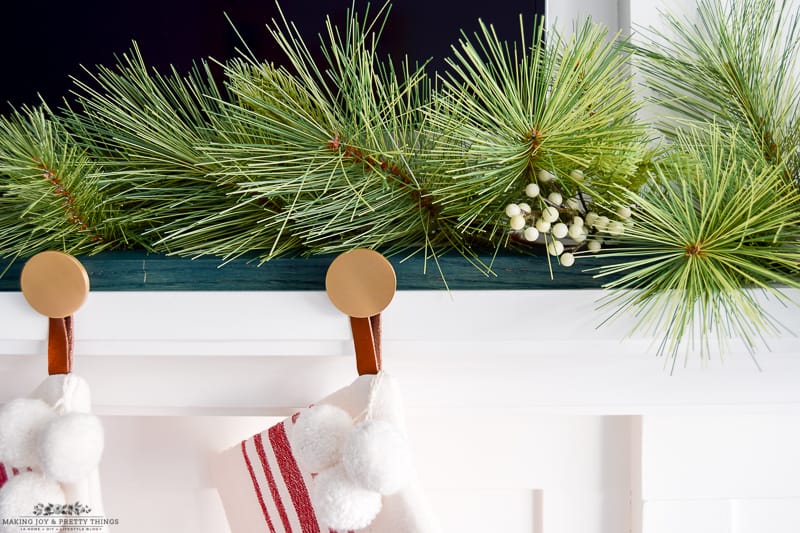
Next, I used a pretty festive green paint to roughly paint the board. If you cover it with garland as I did, it’s barely visible so doesn’t need to be perfect.
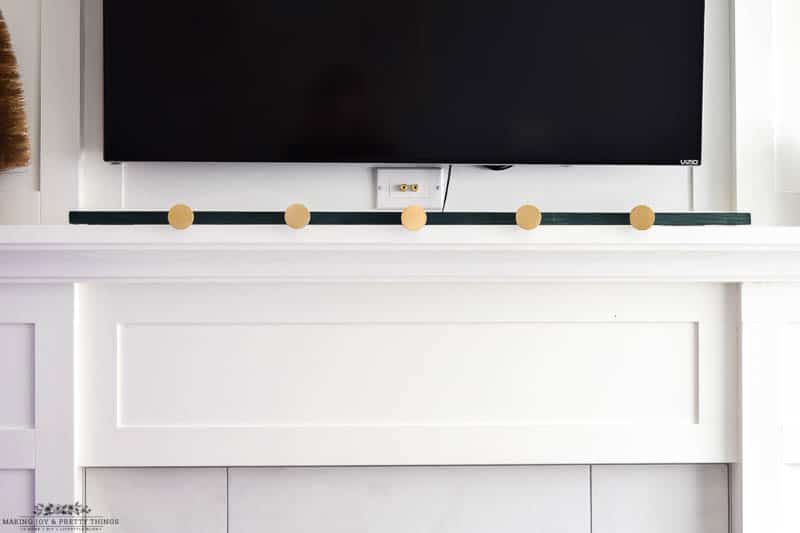
Step 3. Use Bigger Screws to Secure Knobs
Last, I removed the screws that come with the knobs. We picked up the new screws because the ones that come with the knobs weren’t long enough to hold the knob to the wood.
Using the new machine screws and washer, I screwed the knob into the board. I needed a screwdriver to make sure it was really tight!
Step 4. Hang up the DIY Stocking Holder
I then used 3M strips to stick it to our mantel. The more, the better! It is a little front-heavy (those knobs are no joke!) so I put the strips toward the back of the wood.
We haven’t had any problems with it staying put. But, I’d still use more than just one set of strips.
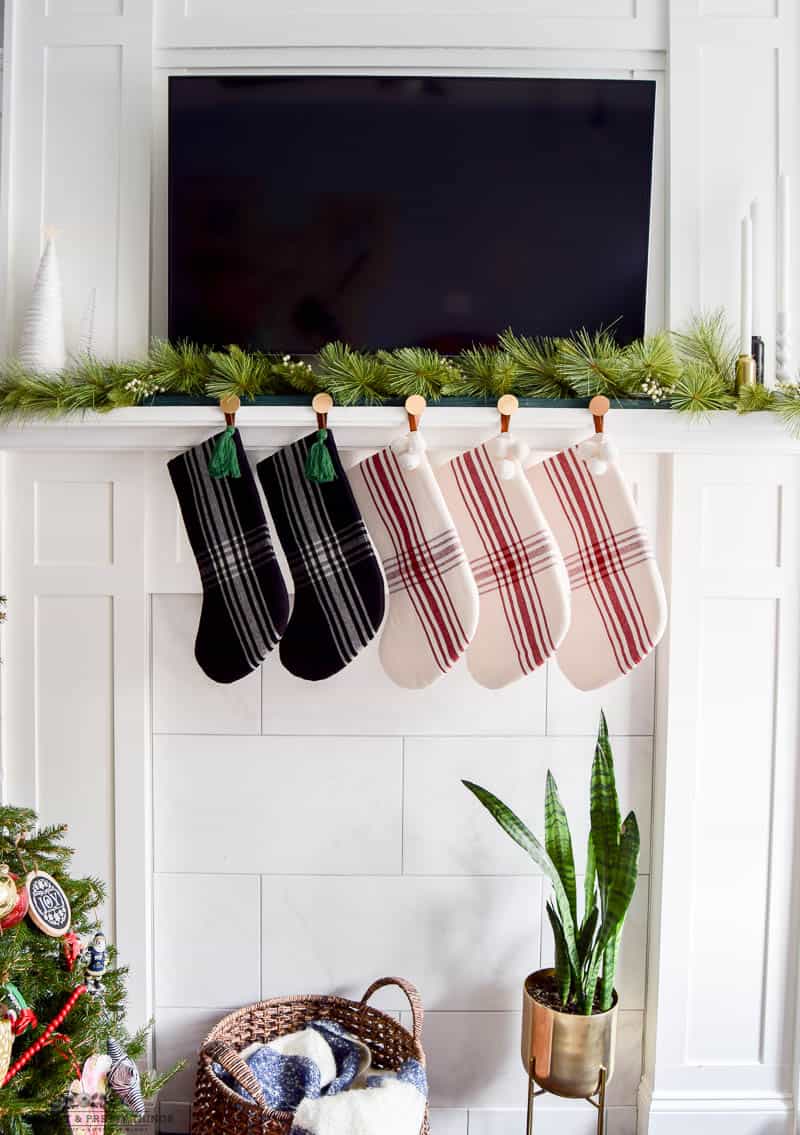
Step 5. Add Stocking and Decor
I hung up our stocking, added some pretty garland, a couple of candleholders, and some decorative trees and it’s done!
I took entirely too many pictures because I just LOVE how it all looks.
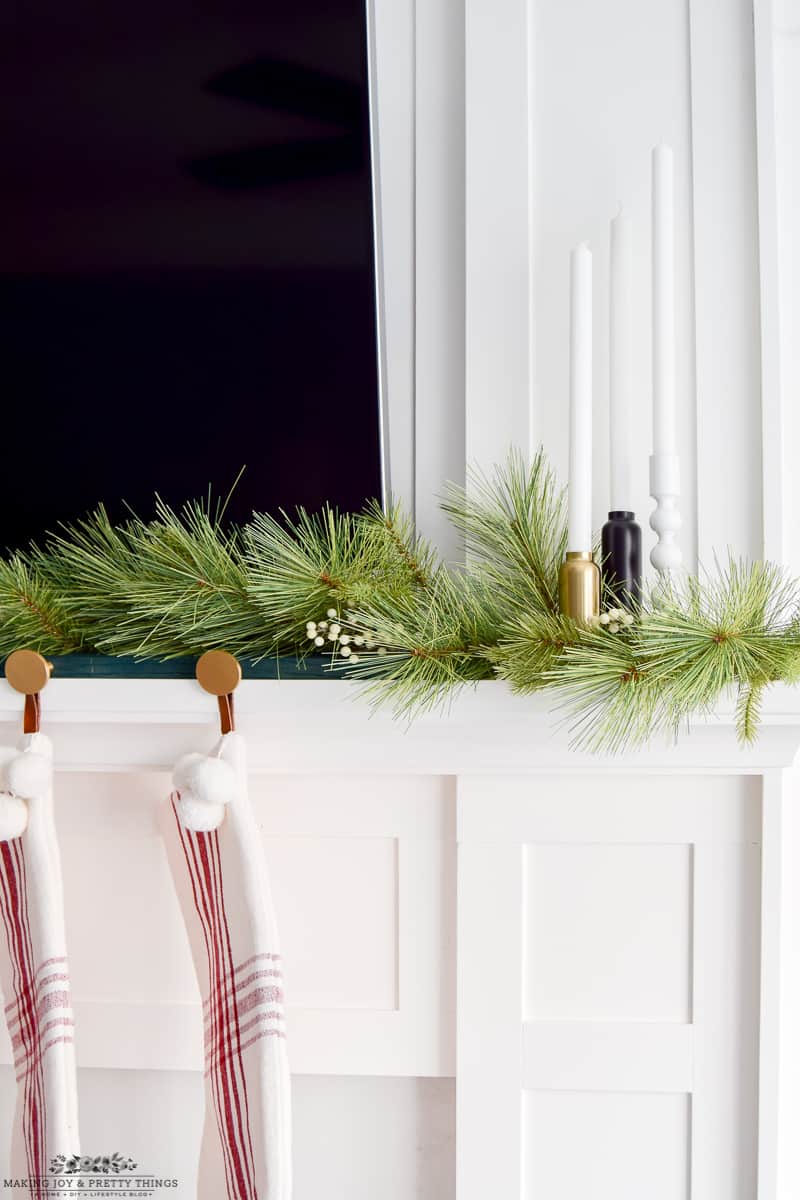
Brass makes my heart happy! I added in a brass candlestick, too. Can’t ever have enough brass amiright 😉
The stockings are so pretty! I love that they are kinda matchy-match without being exactly the same.

Other Decor for Mantel
- Pine Garland, similar
- Brass/Black Candlesticks
- White Candlestick
- White Yarn Christmas Tree, no longer sold (learn how to make your own yarn Christmas trees here)
- White Bottlebrush Christmas Tree, similar
- Blanket Basket
- Plant Stand

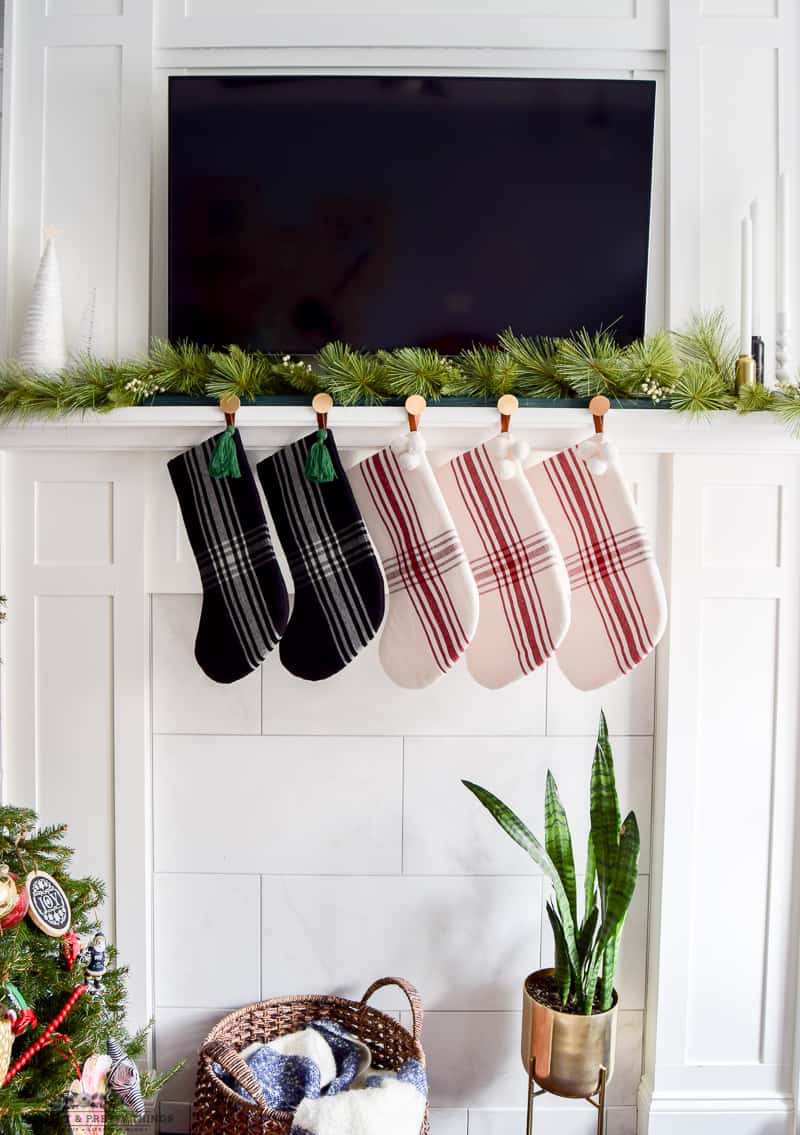
This DIY stocking holder held up super well and I just love the way it set off our mantel for Christmas. Best of all, this can’t be pulled down by any of the kids. Can’t wait to stuff these for Christmas
Be sure to check out these other Christmas DIY ideas to add this year:
- Cozy Christmas Mantel by The Lily Pad Cottage
- DIY Believe Christmas Sign by Making Manzanita
- Modern Dollar Store DIY Christmas Ideas from Love Create Celebrate’s YouTube Channel
Wishing you a joyful day!

How to Make a Modern Christmas DIY Stocking Holder
Make a DIY stocking holder using brass knobs and paint that stays in place and is super sturdy
Materials
- 1×2 Oak Board
- Brass Knobs
- Screws
- Screwdriver
- Paint
- 3M Strips
- Stockings
Instructions
- Cut the Oak Board
- Paint the DIY Stocking Holder
- Use Bigger Screws to Secure Knobs
- Hang up the DIY Stocking Holder
- Add Stocking and Decor


So stylish and beautiful!! Love this, sharing & pinning!
Thanks so much Lora!!