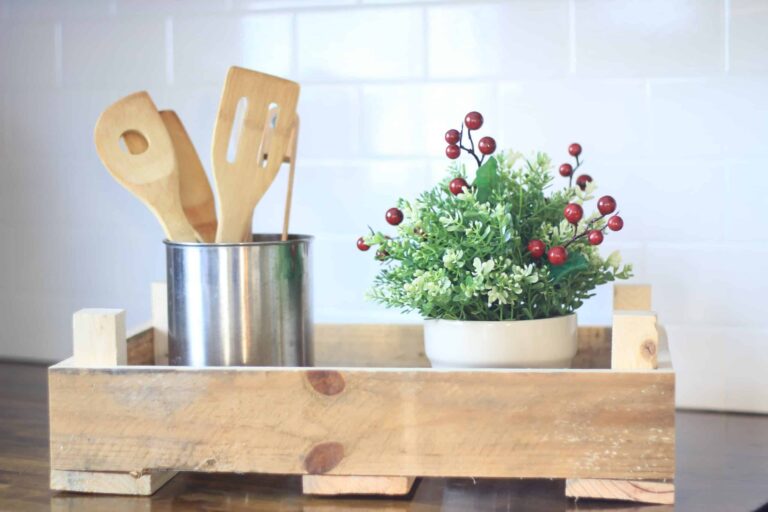
DIY Picture Frame Tray
Do you ever find you are always pressed for time but absolutely need that DIY fix? This DIY picture frame tray only takes 5 minutes but I promise you will get more than that out of it!
Hi everyone! I have a bunch of DIYs I’ve been working on recently that have been taking up a ton of my time. Along with obsessing over Fixer-Upper decor.
Seriously, you guys, I’m obsessed. I’m actually working on a DIY shiplap wall hanging art piece!!
So, while I’m working on that, I realize my dining room table doesn’t have a centerpiece! Naturally, I took a break from the shiplap and made this centerpiece in 5 minutes. Even we busy mamas have 5 minutes! And the best part, it was FREE.
This post contains affiliate links. Please, click here to read my disclosure policy.
Supply List for DIY picture frame tray:
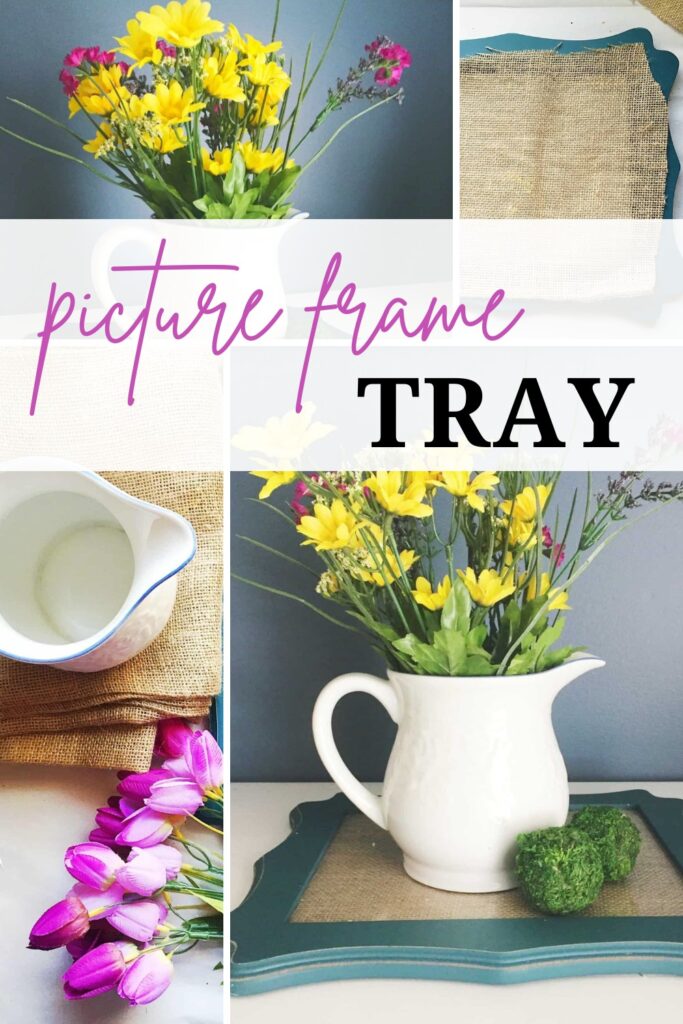
- Picture Frame
- Vase (similar)
- Yellow Flowers (similar)
- Pink Flowers
- Burlap
- Moss Balls
Remember, use whatever you already have in your house!! If you don’t have anything I included some similar items but try your best to keep this free!
And if you don’t like the color of a frame you have, throw a coat of paint on it. You can make awesome GORGEOUS home decor for free right at home.

Notice in this picture I was going to use tulips! Well, they didn’t look quite right in the vase so I switched them out to a wildflower arrangement from Michaels. The burlap and moss balls are also from Michaels.
The blue frame I got a few years ago at Hobby Lobby. But, again, any frame would work and can be easily changed with a fresh coat of paint!
The vase was actually found in my basement. The house we live in used to be my husband’s grandparent’s house. This beautiful vase was collecting dust after they passed away.
I love that I’m able to use it right on our dining room table where we can see it every day.
Step 1. Cut burlap for picture frame

I roughly cut out a piece of burlap that sort of matched the opening of my frame. Real technical, right? Haha. Ignore the 3M strips, this frame used to be on a gallery wall.
Step 2. Install cardboard backer to tray
I put the cardboard piece that holds everything together back in. This does take a little effort because the burlap is pretty thick. But I was able to get everything in with a little finagling.

This is what it looks like from the front! The burlap adds a really “rustic” look, which I love. You could also use lace or even scrapbook paper as a backing.

Step 3. Install flowers into the pitcher

I didn’t do anything to the vase at all, except clean the dust of course. It had some awesome floral patterns around the outside and a chalky blue rim at the top. LOVE it. I put the wildflowers in and added the moss balls for some dimension. And, that’s it!!

Step 4. Decorate with the DIY picture frame tray

Once you’ve added your moss balls and the pitcher of flowers you can set this tray up practically anywhere! The best part about this decor item is you can literally use it anywhere.
Just set it down and boom you are done and the room looks that much better!

I just love throwing together a craft that’s super easy with stuff I already have. Just goes to show you that with a little time and effort, you can decorate with just about anything.

I hope you guys try this out!! Let me know if you have any questions and show me your own DIY centerpieces.
More DIY Centerpiece Ideas
- 25 Creative Mason Jar Centerpiece Ideas You Can DIY
- How to Make a DIY Wooden Box Centerpiece
- Simple 5 Bottle DIY Wood Centerpiece
- DIY Simple Floral Centerpiece
- Simple Summer Farmhouse Centerpiece
- Vintage Farmhouse Flower Arrangement in a Milk Can
- 40+ Cute Photo Frame Craft Ideas

DIY Picture Frame Tray
Materials
Instructions
- Cut burlap for picture frame
- Install cardboard backer to tray
- Install flowers into the pitcher
- Decorate with the DIY picture frame tray