
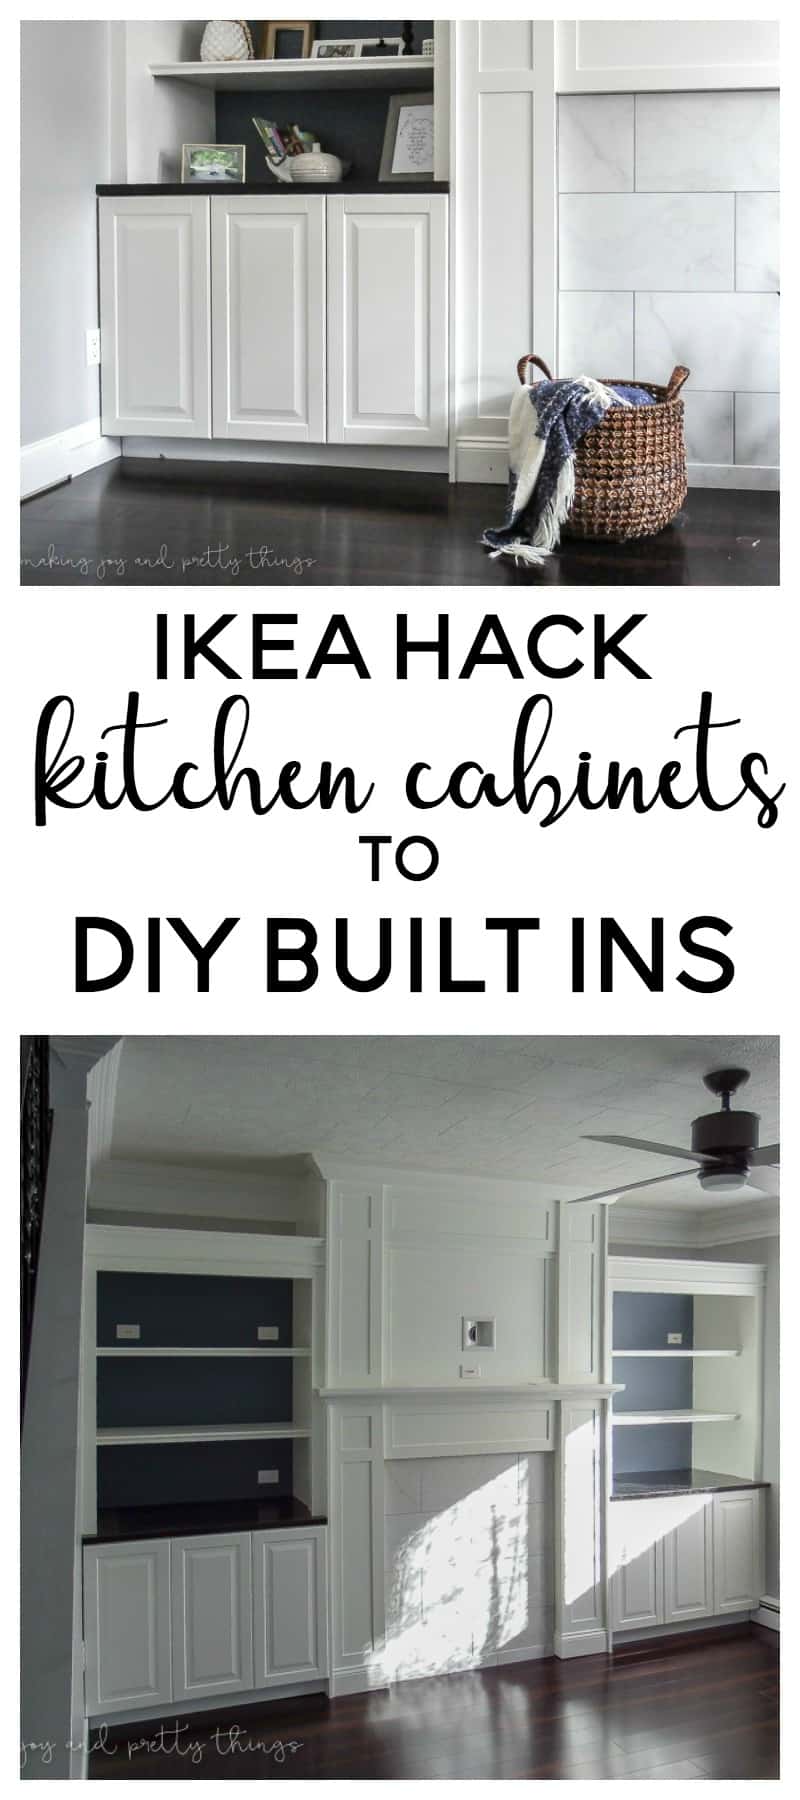
IKEA Built Ins Around Fireplace Using Kitchen Cabinets
Who doesn’t love a good IKEA hack? We created easy and affordable IKEA built ins around our fireplace using kitchen base cabinets and added shelves and trim to complete the look.
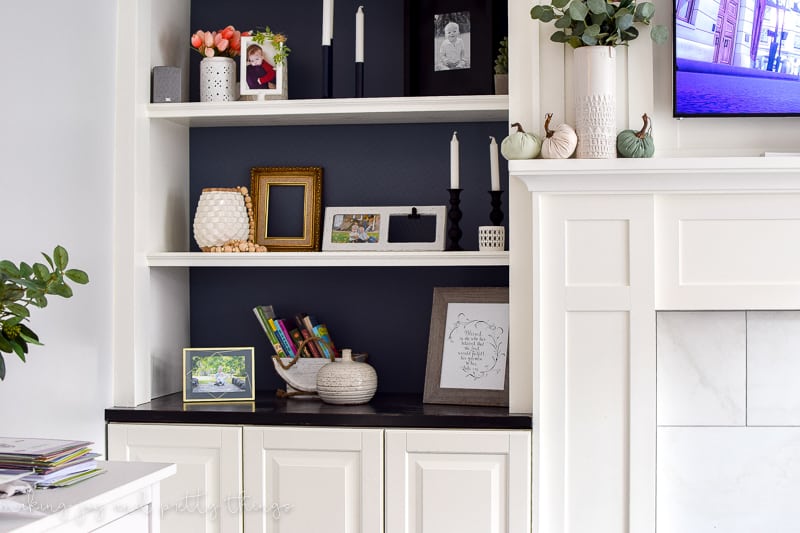
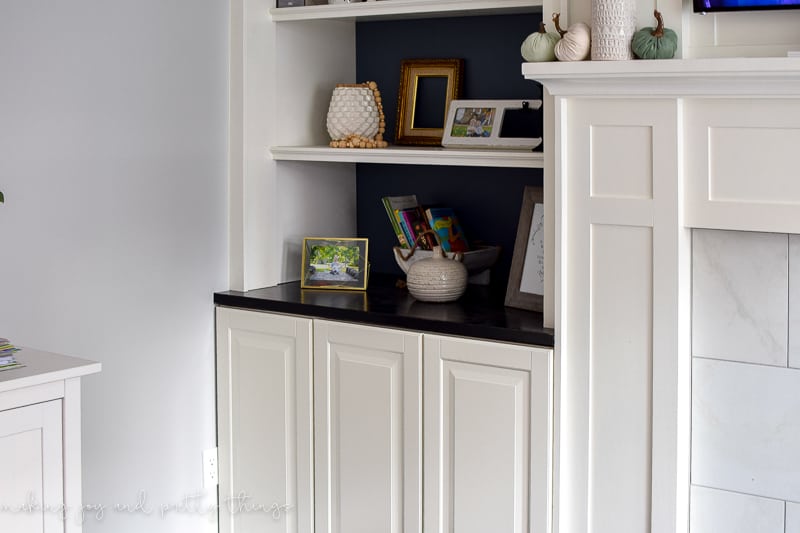
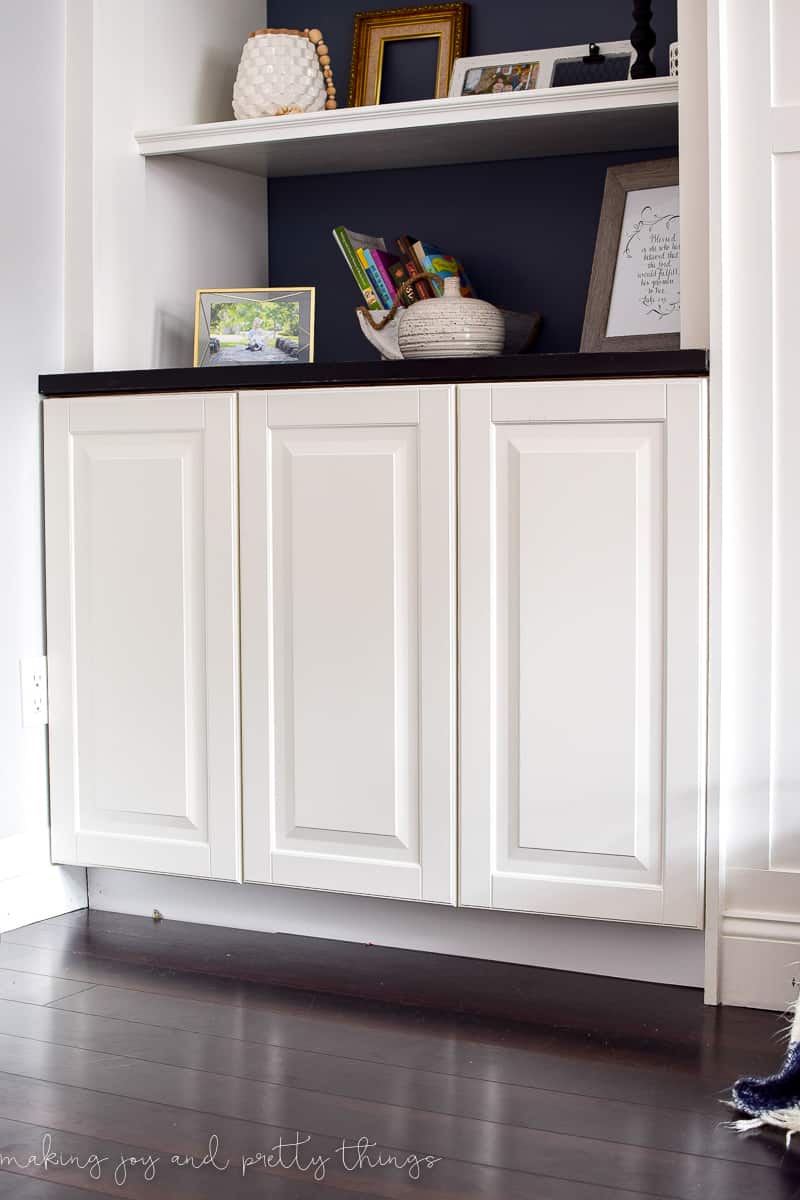
Today we’re sharing a little IKEA hack we’ve used in our living room to create a TON of additional storage! We used IKEA base cabinets (made for kitchens) to make built-ins around our fireplace. Topped with a countertop, trim, and wall shelves – they look like they were totally created custom for this space.
Related reading – Other IKEA hacks you’ll love:
IKEA built ins around fireplace using kitchen base cabinets
We actually did this a long time ago – before we moved into this house…almost 2 years ago! Though I can’t really take credit for this, my FIL had made built-in bookshelves and storage to surround our fireplace. And, he used IKEA’s base kitchen cabinets to do so!
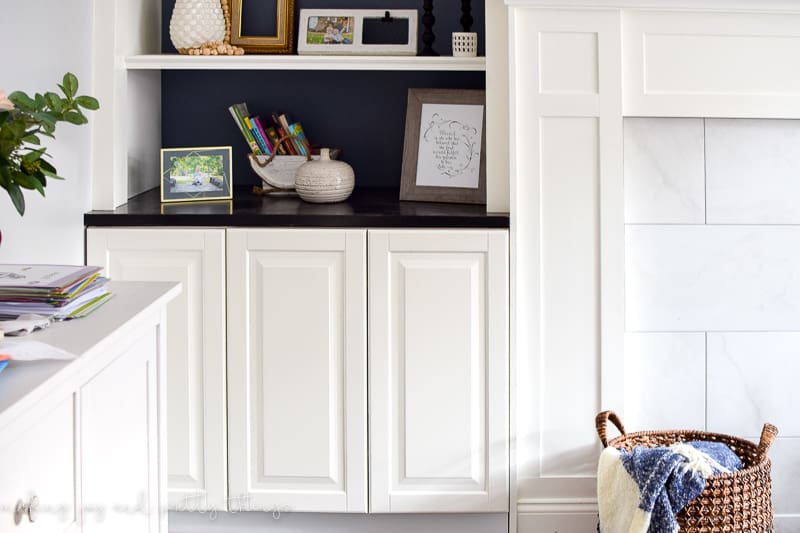
I love love love these cabinets. They’re SO deep which is perfect for storing all the kid’s games, puzzles, books, and other toys.
I love that their crap, I mean toys, are hidden. Since we only have one living space, I really don’t want it to look like a kid toy-splosion (though I can’t say that we really keep it all that clean. Oops).
Since we did this 2+ years ago, I don’t have any step-by-step photos or instructions. But, here’s a basic rundown of how we made these IKEA built ins around fireplace.
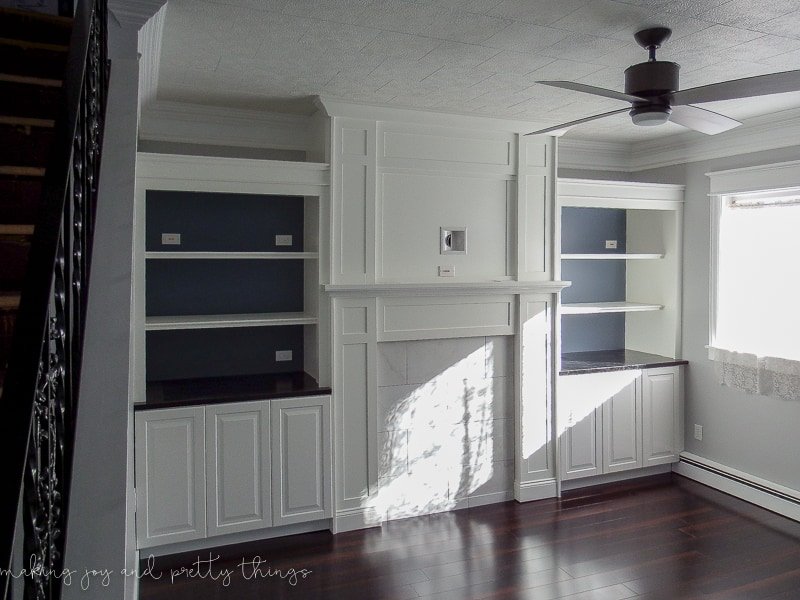
I actually found these pictures of what it looked like finished (and empty) before we moved in!
How to use IKEA kitchen cabinets for fireplace built ins
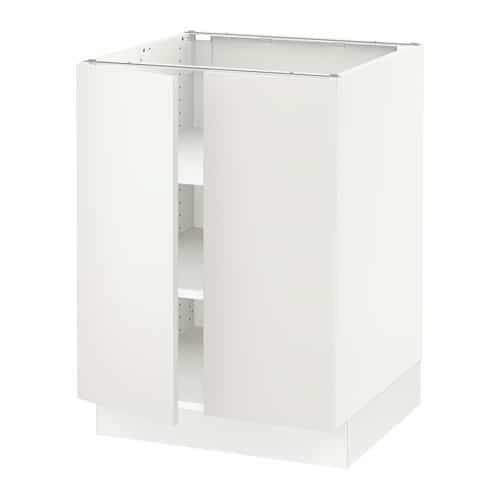
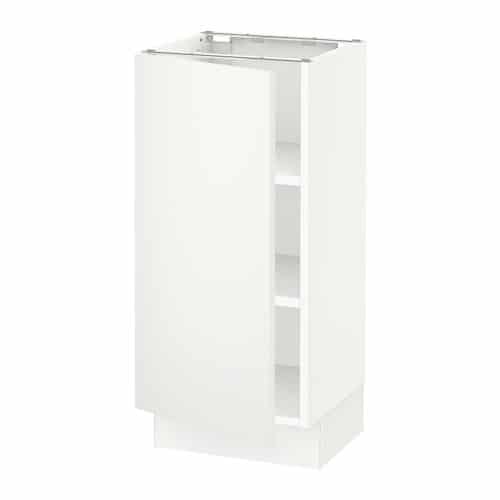
For this IKEA hack, we used IKEA’s base kitchen cabinets on either side of the fireplace. Since the fireplace was already there, we had a predetermined width on either side to fill in with the cabinets.
IKEA has since redesigned all of its kitchen products so the exact base cabinets we used are no longer available.
These look like the newer versions:
They’re both part of the SEKTION base cabinet line at IKEA. I actually love all of the different door fronts they have that can really change the entire look of the cabinets.
Of course, these cabinets aren’t necessarily super cheap. But, they’re much cheaper than having something custom-made.
For our purposes, we used one of the larger, two-door cabinets on either side of the fireplace and one of the smaller, one-door cabinets on either side.
This totaled 4 base cabinets! *You’ll have to measure your space to see what size(s) will fit for you*.
Installing the IKEA kitchen cabinets around fireplace
Once they were assembled and in place, we were able to use wood trim pieces to box them in, making them look like REAL built-ins!
The width of the cabinets together didn’t exactly equal the width between the wall and the fireplace. So, adding the trim pieces (pieces of wood painted white) also hid any gaps!
We took one of the cabinet doors to Home Depot to have them color match the paint to the door color. That way, the wood trim pieces, and the IKEA cabinet colors matched!
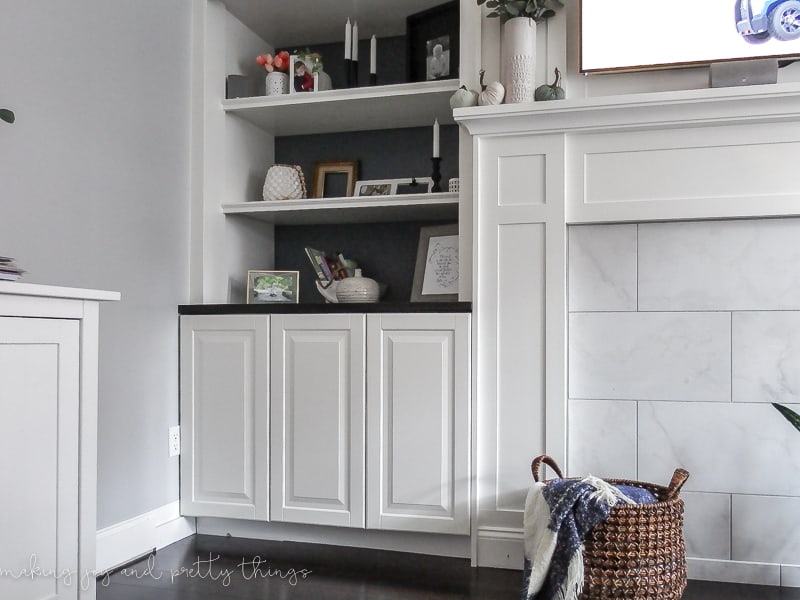
Countertop and Shelves for Built ins
We used a 4×6 project panel that is no longer sold. But you could also use a butcher block slab (similar to this). We stained it and installed it on top of the cabinets.
The shelves above the IKEA built ins were made from plywood with a trim piece on the front. We also painted them to match.
We also added a wood piece at the base of the cabinets to cover up the little IKEA feet.
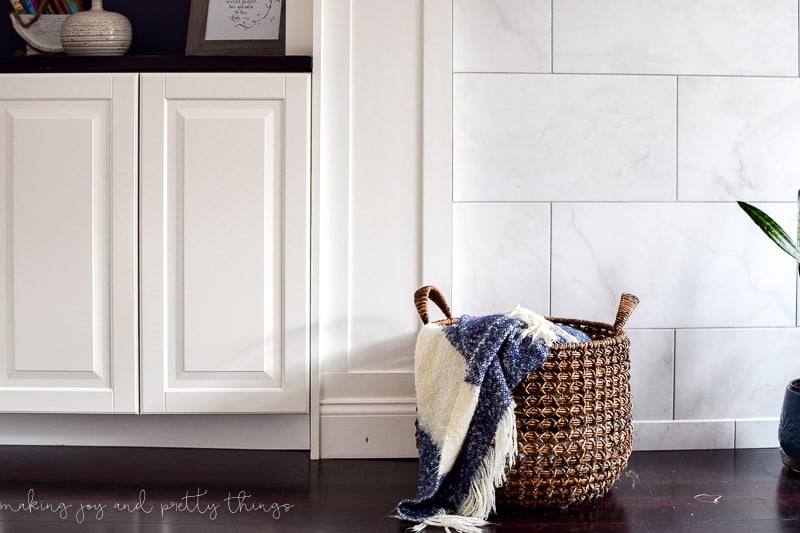
I love how the built-ins look! Living in an old house, I really wished there were actual “real” builtins. But, these are really a close second. Adding depth AND storage while being stylish is pretty much a winning design recipe.
Not really “built in” related BUT I had to point out that my FIL also did all the woodwork for the entire fireplace surround. It’s beautiful! He’s truly talented!
Styling and Organization of the Built Ins
I use the open shelving part for our books, some pictures, and other random decor I’ve accumulated like the decor hoarder I am.
Learn my favorite tips for styling open shelves in this article.
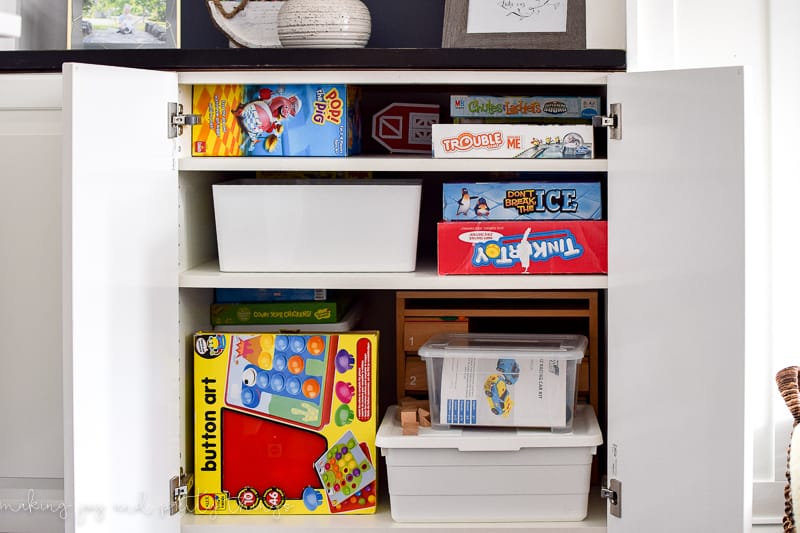
The base cabinets though? Those are stuffed to the brim with kid stuff.
I was going to organize everything to make it look “pretty” but I figured this was a more honest look at what they really look like.
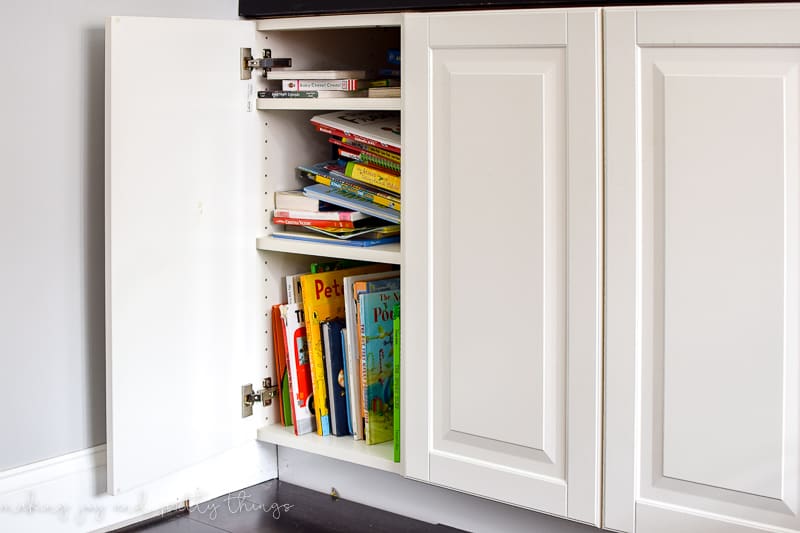
The smaller cabinet has all the books in it. Generally overflowing.
I get annoyed with it every once in a while and organize all the books. You know, small on top, medium in the middle, and large on the bottom.
The kids can practically smell the organization and begin destroying it immediately. So, this is what it looks like 99% of the time.
The bigger cabinet has games, puzzles, and bins of Legos. We can fit SO much in there.
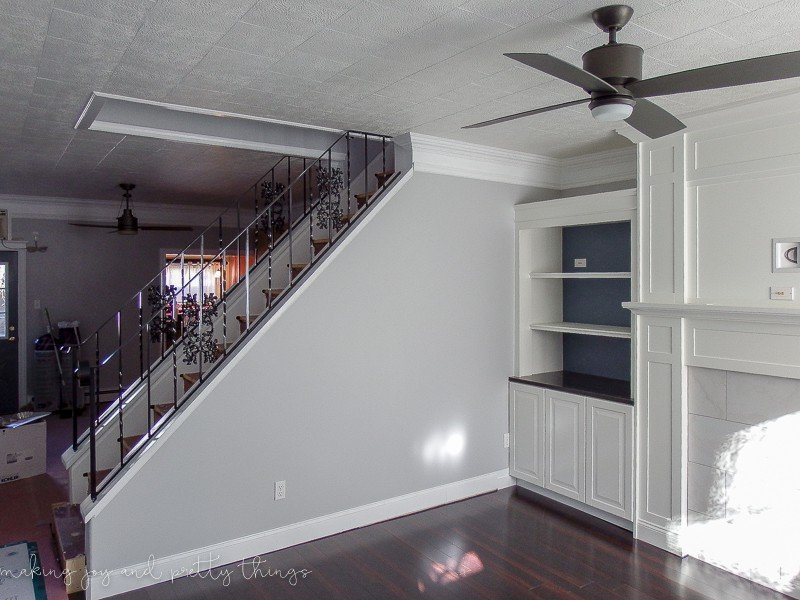
And, that’s just half of the built-ins we have! The other side is where my husband keeps all of the electronics.
And, we have some DVDs because I mean do we throw those away now? Do we keep them? Everything is online now so I don’t know haha.
Using affordable IKEA kitchen cabinets is a great way to add more storage to your living room by installing them around your fireplace. All you need to do is measure your space and do some planning on IKEA’s website to see what will work for you.
With the addition of the wood countertop and the open shelves, it adds so much character to your fireplace.
Wishing you a joyful day!


These are beautiful! I love that blue color on the backing. It’s gorgeous! … And what a great way to hide things away. (Honestly, I think anyone with kids has cupboards that look EXACTLY like that 🙂 )
Thanks so much Erin!! If only you saw the other part of the room where I stashed more of their toys out of the picture hahaha 😉
This is really beautiful! I came across your post when I was looking for DIY built-in ideas. Can you share what you used for the open shelves part on the top?
was the “fire place” there already or did you add that as well?
the “fireplace” was there already but was not working and was way too damaged to salvage the brick
How did you secure your shelves to look as though they were built in?
we used the hardware provided by ikea – though I truthfully wouldn’t do it this way again. We’re going to redo them and build our own floating shelves