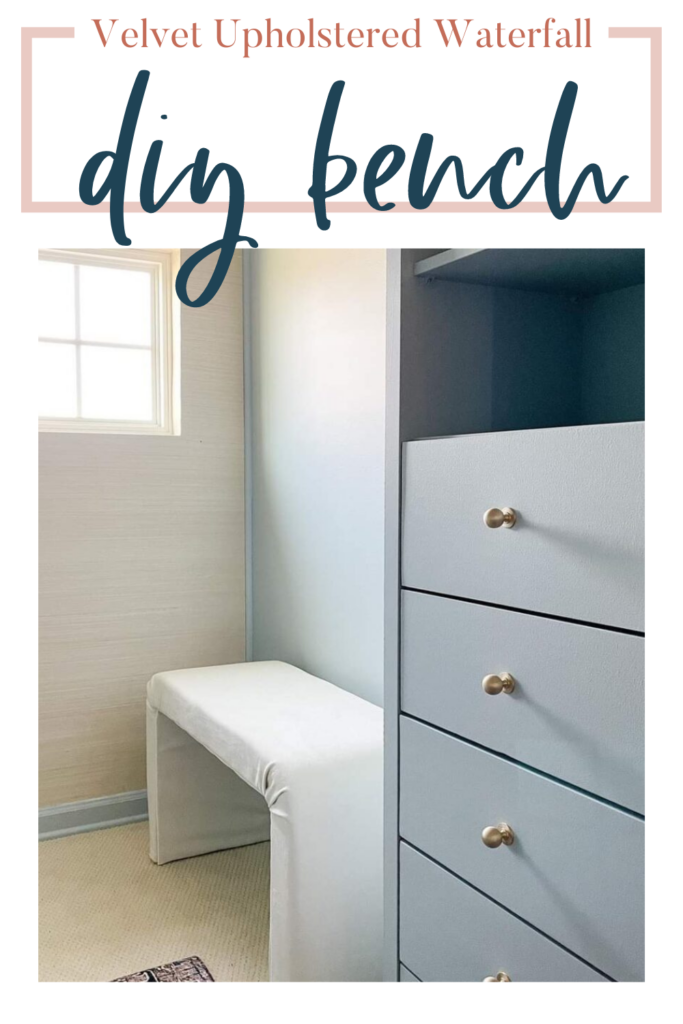
Velvet Upholstered Waterfall Bench DIY Tutorial
Learn how to make an upholstered waterfall bench by following along with this step-by-step DIY tutorial. Even if you have no upholstery experience, you can make your own DIY waterfall bench!
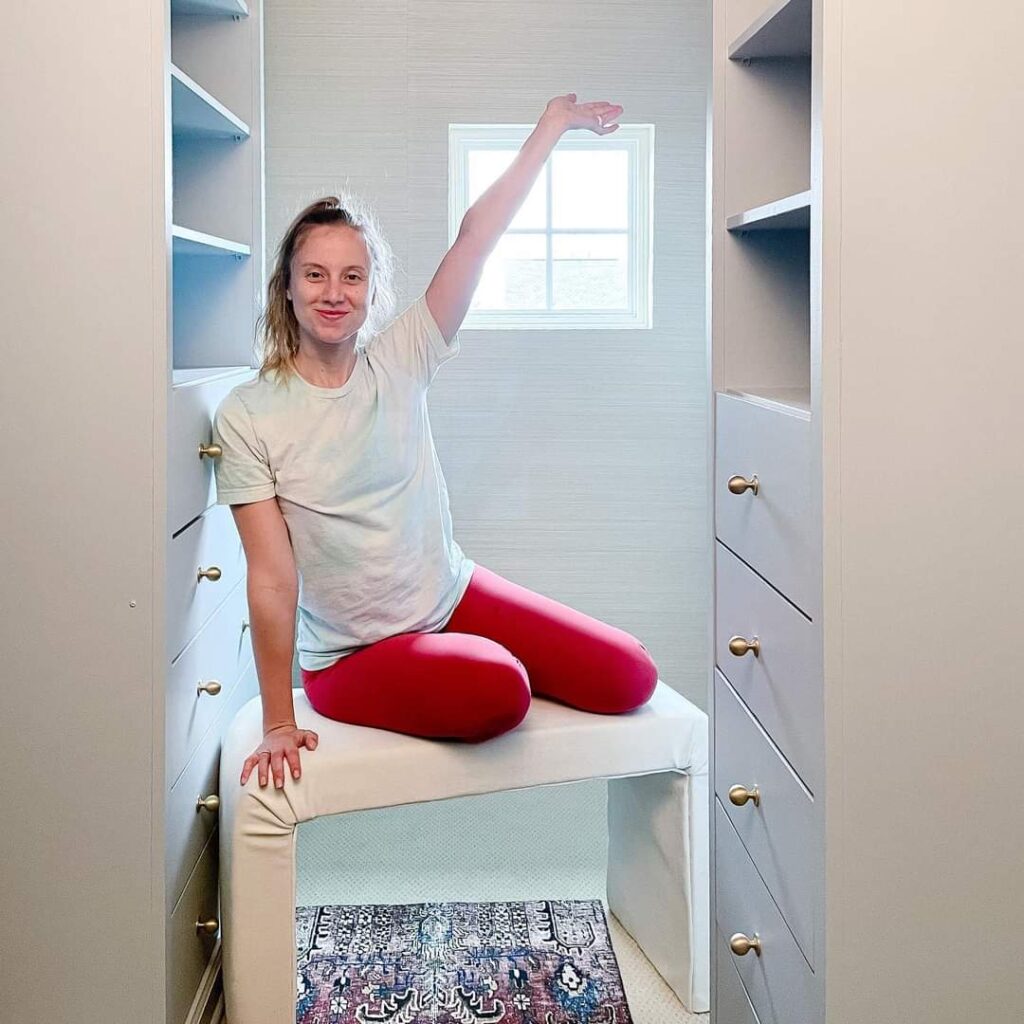
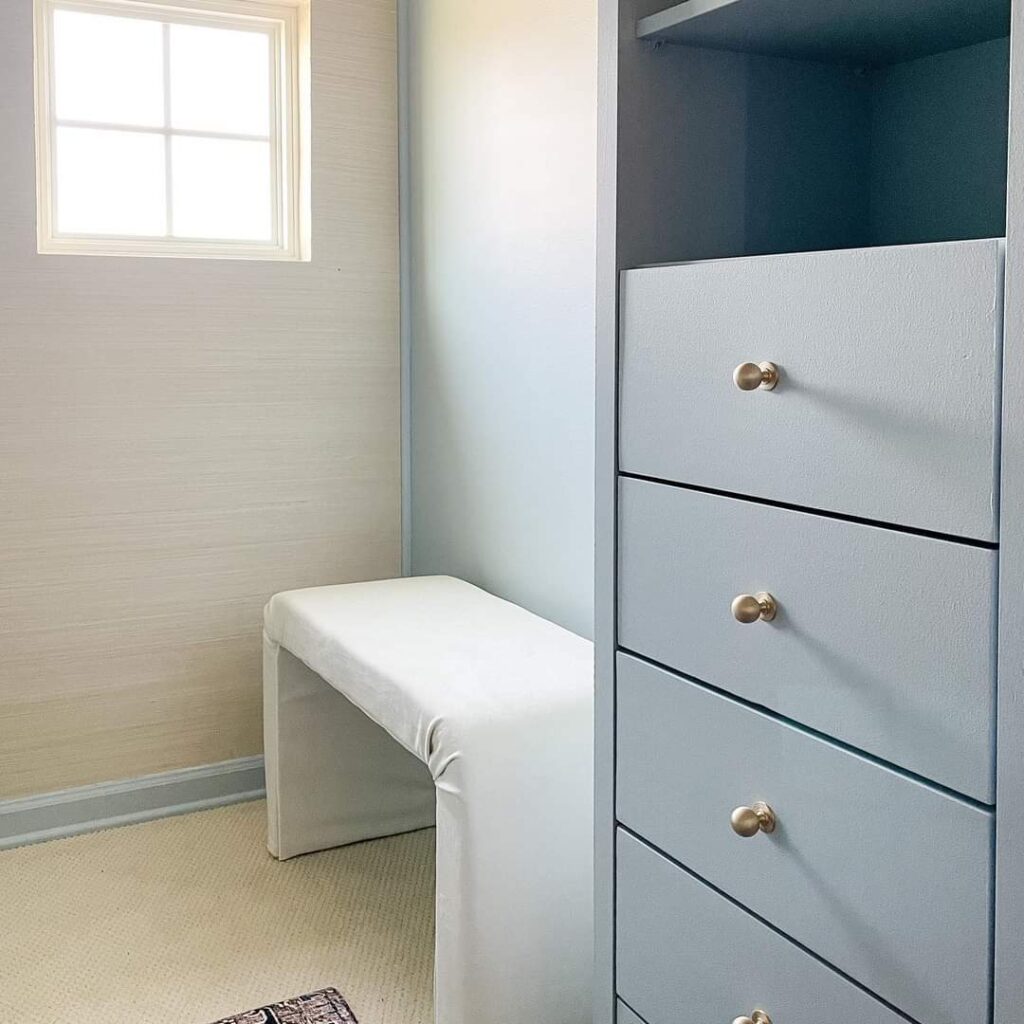
For the corner of our master closet by the window, I really wanted a little bench. Having a bench in a closet is a genius move for practical reasons and just because it looks good and adds a ton of style to the closet!
Before you rush out of the house in the morning, you have a nice comfy place to sit and put your shoes on in the morning.
It’s also a great place to sit and enjoy your morning cup of coffee while you ponder what to wear for the day.
Originally I found a curved white waterfall bench that was perfect…except there was one thing that wasn’t perfect. It was $650.
No way was I going to spend that much on a bench for the corner of our closet. So I thought why not try to DIY the waterfall bench with 2x4s, velvet, and foam?
Spoiler alert – it turned out great and I was able to make it for a fraction of the cost of buying the more expensive version!
Today we’re breaking down the entire process of this velvet upholstered waterfall bench DIY tutorial.
Now, let me preface this DIY tutorial by saying that I have NO upholstery experience whatsoever – so this is totally beginner-friendly.
This project also requires no sewing because frankly, I don’t know how to do that! With a little bit of patience and hard work, you can make your own waterfall upholstered bench too!
Long story short, if I can do this – you can too!
This post contains affiliate links. Please, click here to read my disclosure policy.
Supplies for waterfall bench DIY project:
- Four 2x4s – 4 pieces cut to 30″ and 8 pieces cut to 16.5″
- Miter saw
- Kreg pocket hole jig
- Pocket hole screws – 2 1/2″
- Wood glue
- Clamps – we used these to clamp the foam to the bench and something like this to clamp the wood pieces together as we assembled (because didn’t have any clamps big enough)
- Drill
- Velvet upholstery fabric – at least 2 yards
- Foam – at least 2 yards
- Something to cut foam (utility knife, fabric scissors, electric carving knife, carpet shears)
- Fabric scissors
- Stapler
- Flexible trim (aka upholstery tack strip)
- Spiked tack strip
Step 1. Cut wood
First, you’ll cut the wood down to size with a miter saw.
Here’s the simple cut list:
- 4 pieces cut at 30″
- 8 pieces cut at 16.5″
We’re just using cheap 2x4s because they will be completely covered by the foam and upholstery fabric. The wood doesn’t need to be pretty, but the boards do need to be straight.
The easiest way to make sure you’re buying wood that isn’t bowed is to inspect them by looking down the long sides of each 2×4 to make sure it is a straight line before purchasing.
Step 2. Drill pocket holes
Once the wood has been cut down to size, you can drill the pocket holes with a Kreg pocket hole jig as shown in the drawing.
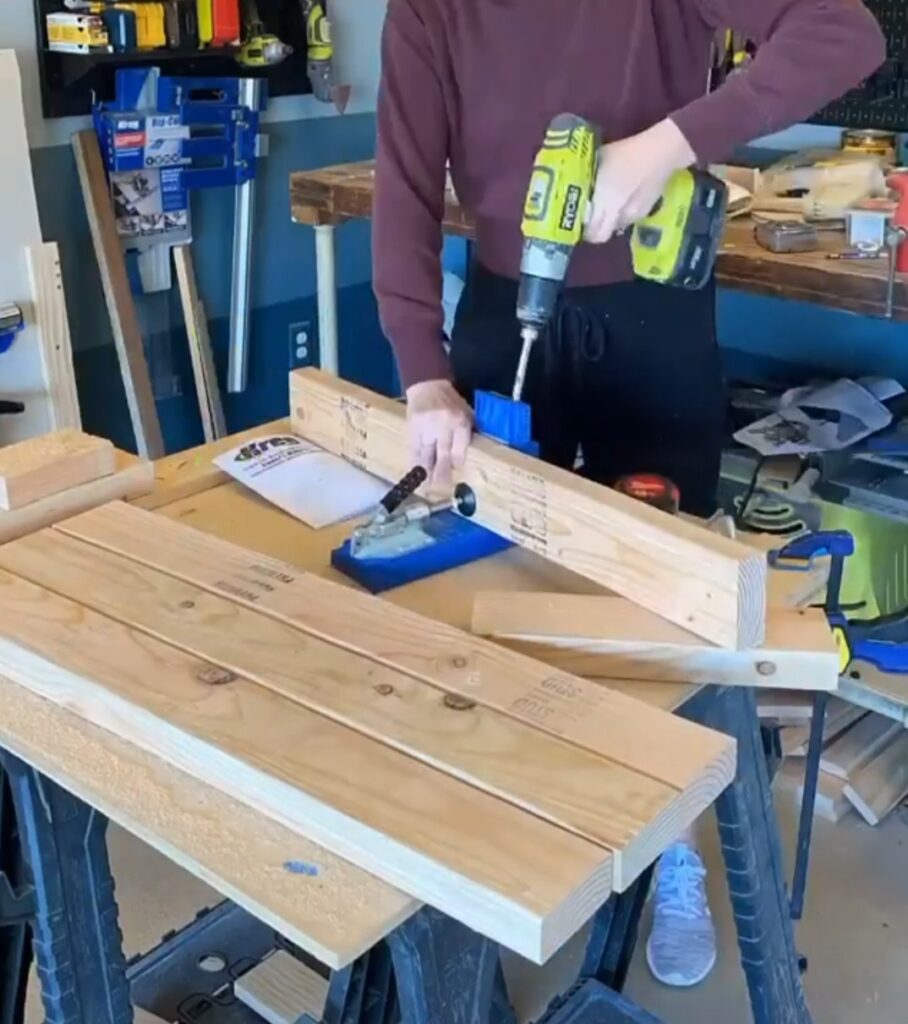
Just mark the wood and drill all the pocket holes at the same time to save time.
Step 3. Assemble the top
Start by assembling the top pieces for the bench first. The bench top is made up of four 2x4s (the ones you cut down to 30″). Along the edges of each board, we added 3 pocket holes in the last step.
To attach them, add wood glue to the edges and clamp them together so they are lined up and secure while you’re attaching the 2 1/2″ pocket hole screws.
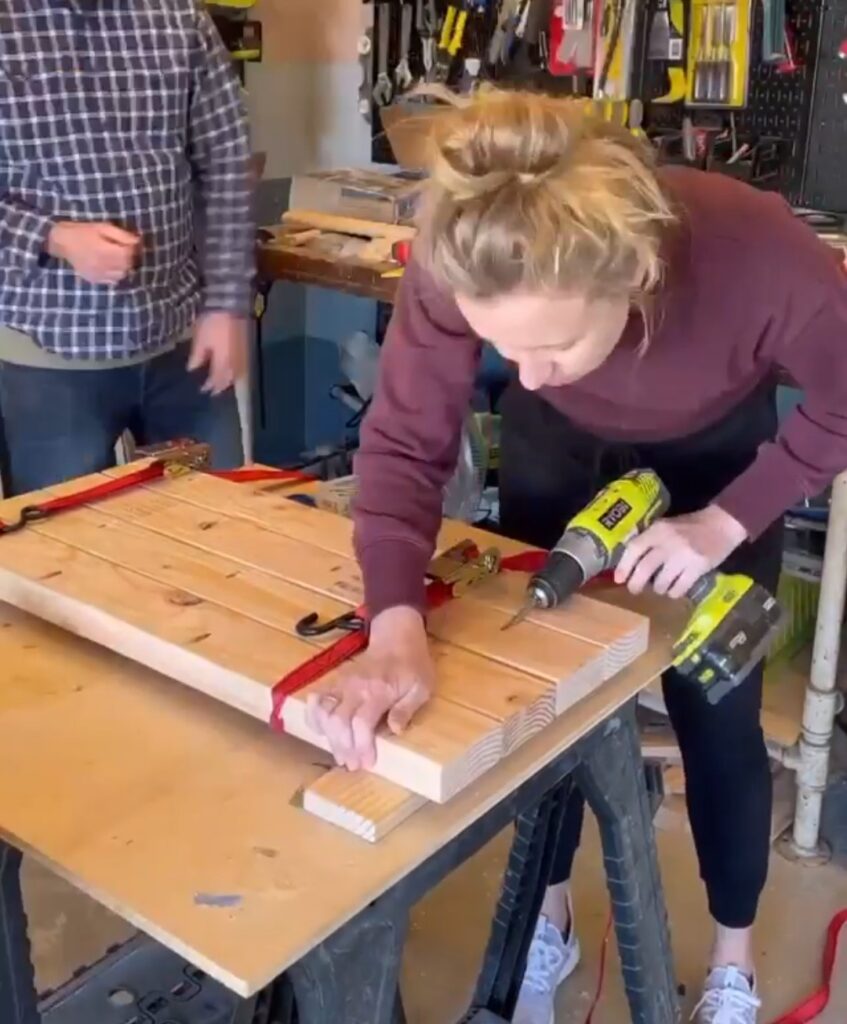
We didn’t have any clamps that were big enough to fit across the whole bench top, so we improvised with some ratchet straps.
Remember that because we’re using pocket holes here, you can’t just use regular wood screws. You need to use pocket hole screws.
Step 4. Add the legs of the bench
After the top has been assembled, you can repeat the process with the pieces of wood for the legs.
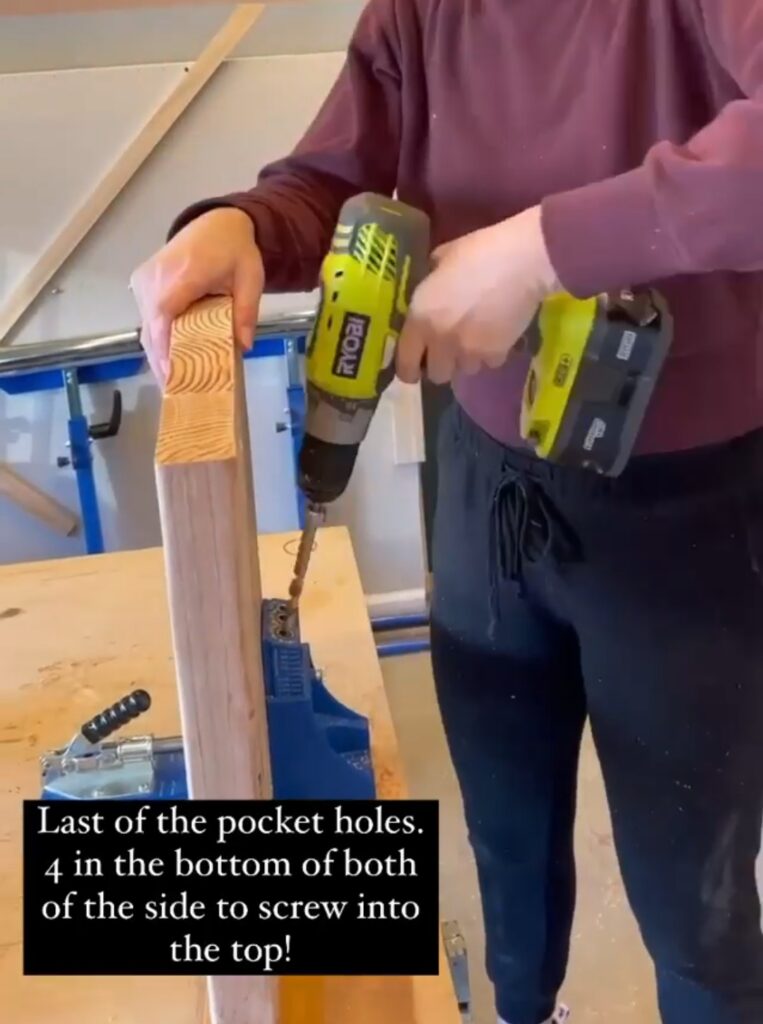
Add more wood glue on the edges of the 2x4s and attach with pocket hole screws at the pre-drilled pocket holes. Each side leg will be four 2x4s, which is why we cut 8 total.
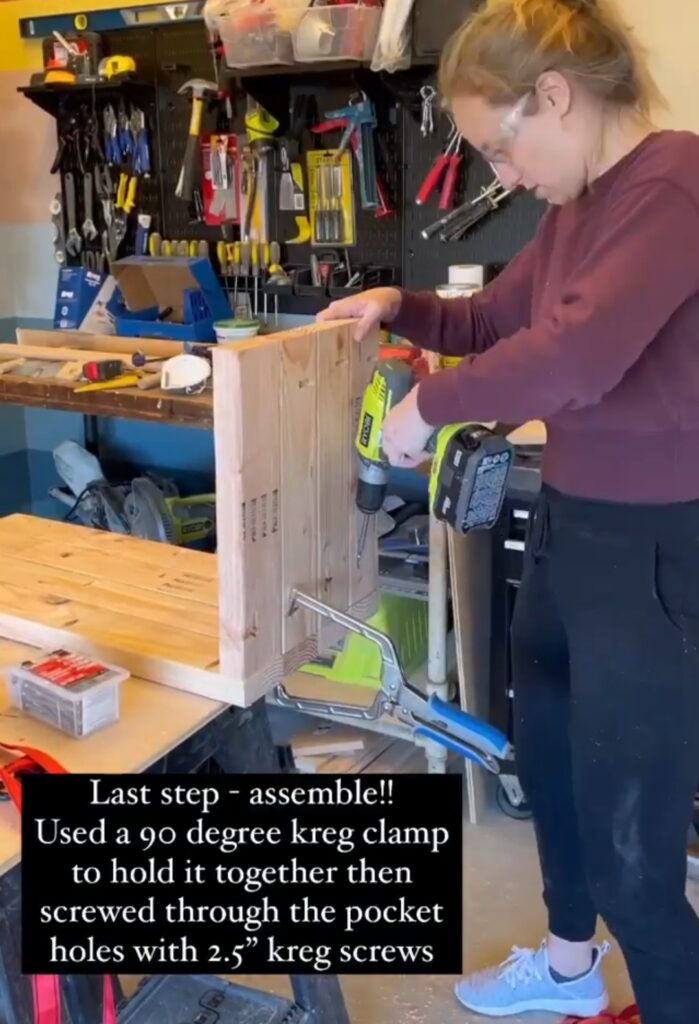
To attach the legs to the bench top, there are four more pocket holes in the top edge of the legs which get screwed into the bench top.
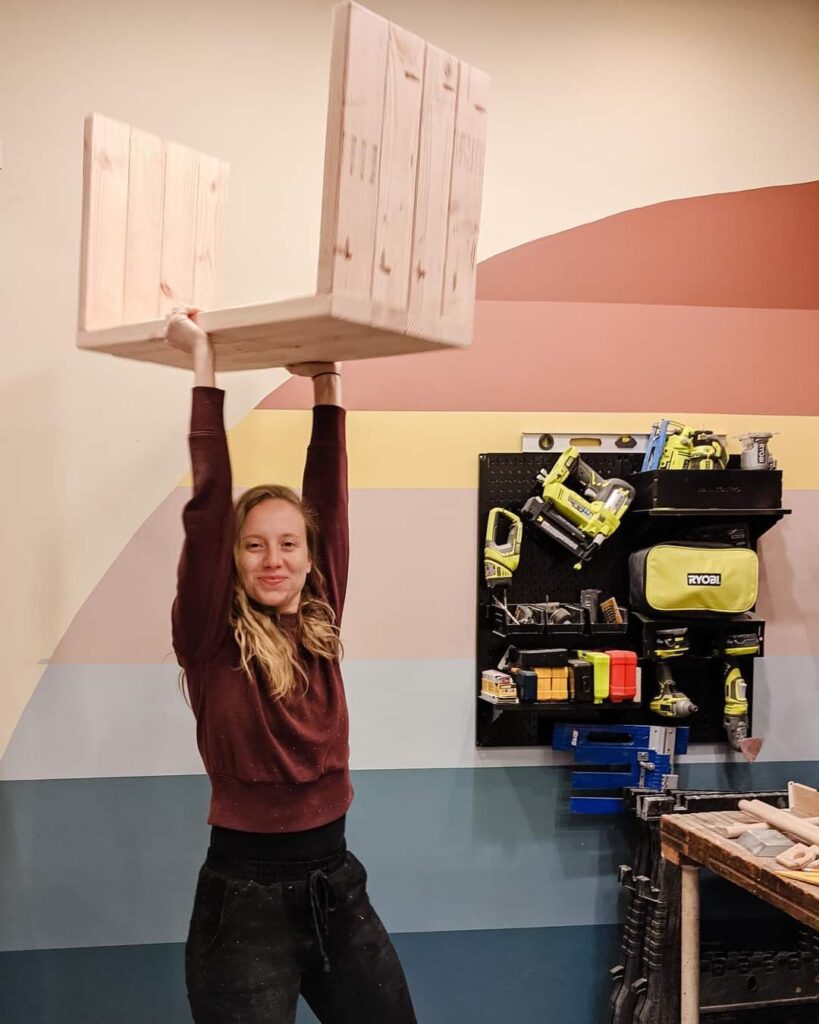
Once the 2×4 pieces are all assembled in the U-shape, you’ll be able to tell just how strong it is! And at this point, you should feel pretty proud of yourself.
The bulky 2×4 wood creates super strong joints, so I felt confident about this wood bench project.
Step 5. Cut foam

Now it is time to cut the foam, which honestly wasn’t as easy as it looks. I’m sharing what we did, what was suggested to us, and what we would do if we had to do this step again.
I started by clamping the foam into place along the wooden bench frame. I tried a drywall knife, multiple pairs of scissors, and even a bread knife. Honestly, the bread knife worked the best.
I had some followers chime in while I was working on this (and they could see I was struggling). They suggested fabric scissors, an electric carving knife, and carpet shears.
If I had to cut the foam again:
- I would clamp the foam onto the bench and then mark it with a Sharpie marker and remove it to cut.
- Then put it on the floor with a cutting mat below it (or something else that you don’t mind getting cut up).
- Use a straight board (or long level) to push it down as flat as possible with your knee leaning over the top of it.
- Then you can use a utility knife to cut through the foam. It may take a couple of passes with the utility knife, but it should work!
The key here is having the foam cut exactly to the right size the first time, which is why we should have just marked it and then taken it off of the bench to cut. We had to keep trimming it and it was a bit of a mess. Lessons learned!
Step 6. Cover foam with velvet upholstery fabric (at the bottom)
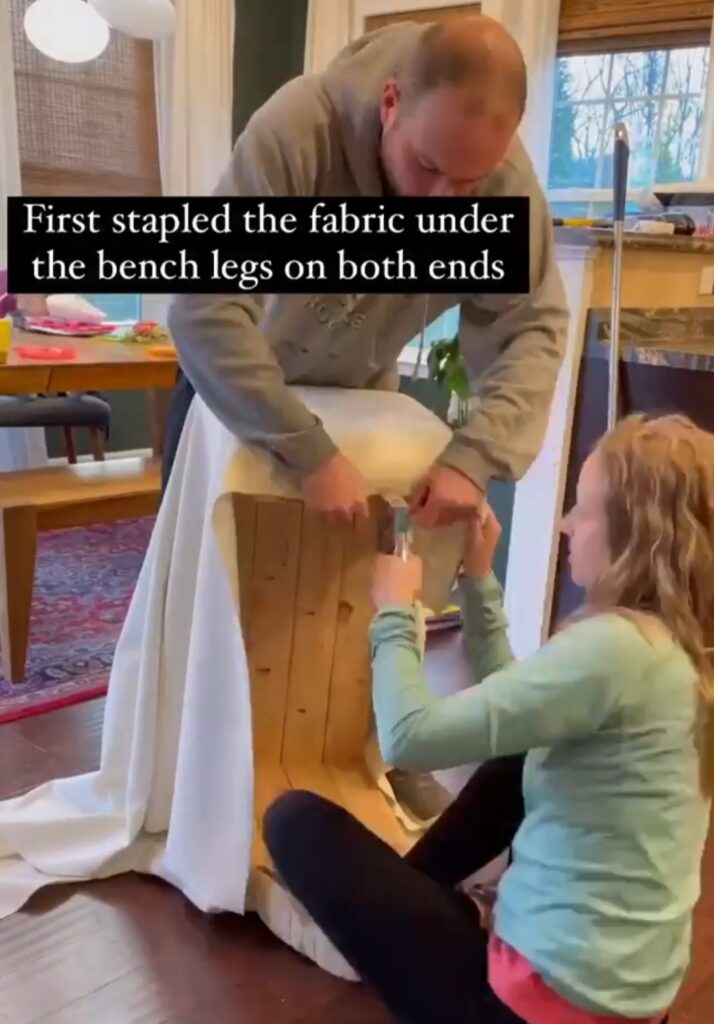
Now it is time to add the velvet upholstery fabric! It is definitely a good idea to have two people for this part. It helps to have one person pull the fabric and hold it into place while the other person staples it.
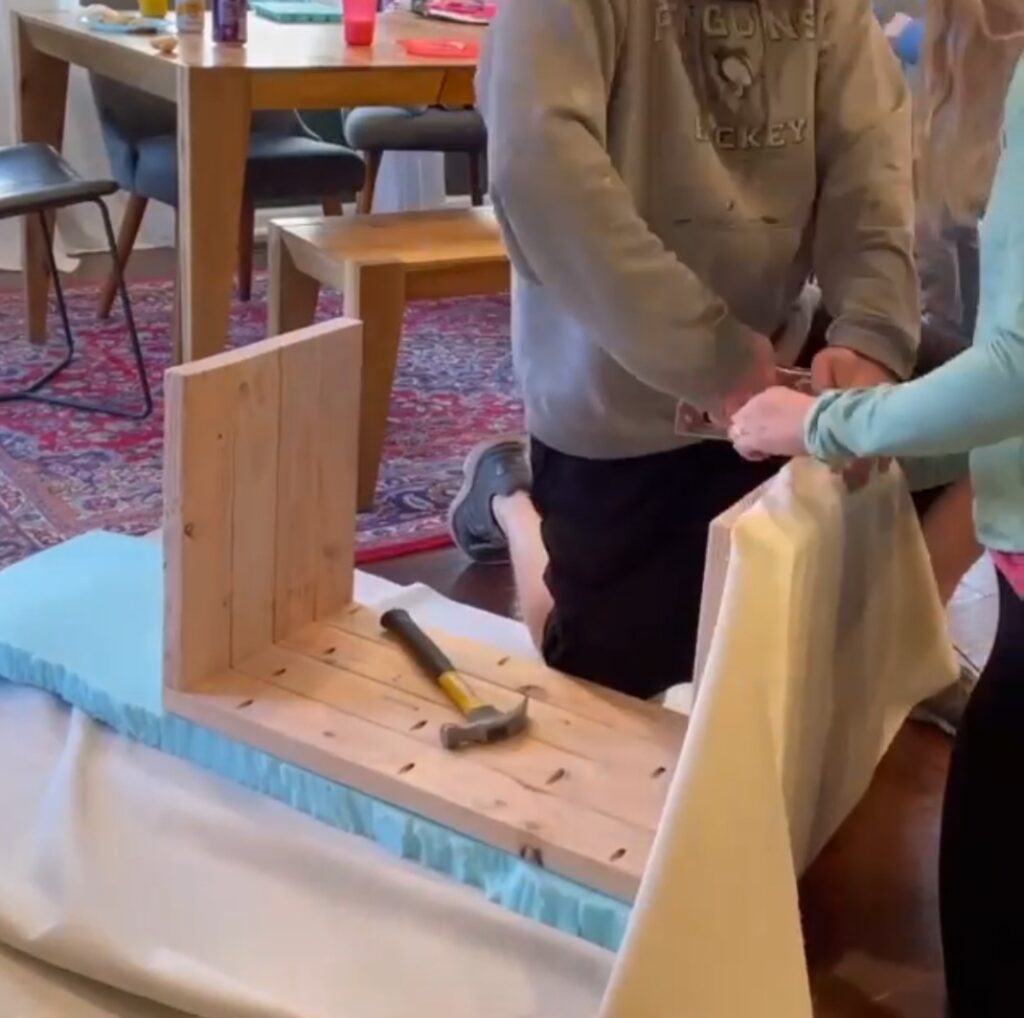
We started by putting the bench upside down and stapling the fabric to the bottom of the legs on the underside of the bench. Pull the fabric as tight as you can to make sure there are no wrinkles or excess bits of fabric.
Once the fabric is attached to the bottom with staples, you can trim off any excess with fabric scissors.
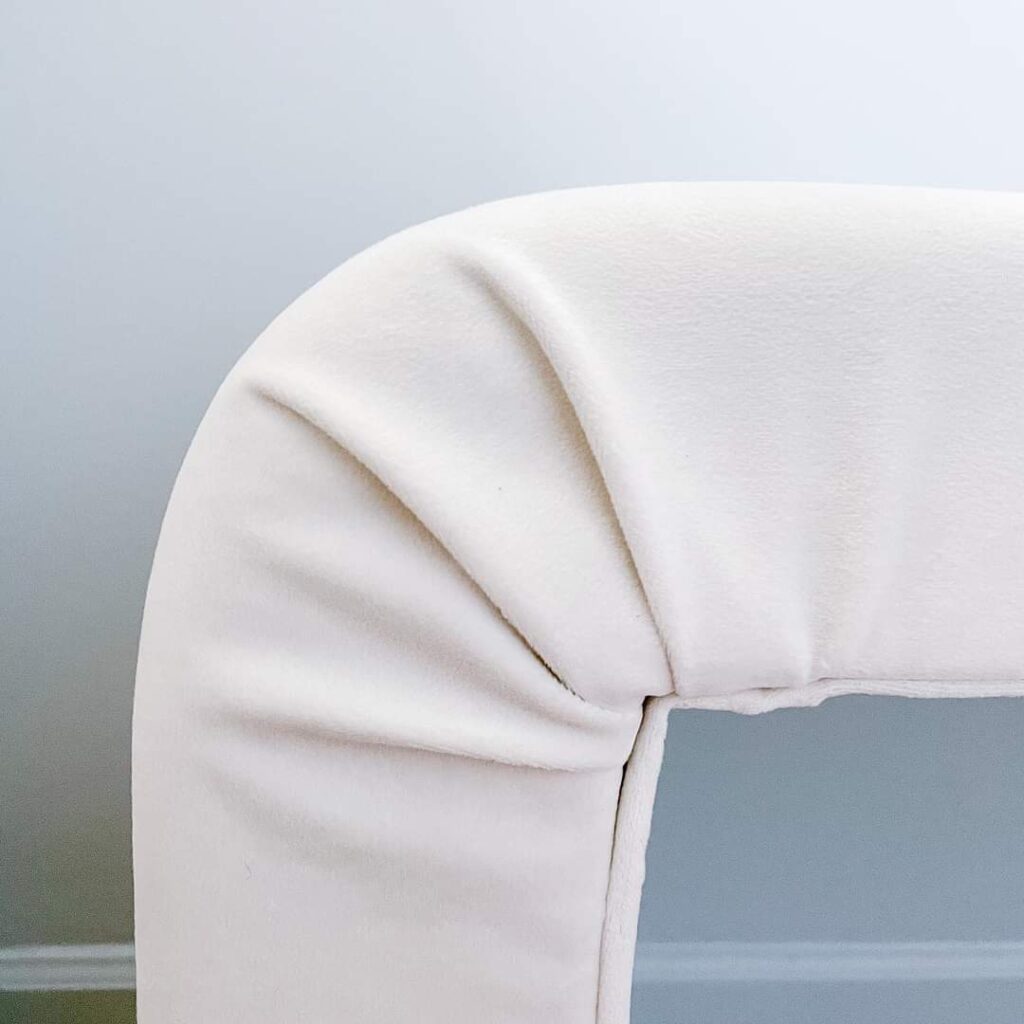
Step 7. Pleat the corners
Now you can spend some time on the corners, folding and pleating them so they look intentional and not a mess. Once you get the folds just right, you can staple it underneath to the wood.
Again, it is helpful to have two people here….one person to hold the folds and one person to staple into place. You just don’t have enough hands to do it all!
Once you get the corners stapled down, cut off any excess fabric remaining.
Step 8. Clean up edges with trim and tack strips
Once everything was stapled into place on the side, we moved onto the bottom of the bench, which we wanted to cover with more fabric so that it looked nice and clean – even from the bottom.
We started on the bottom by cutting more fabric to cover the underside of the bench and stapled it to the edge along with some of this flexible trim so we would have a nice line for the edge of the fabric.
Then we used a tack strip with spikes to grab the bottom fabric, flip it around, and push the spikes into the wood under the bench. Then you can use a rubber mallet or hammer to push the tack strip into place.
Repeat the process on the opposite edge of the bottom of the bench and both legs.
I don’t take credit for this absolutely genius tack strip hack. I originally saw it in this tutorial from A Beautiful Mess, so you can go see more details in that post. It worked great to give the edge of the fabric a nice clean line, don’t you think?
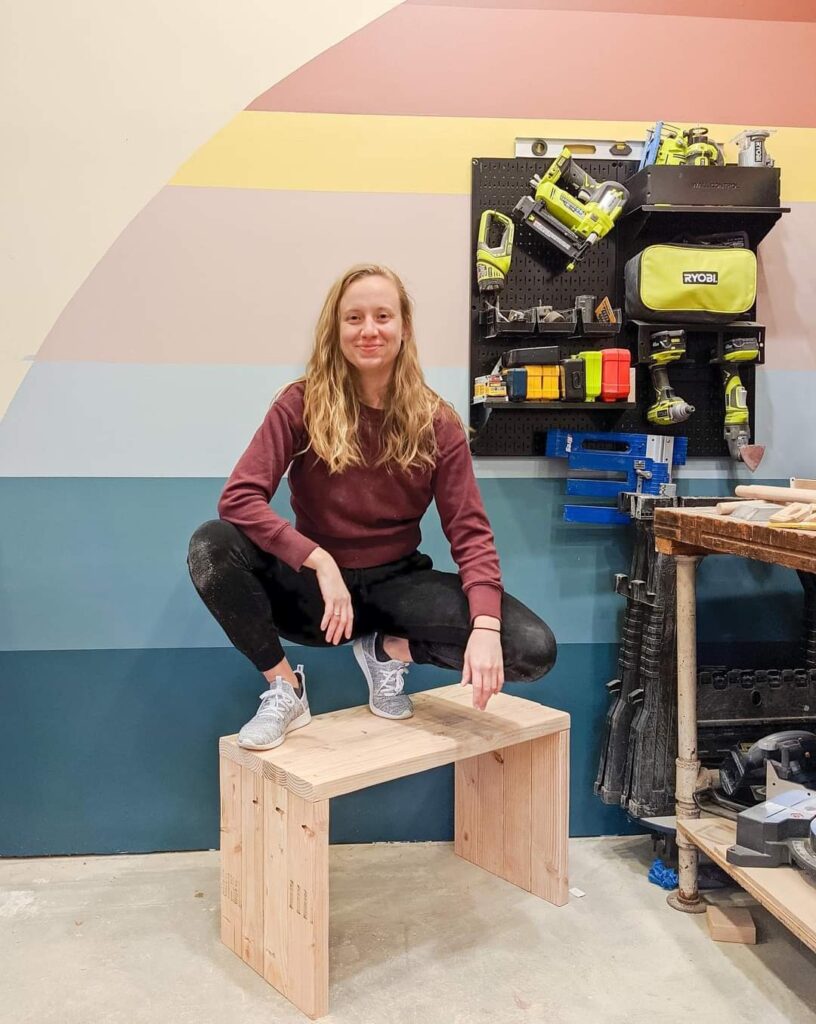
This bench wasn’t the easiest project we’ve ever made, but it turned out great! I love how it turned out and how it looks in the corner of our master closet. It was the perfect finishing touch to the corner of the renovated closet.
We were definitely able to build it ourselves for a lot less than what my inspiration was on sale for, so I’d consider that a win!
You can use this tutorial to make your own upholstered waterfall bench or change the bench dimensions to make it longer so you can turn it into a coffee table! Wouldn’t that be fun?
Want to see more of our IKEA master closet renovation?
- How To Use the IKEA Pax Planner to Design Your Closet
- Custom Plywood Backs for IKEA Pax Wardrobes
- IKEA Pax Wardrobe: Making Your Closet Look Built-in
- Upholstered Waterfall Bench DIY Tutorial (you are here!)
- IKEA Walk-In Closet Reveal