
DIY Polaroid Photo Booth Frame
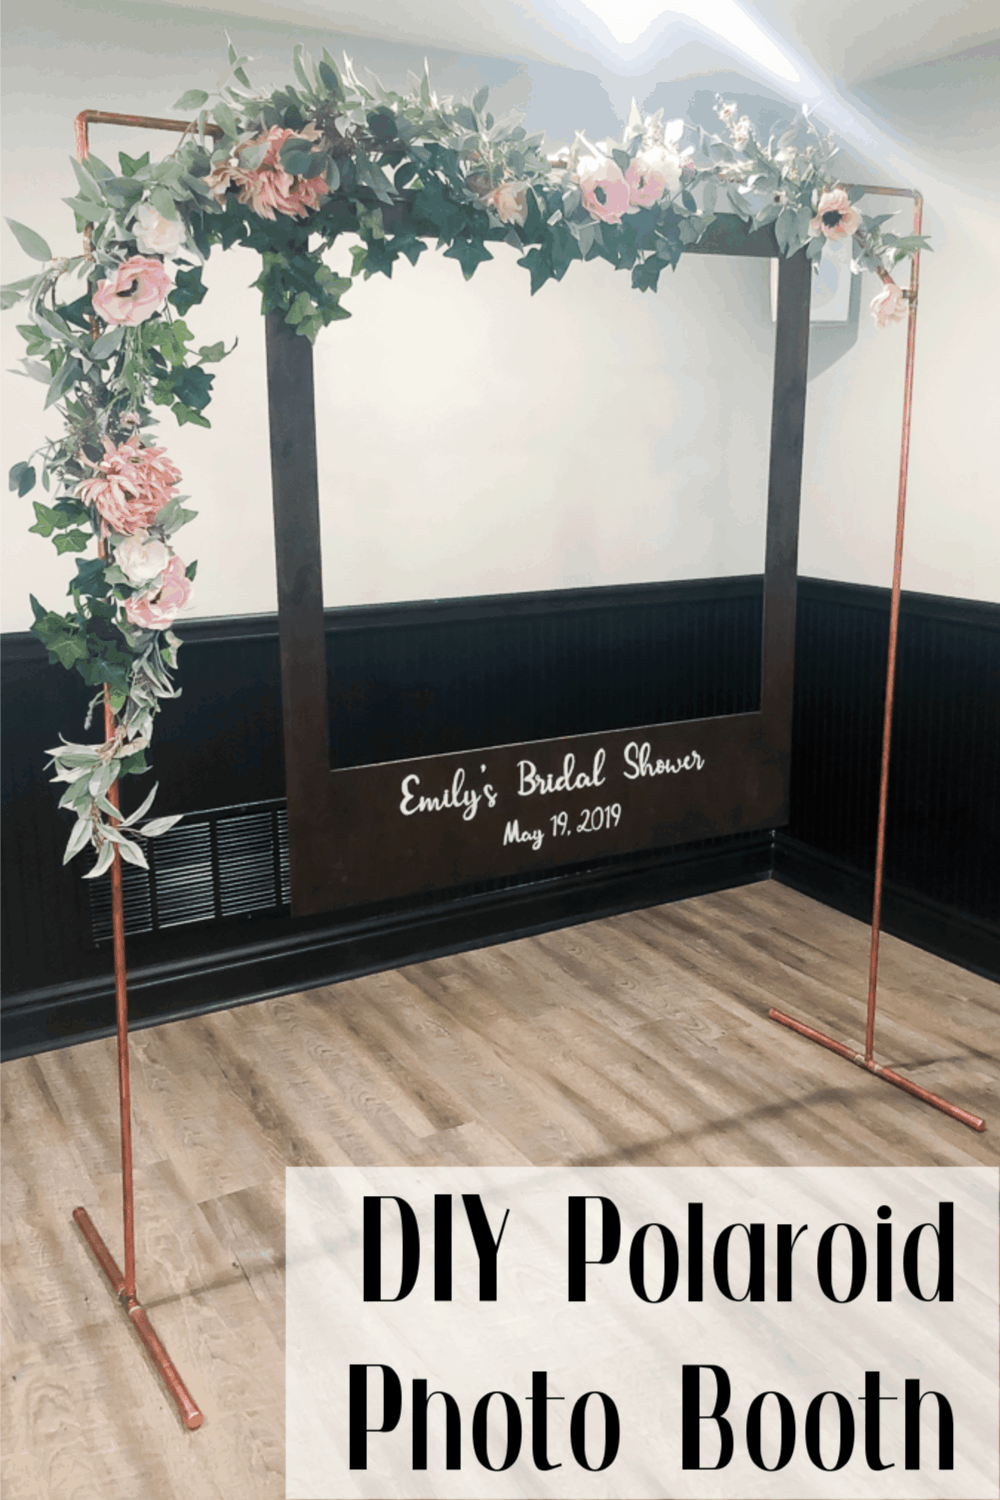
Learn how to build a custom DIY Polaroid Photo Booth. This easy backdrop is perfect for weddings, bridal showers, baby showers, and birthday parties!
It’s been a while since I posted a DIY tutorial. It’s not that I haven’t been making anything. It is SO much effort to both plan everything I’m making and then also be able to photograph it, edit pictures, and subsequently blog about it. EXCUSES, right 😉
But, with my sister’s bridal shower, I did so, so, SO many DIY projects and I knew I had to blog about them. I couldn’t quite find exactly what I was looking for for her shower. And I’m wondering if other people wanted to do the same type of thing but just can’t find a tutorial!
I knew I wanted to have a photo booth. Something that could work for both the bridal shower and the wedding. I looked all over Etsy and even Pinterest and just couldn’t get exactly what I had in mind.
This post contains affiliate links. Please, click here to read my disclosure policy.
DIY Polaroid Photo Book Inspriation
Etsy has some fabulous options for anyone not into DIYing. I get it. It’s not for everyone. Even a few that are similar to what I did.
Like this copper wedding arch. SO cute. I definitely used it as inspiration. But I just couldn’t justify spending the money on something I could 100% make myself for wayyyyy less.
But, with those arches, you don’t get the photo booth effect. It’s just a pretty arch.
And I needed the photo booth.
I’m really acting like this was my bridal shower, huh?
Pinterest was not even a thing when I had my bridal shower, so there was no DIYing. My shower would be a lot different today – lots more DIYs and a whole lot less people.
I really love the whole Polaroid photo booth idea.
I saw on Pinterest people making Polaroid frames from wood that you can hold up and take a picture behind. Like this:
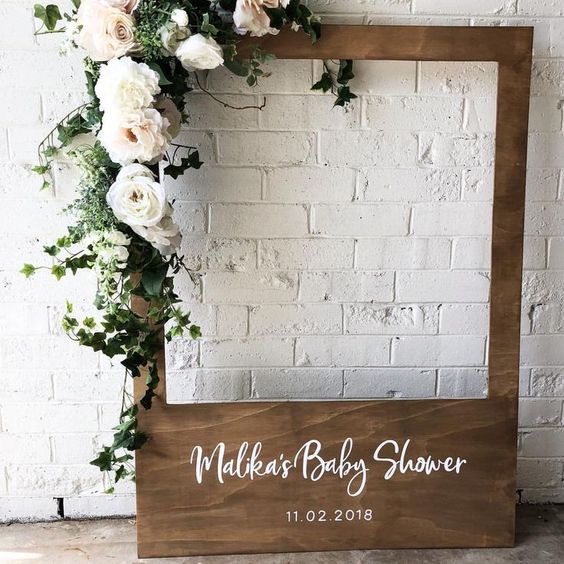
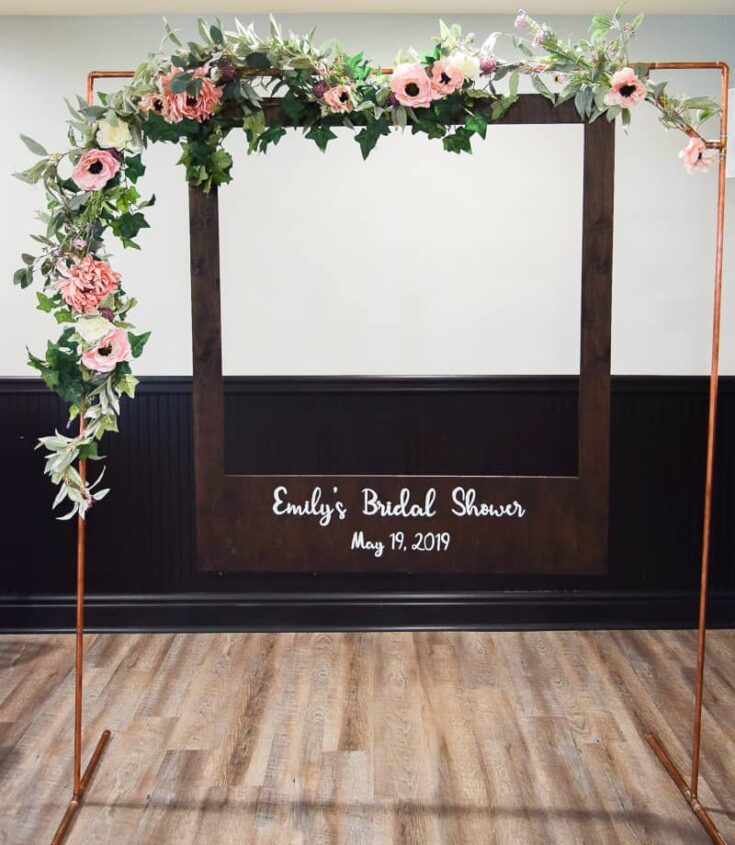
So, basically, I wanted to combine the cool copper arch backdrop with a larger wooden polaroid. The Polaroid would attach to the frame and people could stand behind for pictures.
No one has to lift up the frame, it’s not getting tossed on the floor and damaged. AND, I’d make fun floral garland bling to go with it.
Problem solved. Now to tell TJ my vision and ask him how the heck we’re going to make it 😉
I’m going to break it down into 3 different steps. 1 – the polaroid itself. 2 – the lettering on the polaroid. 3 – the copper frame and attachment.
DIY Polaroid Photo Booth Instructions
Part 1: How to Make a DIY Photo Booth Frame that Looks Like A Polaroid
DIY photo booth frame Supplies:
- Underlayment Plywood
- Table Saw
- Circular Saw
- Measuring Tape
- Sander
- Minwax Jacobean Stain (I use these staining pads to stain and LOVE it)
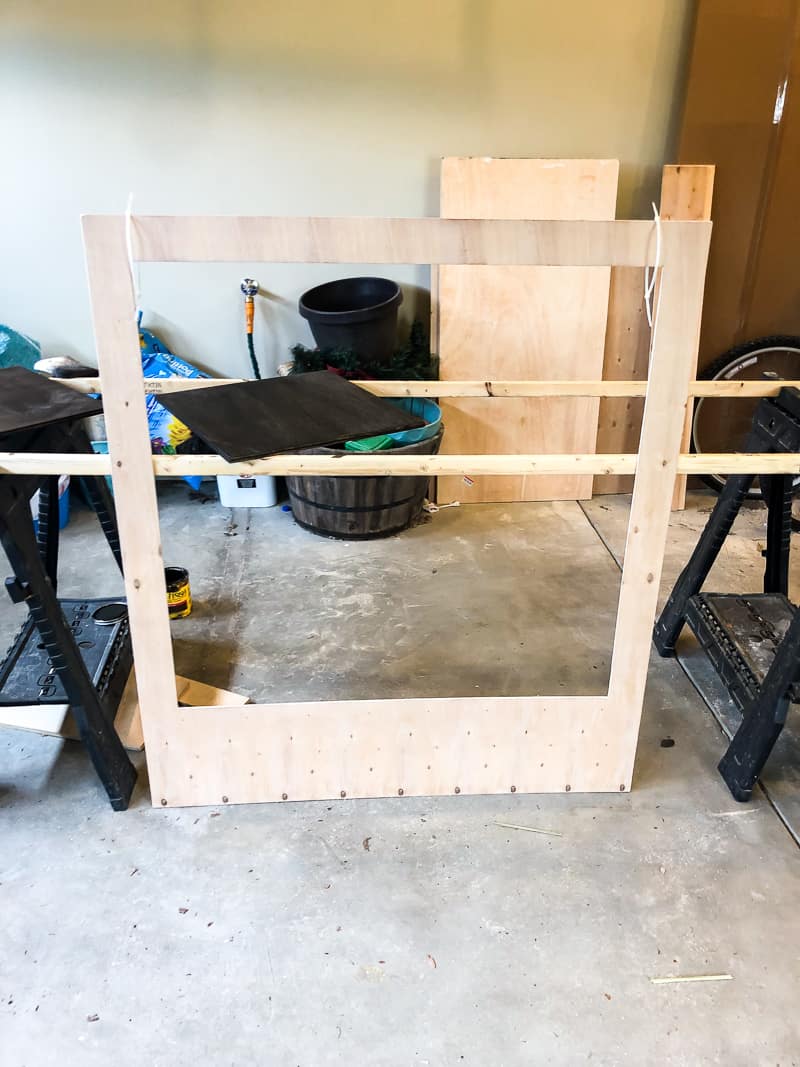
Step 1. Cut plywood.
First, we used the table saw to cut the underlayment plywood to roughly the dimensions of a Polaroid picture. TJ actually researched and found exact dimensions but rounded it off for this project.
The plywood measured – 48″ high by 42″ wide.
We kept a 3″ frame on the top and sides and a 10″ frame on the bottom.

We cut the inside out with a circular saw.
Step 2. Stain plywood polaroid.
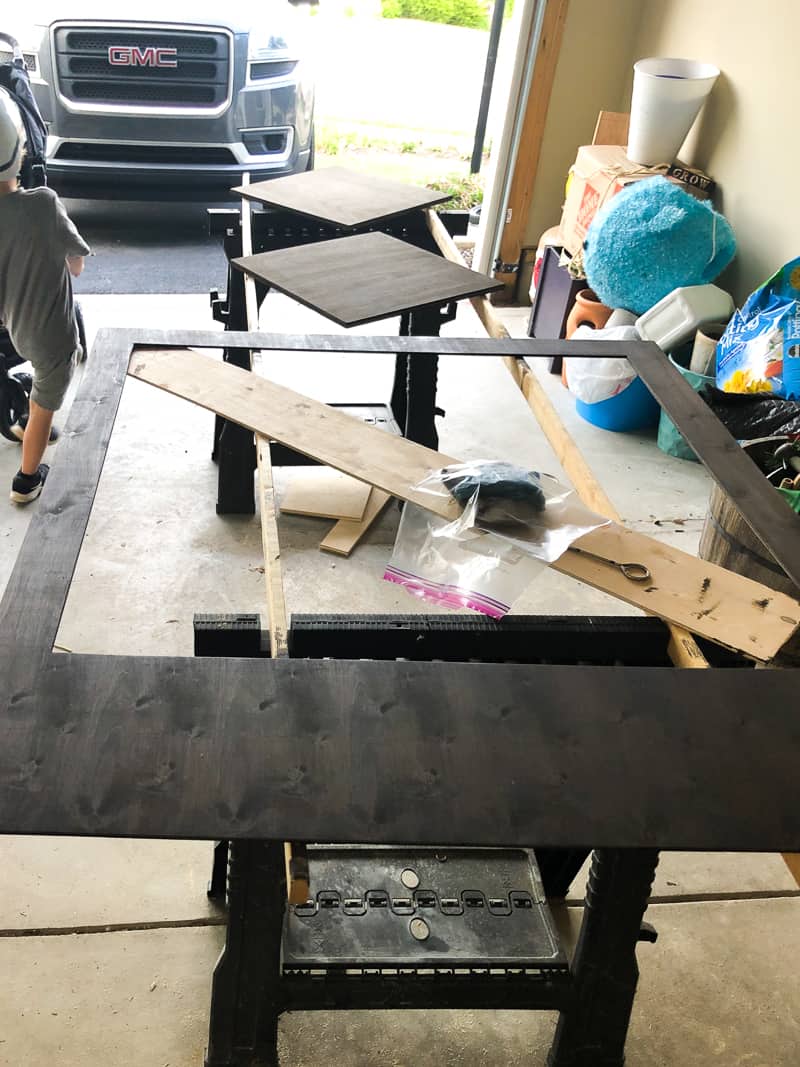
Then, stain both sides of the polaroid. I used Minwax Jacobean stain color, which is a gorgeous dark wood tone.
I’m planning on using one side for the bridal shower and one side for the wedding.
Let the stain dry thoroughly before moving on. Learn more about how long it takes stain to dry here.
Part 2: How to Add Pretty, Customized Lettering to the Polaroid Photo Booth (no fancy equipment required!)
Lettering Supplies:
- Computer and Printer (just needs to be a black and white printer)
- Picmonkey or Canva
- White Chalk (I just used some of my kids’ white chalk)
- Pencil or Pen (I prefer a pencil because it’s easier to push and trace but a pen works, too!)
- White Paint Marker. ***I SWEAR by this paint pen. It’s my absolute favorite and would never use anything else***
I love using this lettering technique to transfer pretty fonts onto just about anything. I’ve used it on so many projects and it always looks so professional.
Warning – it can be time-consuming.
But, unless you’re an expert calligrapher, this is really a great alternative that produces great results every time.
Step 1. Design words.
First, design your words in Picmonkey. Picmonkey is free to use and has a great selection of fonts to choose from. Canva is another great free option to design your letters online.
You can also use a Google Doc or even Microsoft Word.
For this project, I used a script font for the wording (found here).
I rotated an 8.5 x 11″ paper to landscape in Picmonkey and added the text.
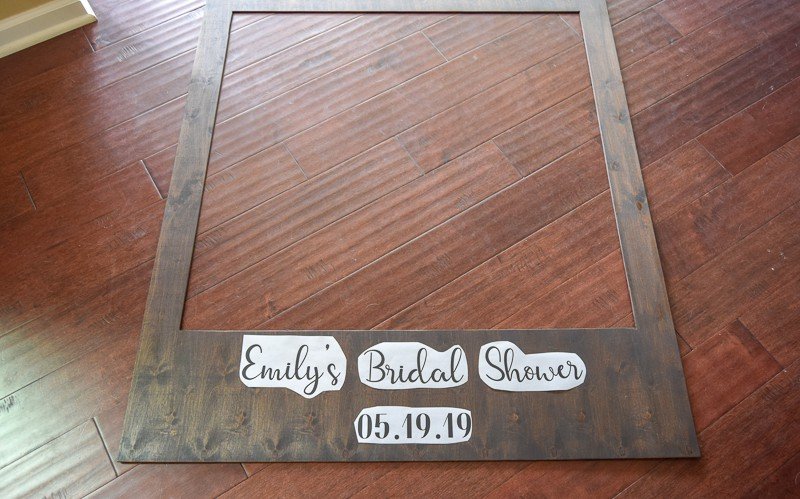
Step 2. Print and cut out words.
Next, print it out and cut around the letters with scissors. Then you can lay everything out on the bottom of your plywood polaroid frame.
It can take a couple of tries to get the size down for the right scale for your project. Don’t get discouraged! This is an important step!
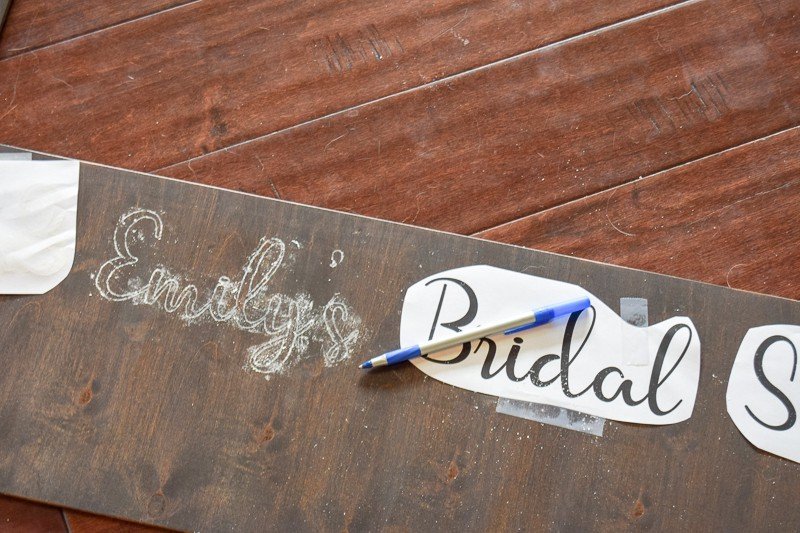
Step 3. Cover the back of the paper with chalk & secure to frame.
Once the words are printed and cut out, color the BACK of each piece of paper with white chalk. Heavily. Don’t be shy.
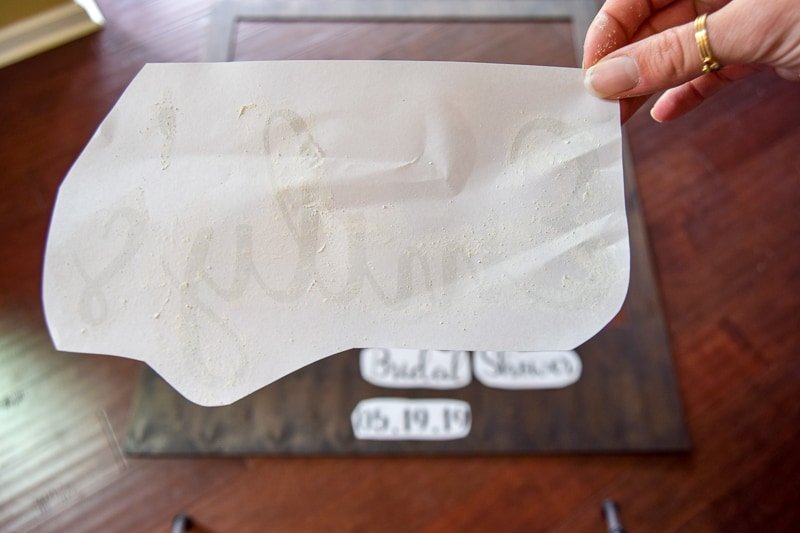
Do this to each piece of paper, then put them back on the polaroid frame. It is helpful to use tape to secure them to the polaroid, so they don’t move for the next step.
Before moving on, make sure everything is level and equally spaced.
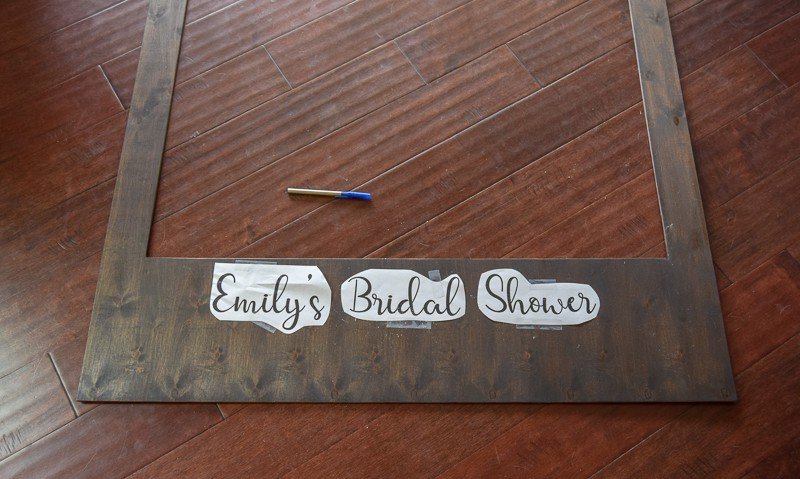
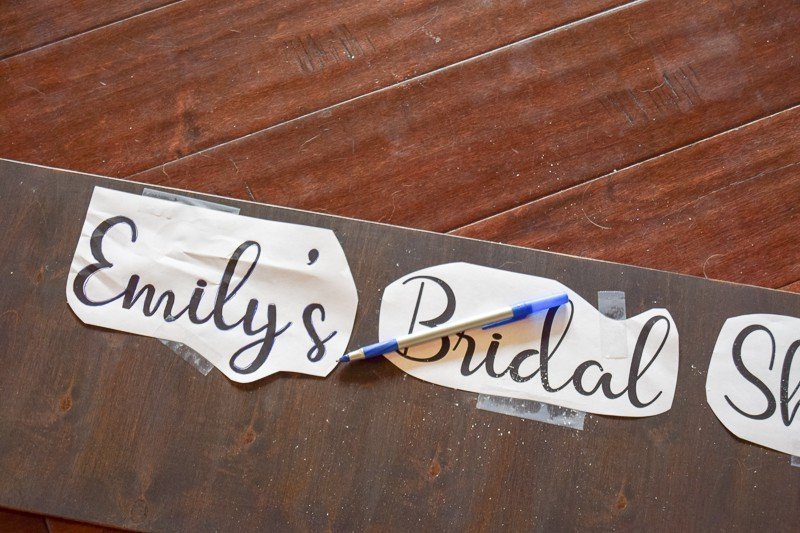
Step 4. Trace letters.
Then use a pen or pencil to trace the outside of the letters. You want to press pretty firmly on the pen to make sure the letter outline transfers to the polaroid with the chalk dust.
This is what you’re left with!
Don’t worry about the extra chalk smeared everywhere. It can be wiped off later.
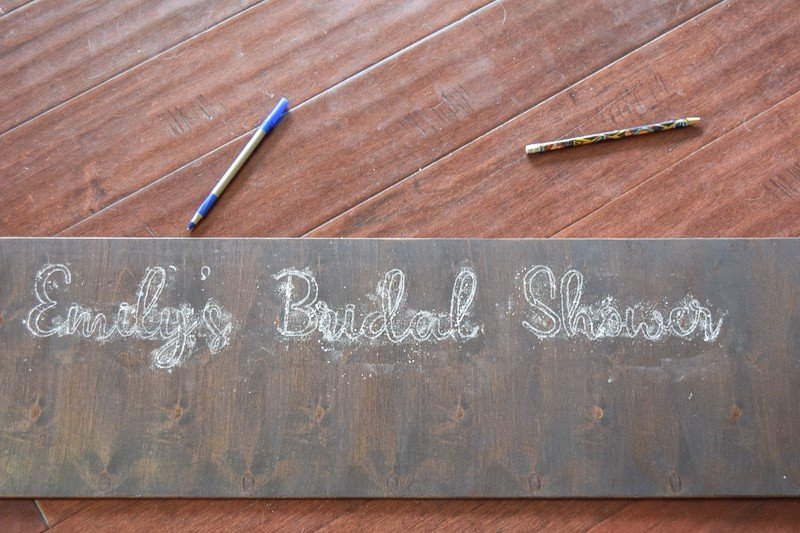
That’s the hard part, really.
Step 5. Fill in letters with paint pen.
Now, grab your Sharpie paint marker and trace over the chalk lines.
Depending on how big the font is and what type of font you used, you’ll need to color in the letters, too.
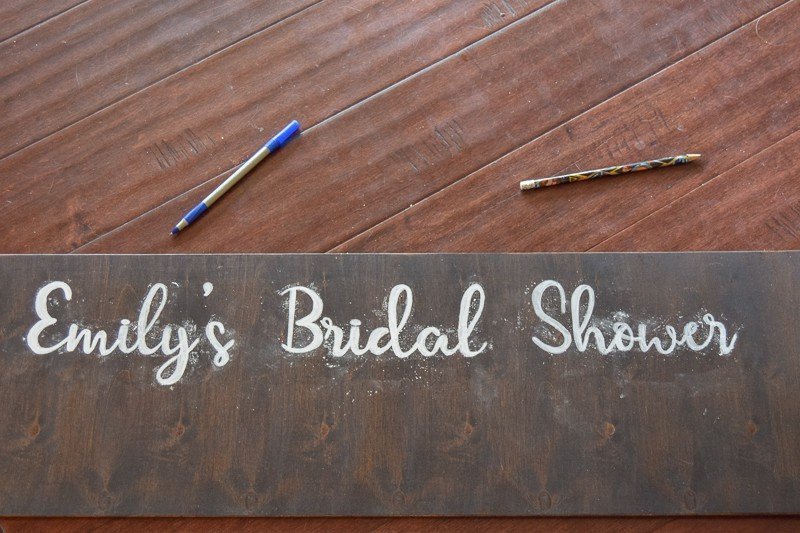
I generally go over the letters twice. Make sure you let it dry completely in between coats.
Once it’s COMPLETELY dried, you can just use a cloth to wipe off the extra chalk.
Part 3: How to Make the Copper Frame for DIY Photo Booth Frame
Supplies for copper photo booth structure:
- 1/2 in. x 10ft pipe (3)
- 3/4in. x 2 ft pipe (2)
- 1/2in. 90-degree elbow (2)
- 3/4in. x 3/4in. x 1/2in. tee (2)
- 3/4 in. end caps (4)
- 3/4in Pipe Cutter
- Read below for more info, but if we make this again, we would use all 3/4in pipe so would only need a 3/4in pipe cutter. If you follow instructions exactly as printed here, you’ll also need a 1/2in pipe cutter
- ***TJ likes the Husky brand pipe cutter better***
- HDX 3/4in Heavy Duty Fitting Brush
- Propane Solder Torch
- Lead-Free Solder
- Wire or string to attach the polaroid frame to copper structure
Step 1. Cut the copper pipe.
- Cut the 10ft pieces down to two 7ft pieces and one 5ft piece.
- Cut each of the 2ft 3/4in pipe in half (these are used for the base of the photo booth)
**Note in the picture, we did something different in the top two corners but this didn’t end up working and we would do it the way listed here**
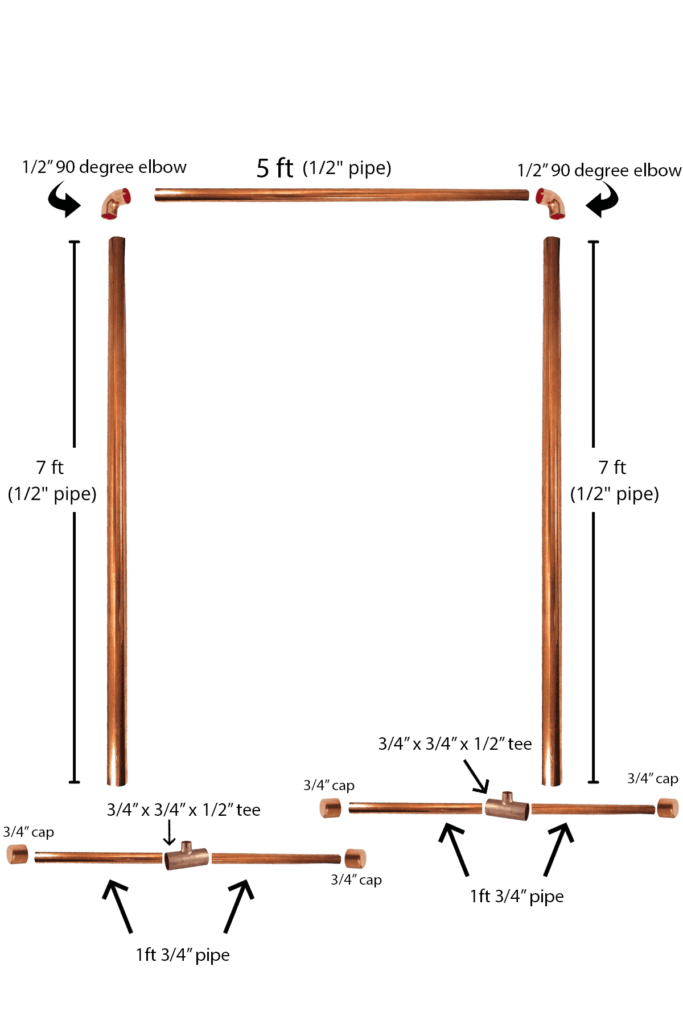
If we were to do this again, we would use all 3/4″ pipe. It is a little more expensive but we think it would have provided more stability to the overall structure and *maybe* we wouldn’t have had to solder.
Step 2. Assemble and solder joints.
Please don’t attempt to solder if you aren’t comfortable with the process. Copper gets hot very quickly and it would be very easy to get burned.
To solder, we watched this video on YouTube, which we’ve included below.
We ended up soldering the sides together and the bottom 3/4″ pieces to the tee piece. It was stable enough to stand without the soldering but if it got bumped a lot it maybe could have fallen over.
Also, we knew we wanted to use this outside at the wedding and it definitely wasn’t stable enough to handle a wedding crowd without soldering the joints.
We recommend using the diagram above, but with 3/4″ pipe. That should make it significantly more stable.
If, however, it’s still a little wobbly, you can always solder.
We couldn’t solder every joint because it had to be transported from our house to the venue and it wouldn’t have fit in our car together.
Frequently Asked Question: Can you use PVC pipe instead of copper?
YES! Using PVC pipe instead of copper pipe is a great alternative. Feel free to adjust this tutorial to swap in PVC pipes. To get the “copper” look, you can spray paint the PVC pipes with copper-looking spray paint.
Since the PVC pipe is a bit lighter than the copper, you may run into some balance issues. If the weight of the polaroid frame makes the photo booth frame too top-heavy, you can always add some weight to the bottom of the structure for more stability – like sandbags.
Step 3. Hang plywood polaroid frame.
To hang the plywood polaroid frame to the copper frame structure, we used stripped-down copper wire so that it matched. However, looking back we realized it didn’t matter much what we used to hang it because it was completely covered up by the floral garland.
To save a few bucks, you can definitely just use string to hang the plywood polaroid frame to the cropper structure.
We didn’t measure it exactly but we dropped it down a few inches from the top of the copper frame. We wrapped the copper wire around the top of the polaroid frame and then the other end around the top copper pipe in the frame. It held perfectly!
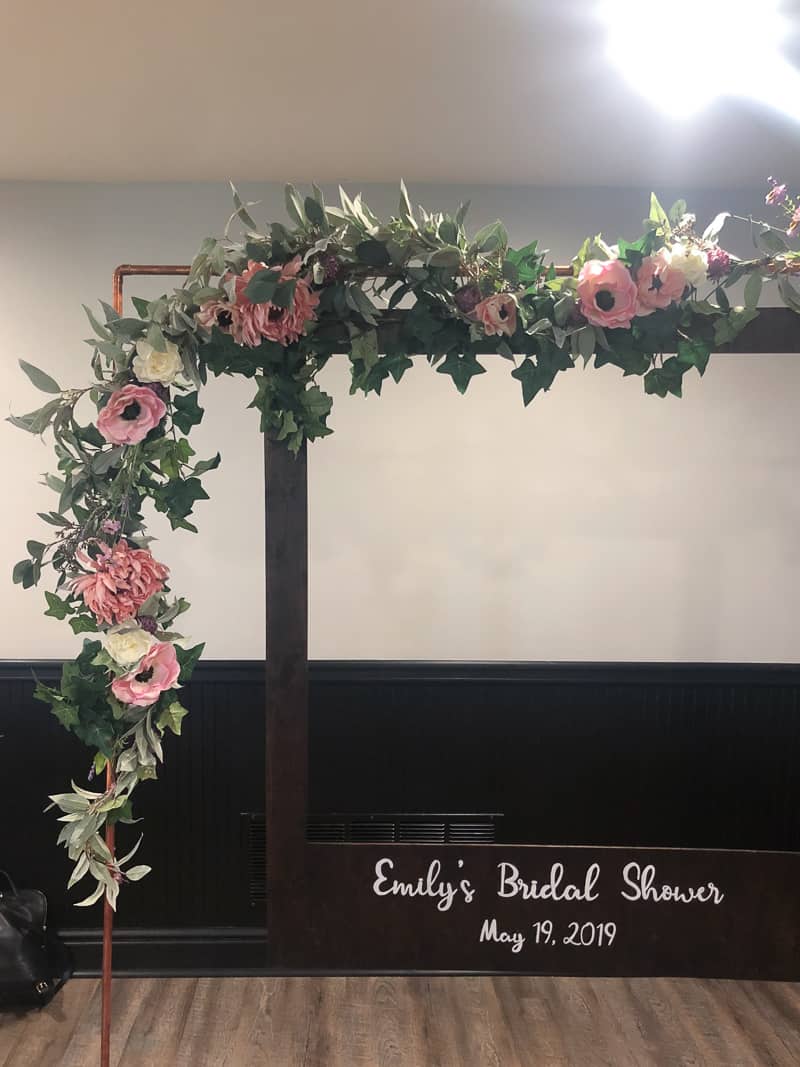
Step 4. Add floral garland.
The floral garland was the perfect finishing touch to this DIY photo booth frame, don’t you think? It was very easy to make. We started with a faux greenery garland, like Eucalyptus, and then weaved in a couple of other greenery garlands to make it more full.
Last, add some larger flowers with hot glue and/or floral wire. Attach to the copper arch structure with wire or string!
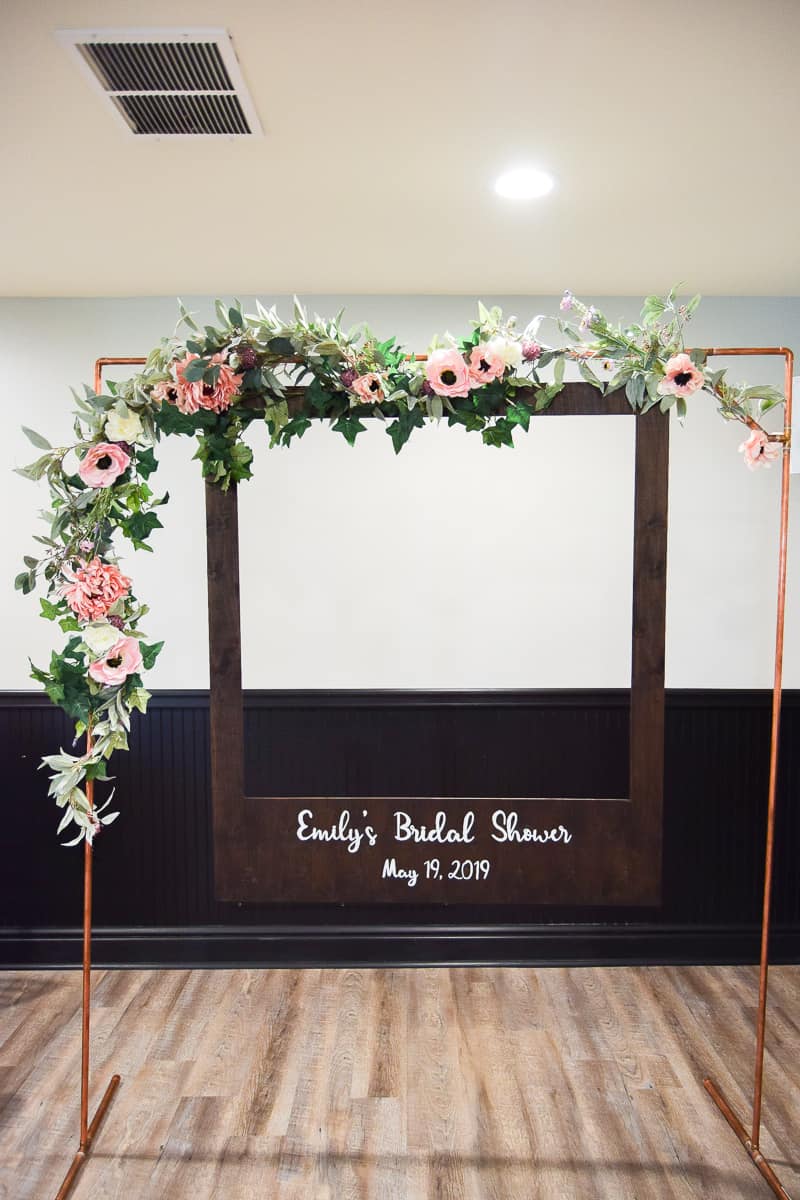
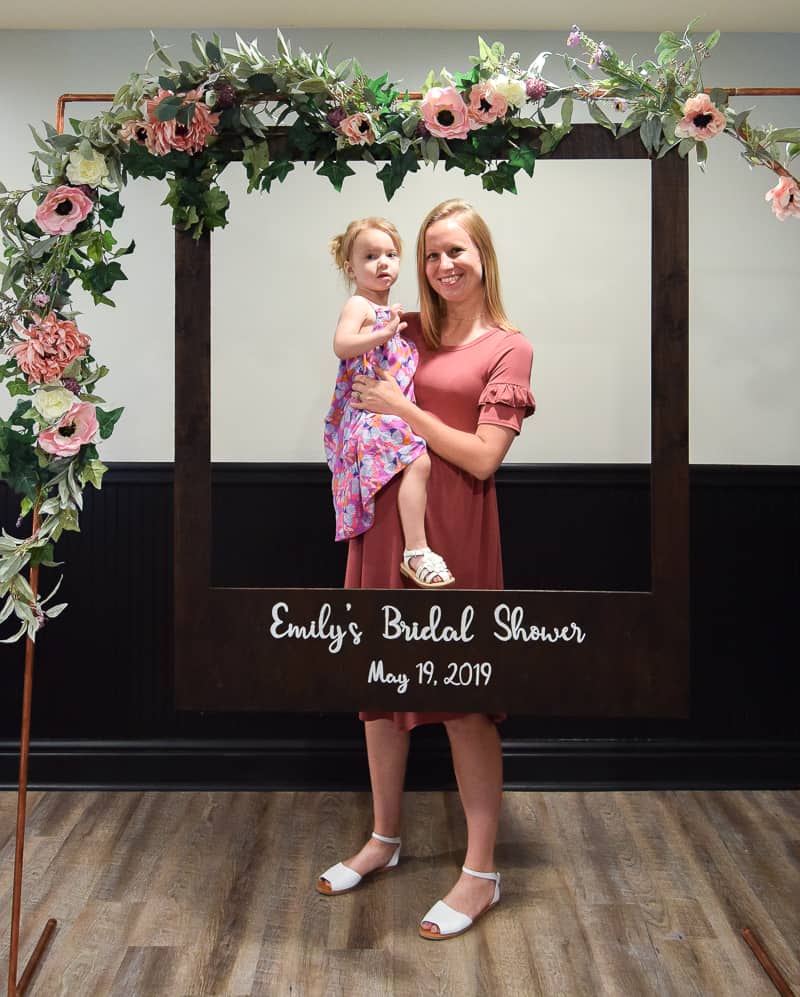
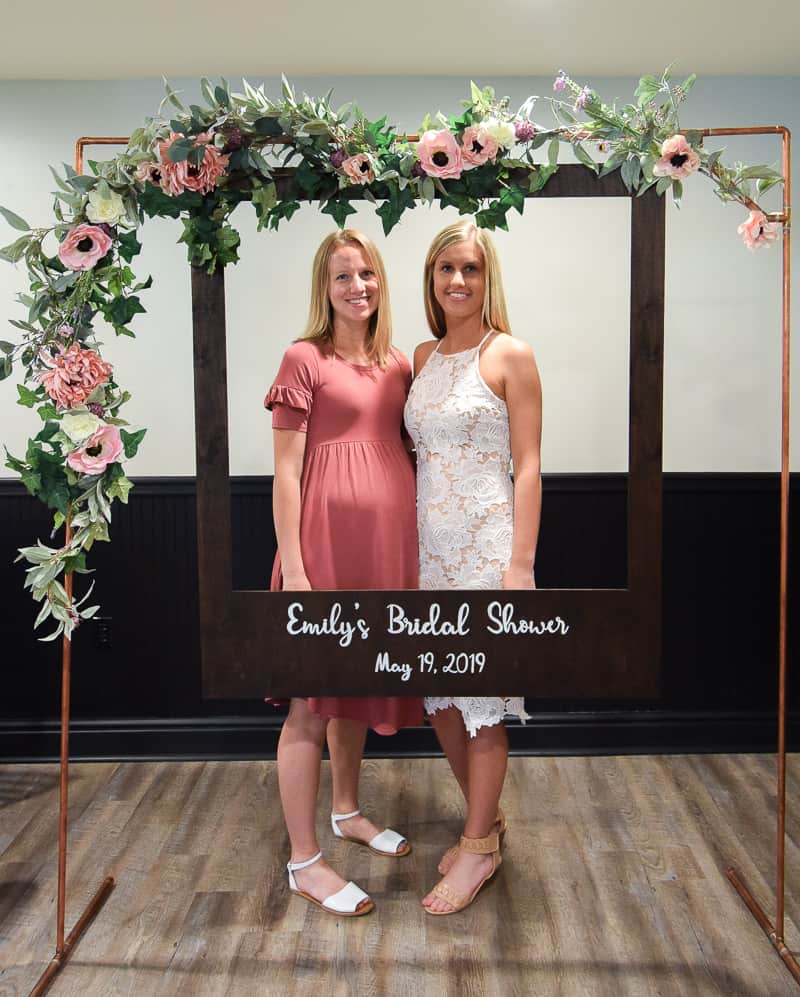
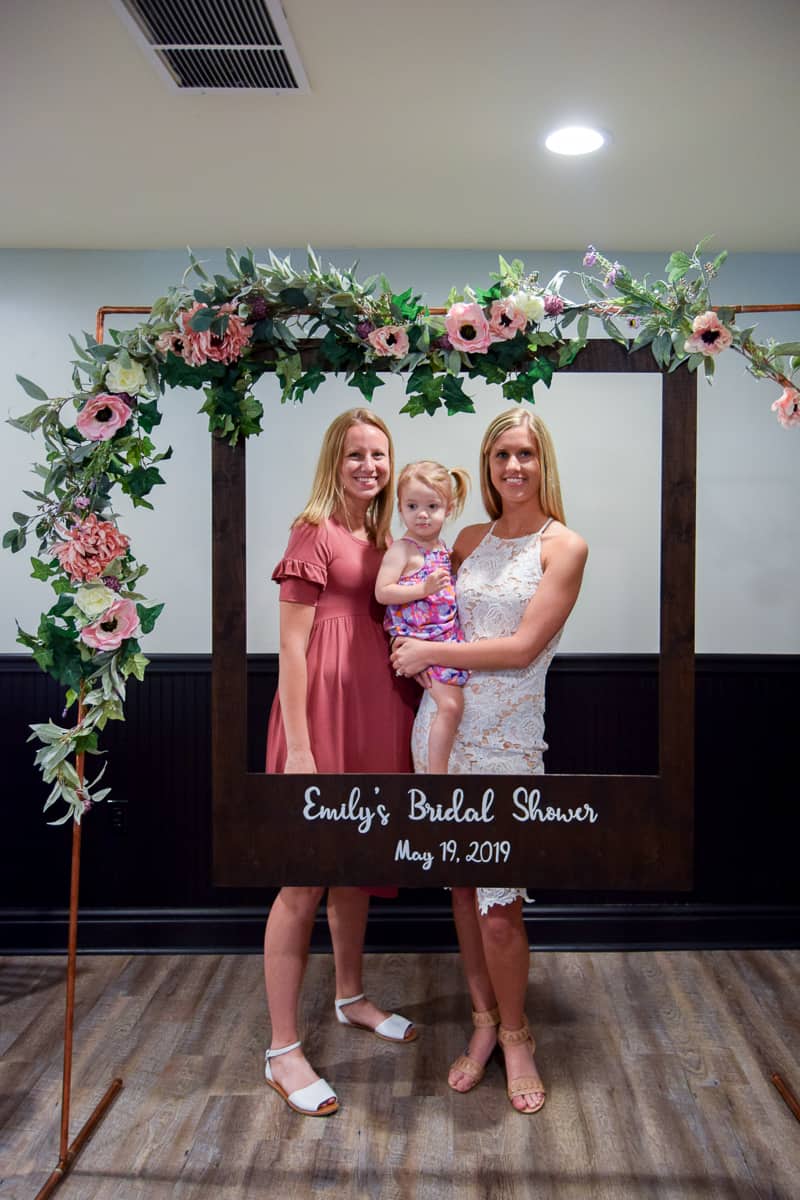
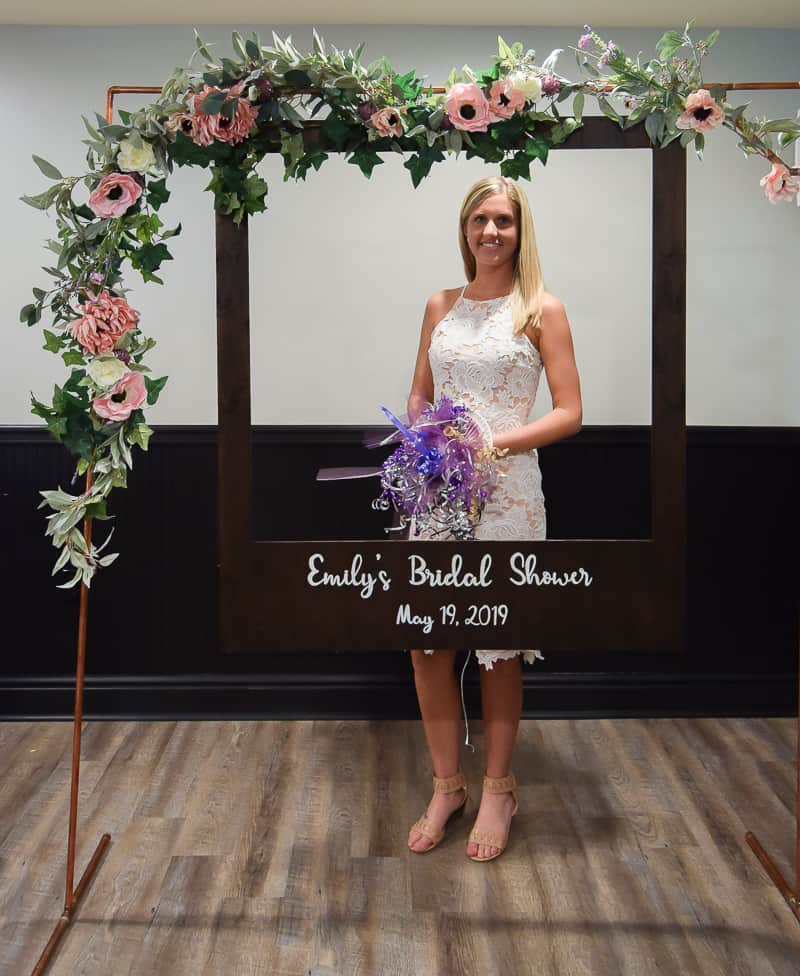
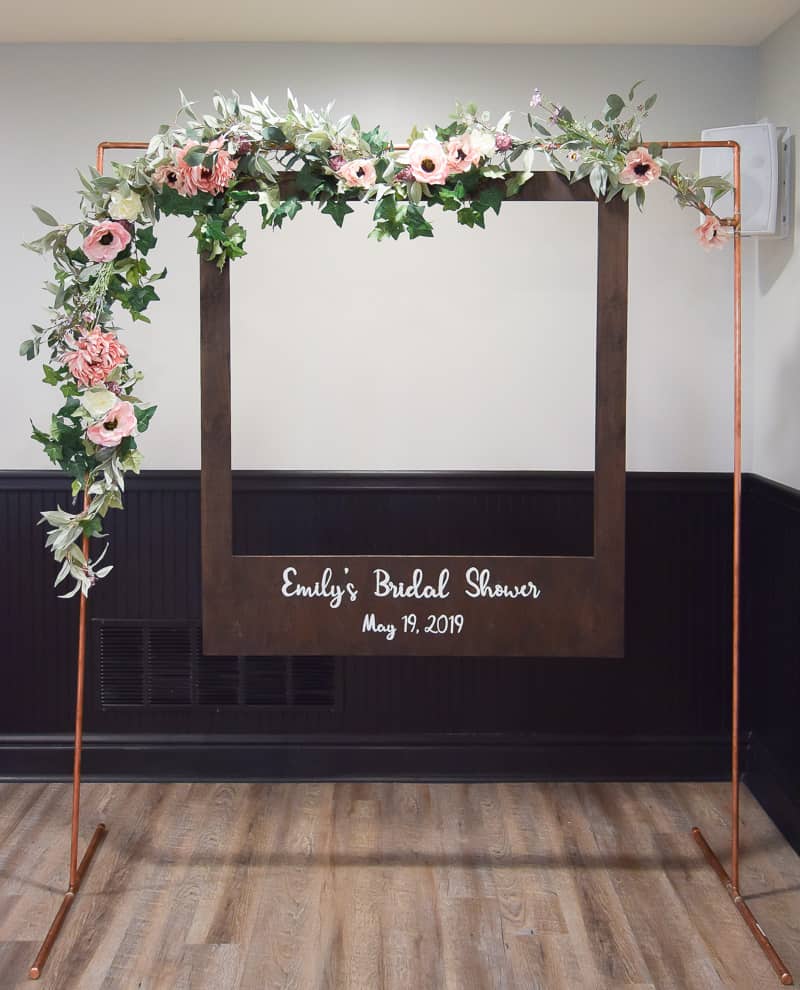
Photo booth frame: reveal
The end result of the DIY photo booth frame & copper arch structure!!
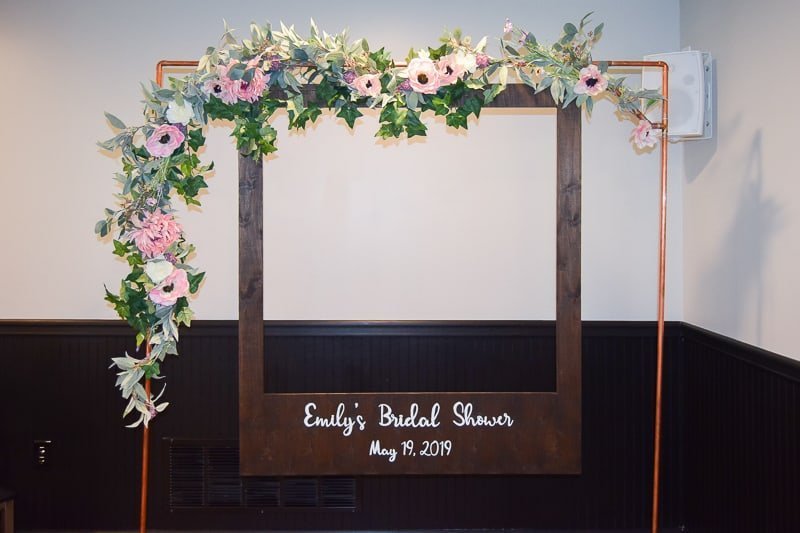
There was the most obnoxious light right about the frame in the venue so just try to ignore that!
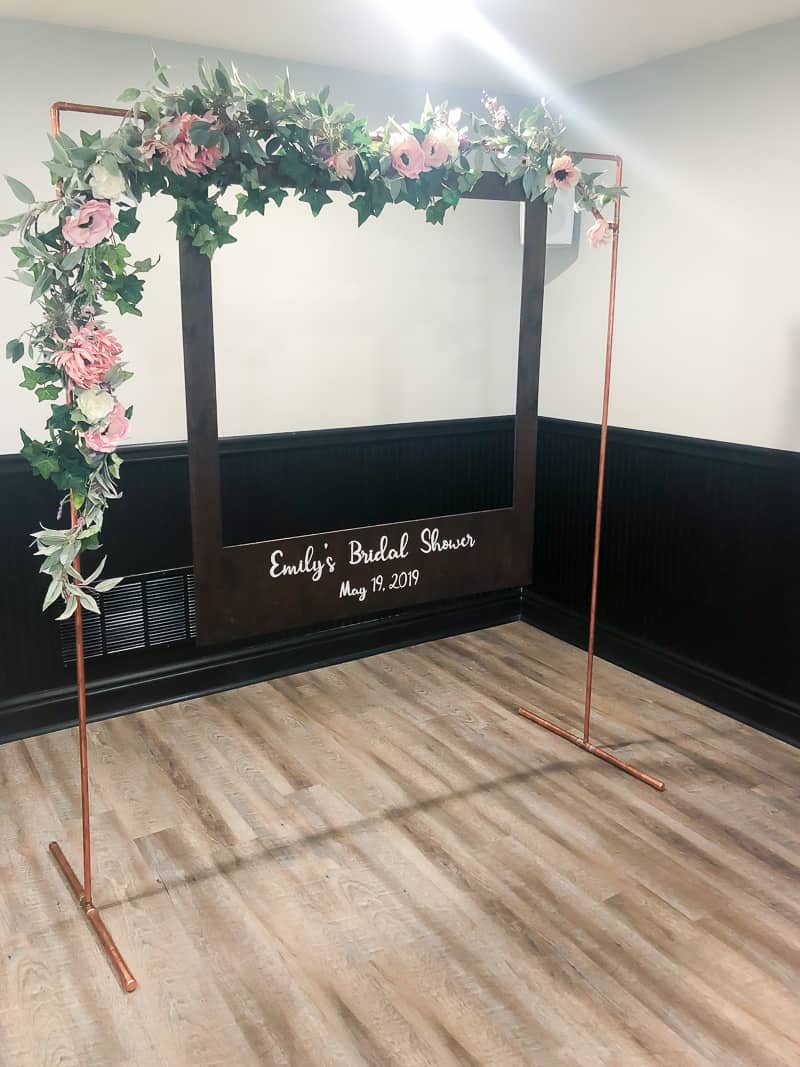
Frequently Asked Question: How large is the finished photo booth?
As seen in the diagram above with the measurements for the copper pipe photo booth structure, the finished size of the photo booth is approximately 5 feet wide and 7 feet tall. It is also 2 feet deep at the base.
It needs to be on a flat surface with no slant. If your event is outside, try to find a spot to set up the photo booth on a hard and flat surface – like concrete if possible.
You’ll also want to have plenty of room in front of the photo booth to set up a tripod with the camera and/or have a place for people to snap pictures with their cell phones.
Keep this in mind when planning the layout at your event. You’ll want to make sure you have plenty of room for the finished structure and enough room for the guests to maneuver around.
The DIY photo booth frame was a big hit at the party! I set up my DSLR camera on my tripod so we could get all the pictures. Most people just used their cell phones and that’s fine, too!
It was also so much fun at the wedding with props, too 🙂

This DIY Polaroid photo booth frame and copper pipe arch structure are perfect for your next big event – like a wedding, bridal shower, baby shower, retirement party, or birthday bash!
Follow along with this step-by-step tutorial to make your own! It is sure to be a hit with your party guests!
DIY Polaroid Photo Booth
Build a custom DIY Oversized Polaroid Photo Booth perfect for weddings, bridal showers, baby showers, and birthday parties.
Materials
- Underlayment Plywood
- Table Saw
- Circular Saw
- Measuring Tape
- Sander
- Minwax Jacobean Stain
- Computer and Printer (just needs to be a black and white printer)
- White Chalk
- Pencil or Pen (I prefer a pencil because it's easier to push and trace but a pen works, too!)
- White Paint Marker
- 1/2 in. x 10ft pipe (3)
- 3/4in. x 2 ft pipe (2)
- 1/2in. 90-degree elbow (2)
- 3/4in. x 3/4in. x 1/2in. tee (2)
- 3/4 in. end caps (4)
- 3/4in Pipe Cutter (see notes below)
- HDX 3/4in Heavy Duty Fitting Brush
- Propane Solder Torch
- Lead-Free Solder
- Wire or string to attach the polaroid frame to copper structure
Instructions
- Cut plywood into polaroid shape. Leave a 3" frame on top, 10" frame on the bottom and cut out the middle using a circular saw
- Stain both sides of the plywood
- Add customized letting to the polaroid frame using a paint pen
- Make copper frame for polaroid photo booth
- Attach polaroid to the frame using wire and you're done!
Notes
You can use both sides of the polaroid frame for different events.
If we were to do this again, we would use all 3/4″ pipe. It is a little more expensive but we think it would have provided more stability to the overall structure and *maybe* we wouldn’t have had to solder. If you follow instructions exactly as printed here, you’ll also need a 1/2in pipe cutter
Looking for more fun DIYs? Check these out!


Can you please let me know the measurements for the plywoood poloroid cut out. What is the height and width you used?
The plywood itself is 48″ high by 42″ wide. There’s a 3″ frame around the top and sides and 10″ on the bottom. So the opening is 36″ wide 35″ tall.
Do you know how just much the Polaroid frame weighs?
Unfortunately, no. I would guess maybe 8-10 pounds? That’s really a guess though. I could carry it myself easily but you do need something sturdy to hold it up.
ahhh thanks for letting me know. I swear I triple checked all that stuff *face palm*
Love this! Thank you for sharing! Were you at all concerned with the structure falling over because the Polaroid was so heavy?
Thank you! So if someone decided to push it over, it could definitely fall over. But, it’s not going to just randomly fall over. We used it at the bridal shower and at the wedding ( I flipped it around and wrote something else on the other side) and even at the wedding where people drink a little too much (haha) nothing happened to it. That being said, someone COULD push it over if they felt like it. Hope that helps!
It really does, thank you! I was mostly worried the Polaroid would make it unbalanced. ?
Love this! In the post you mentioned posting about how you made the garland, but I wasn’t able to find any post about it. I was just wondering if you would be willing to share how you made the garland- it’s perfect!
Hi Liz! Yes, I did and then I never posted about it. Sorry ?. Basically I used green garland like eucalyptus and weaved a few different kinds together. Then I glued different flowers over it.
Can you please tell me what size the photo booth was .I know you said 5/12 wide put I didn’t see the height.
It is approximately 7′ tall and 5′ wide.
Do you think I could still use the measurements for the frame and use PVC pipes instead?
Yes, PVC pipes sprayed with copper spray paint would work great as well!
Can you use pvc instead of copper pipes?
You totally could! That would be a great alternative!
What size font did you use?
I, unfortunately, don’t remember, but if you turn the ruler on for the view when typing the letters, you should be able to see how large they are before printing.