
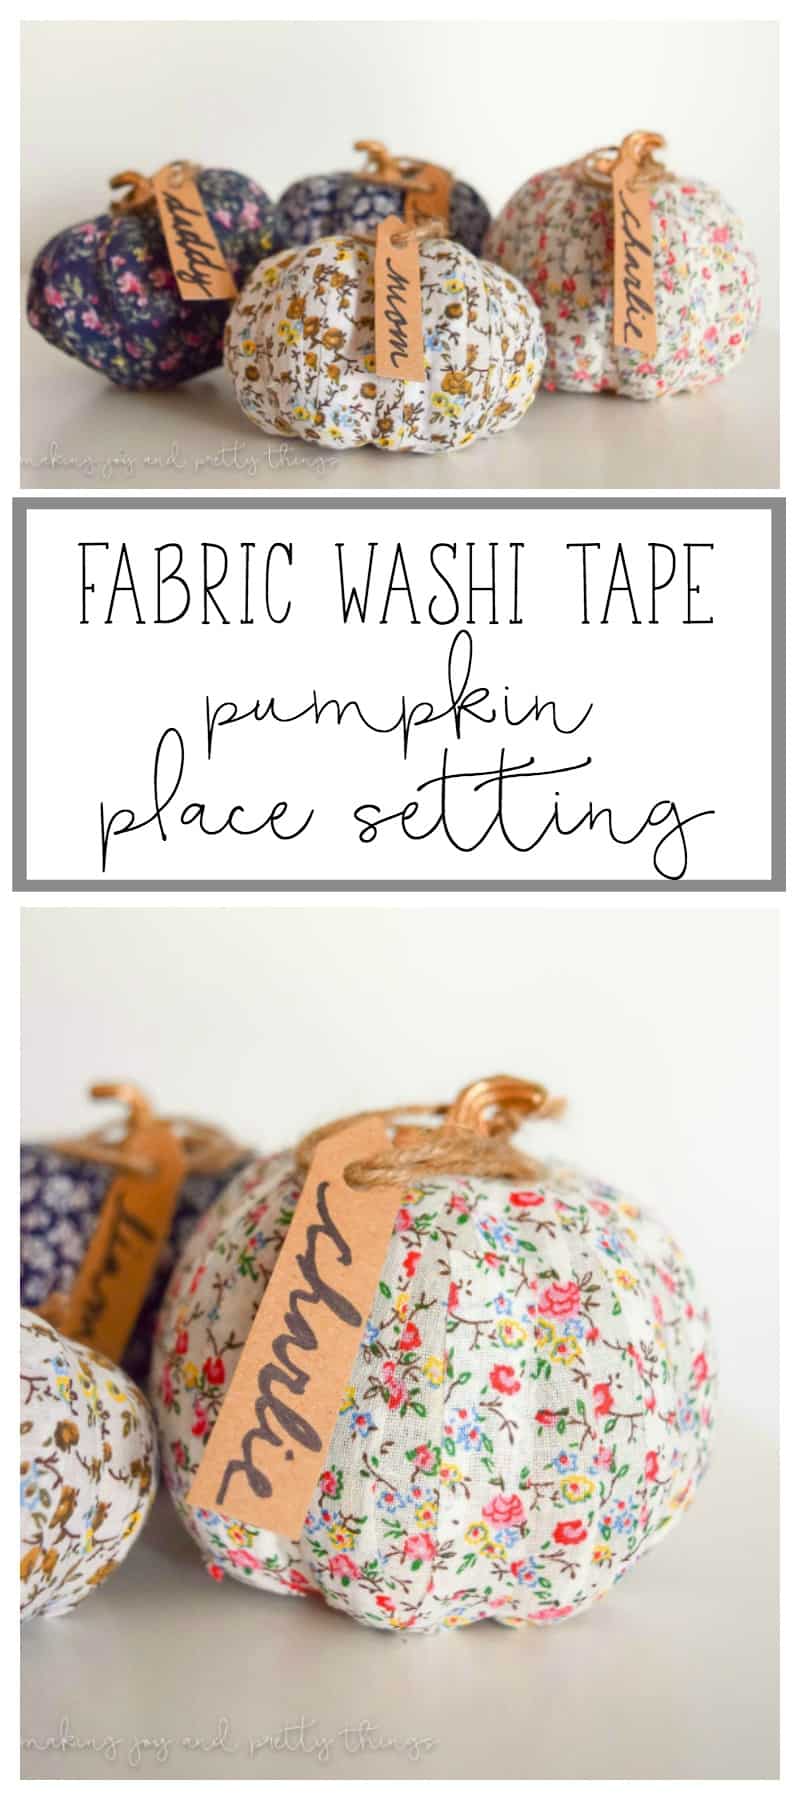
Simple Farmhouse Decor: Fabric Washi Tape Pumpkin Place Setting
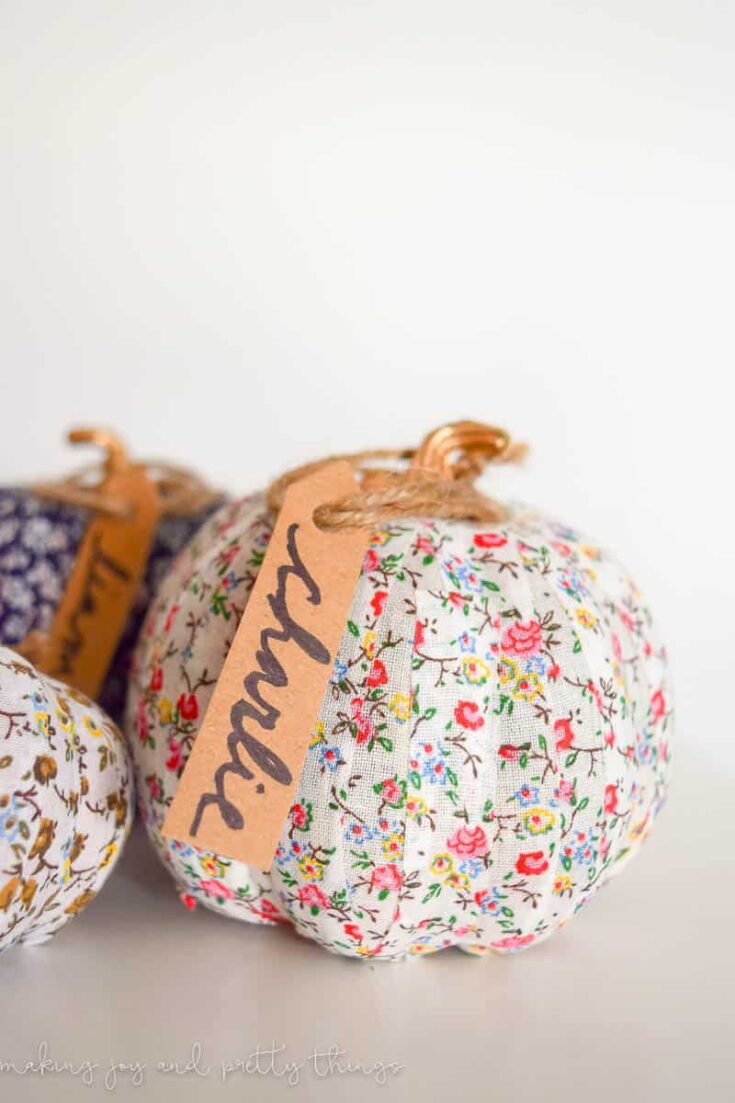
These fabric washi tape pumpkins are the perfect place setting for your fall-themed dinner party or Thanksgiving dinner! Customize little fabric pumpkins with name tags to serve as place settings for friends and family.
Happy October and welcome to another month of Simple Farmhouse Decor!!!
I couldn’t be more excited that October is here! Not only is it my birthday month but it’s the month I got married (5 years this month, crazy!).
Plus, there’s the obvious pumpkin spice latte (I’m not even ashamed to express my love for it). Pumpkin picking, corn mazes, and hoodies. Booties, jeans, and scarves. Cool air and crunchy leaves under my feet. What’s not to love?
As a blogger, I felt obligated to do some type of pumpkin DIY. But I’ve really been lacking in time and energy these days and just couldn’t think of anything for quite a while.
This post contains affiliate links. Please, click here to read my disclosure policy.
How to Make Washi Tape Pumpkins: Step-by-Step Tutorial
I grabbed one of those cheap bags of little pumpkins from Michaels and wondered what on earth I was going to transform them into.
Then, another day while at Michaels, I spotted the cutest fabric washi tape (similar). It was floral and fun and farmhouse. And a light bulb went off! Floral washi tape pumpkins!!
This is truly the easiest DIY ever. I completed all 5 pumpkins in about 30 minutes. The only other supply for the pumpkins is scissors. Easy peasy.
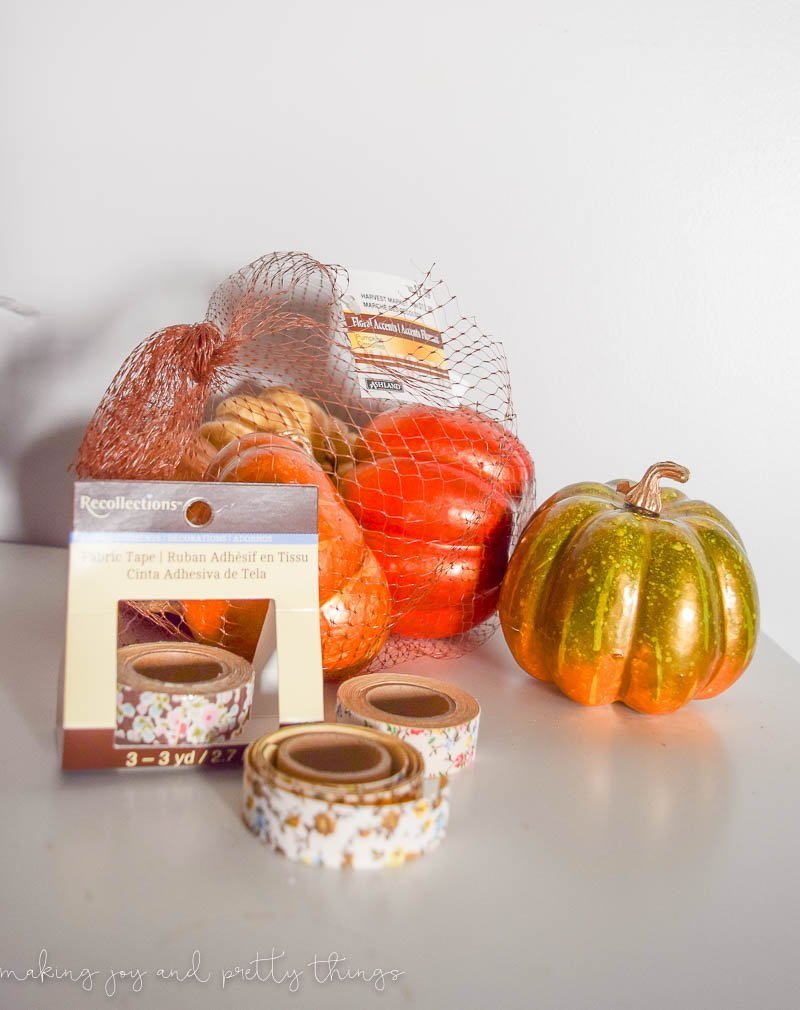
Supplies needed
- Mini pumpkins – You can find these at any craft store or even the dollar store during the fall season!
- Washi tape – I used fabric tape, which had a rougher texture, but regular washi tape would work just fine too. This fall animal pattern tape would be perfect!
- Scissors
- Kraft paper cardstock
- Sharpie
- Twine
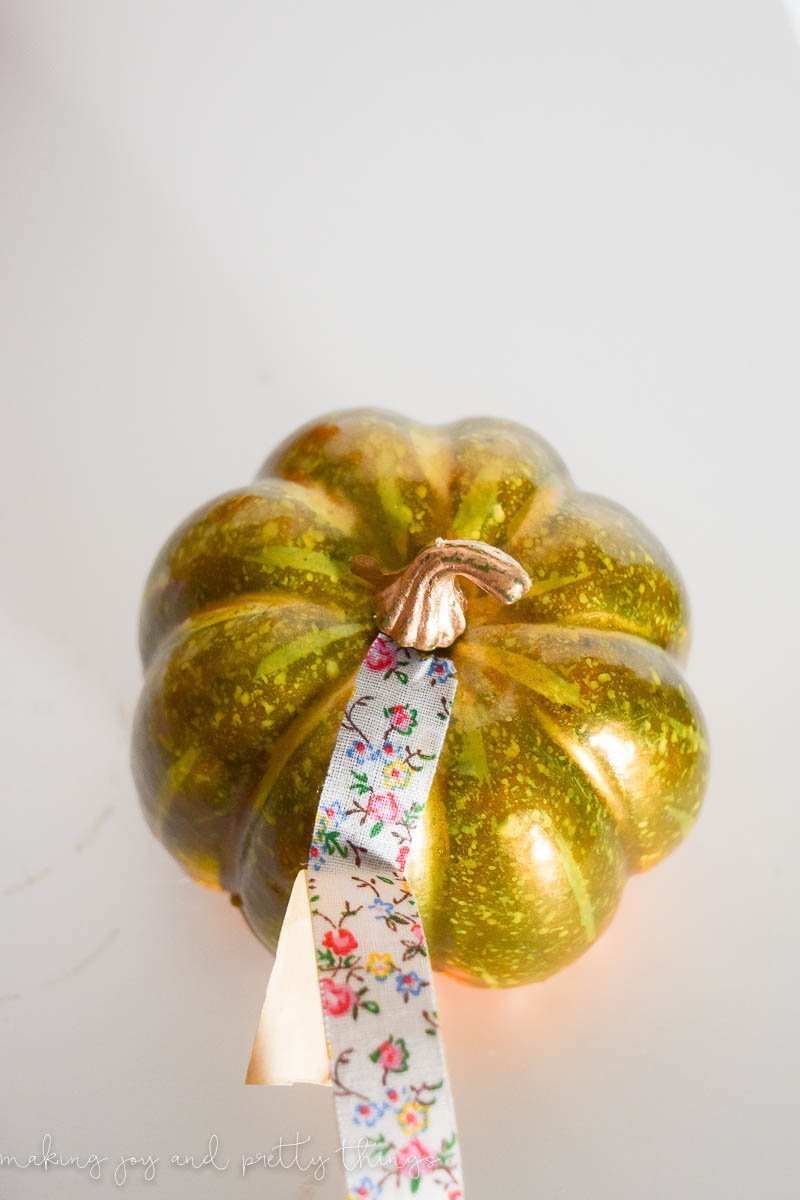
Step 1. Cover mini pumpkins with washi tape
First, place a piece of washi tape at the top of the pumpkin by the stem. Then, peel off the paper backing and smooth the washi tape over the side of the pumpkin. Since the bottom won’t be visible, you only need to have the washi tape extend to any visible areas of the pumpkin.
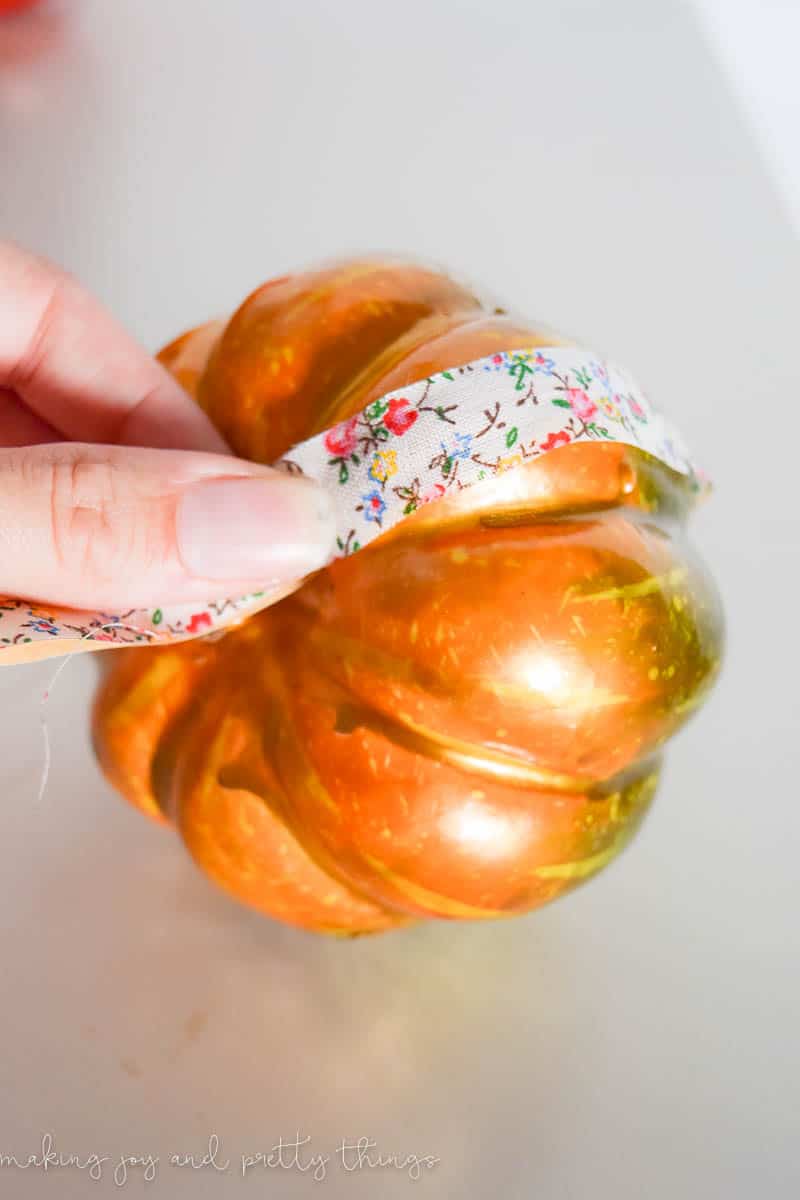
Cut off the washi tape at the bottom and repeat until the pumpkin is covered! SO easy.
I used about a full roll of washi tape for each pumpkin. Some places overlap a bit because of the curve of the pumpkin but for the most part, I tried to place each piece side by side.


I love the fabric washi tape even though it doesn’t necessarily say “fall” at first glance. It’s not a shiny finish and it has a warm feel to it, making it perfectly fall in my opinion.
I was just going to stop here and have these sweet pumpkins as decoration but…I’m doing this fall house tour TOMORROW and needed some place settings for a tablescape. The pumpkins seemed like the perfect place setting!
Step 2. Make the name tags for place cards
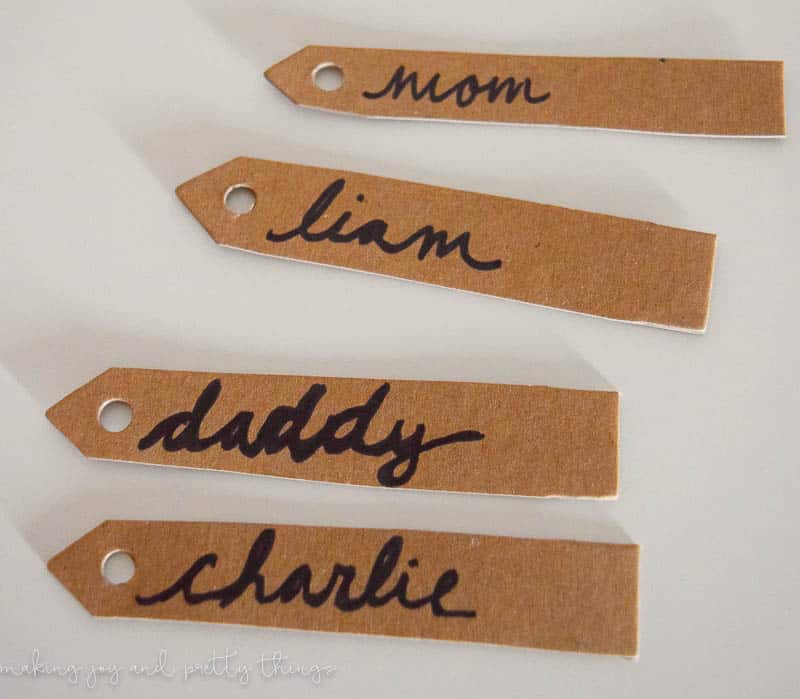
To add the name tags, I used Christmas tree gift tags I had left over from last Christmas and cut off the branch part to leave a sturdy tag.
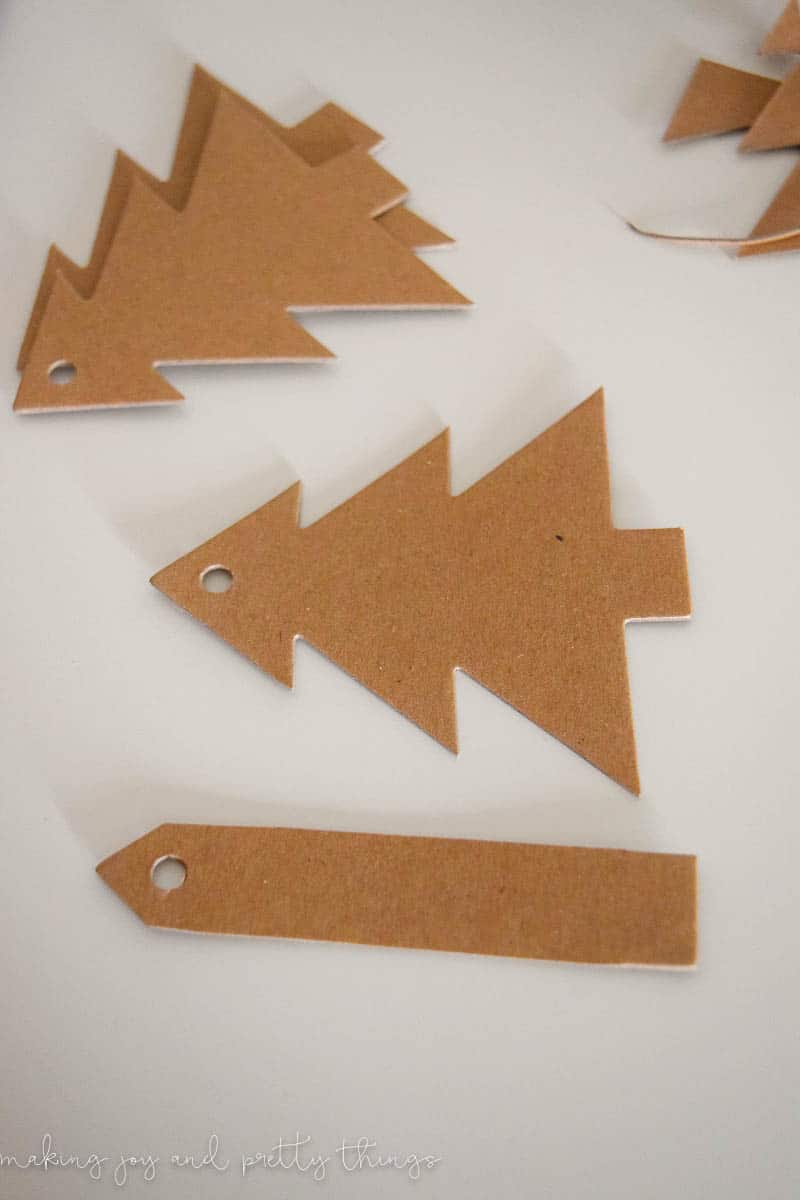
I freehanded some cursive names on them, which is never a good idea. I spelled “dad” incorrectly (what is wrong with me??) so had to turn it into “daddy”. It’s a hot mess.
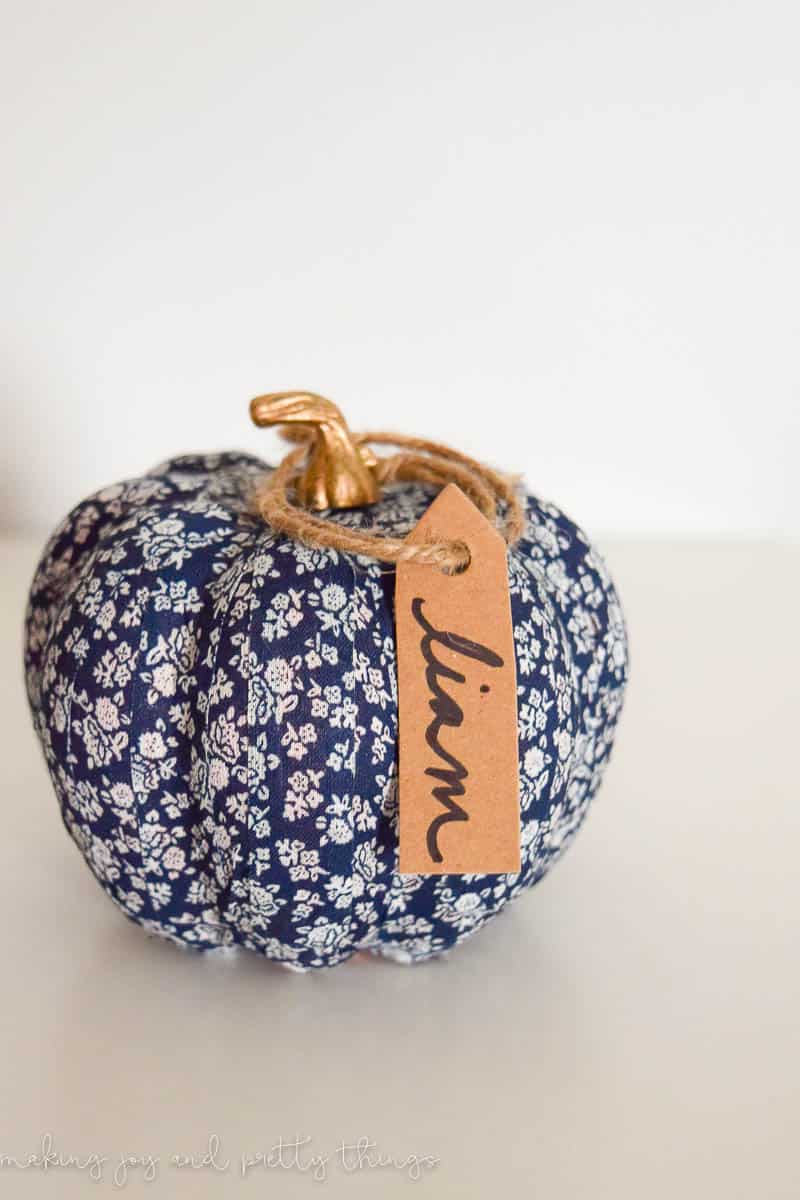
Step 3. Add nametags to pumpkins
They already had the hole at the top so I strung some twine through the hole twice and made a little knot at the top. I cut the name cards down to the edge of the cursive name.
Last, I stuck each on the stem of a pumpkin and … that’s it!
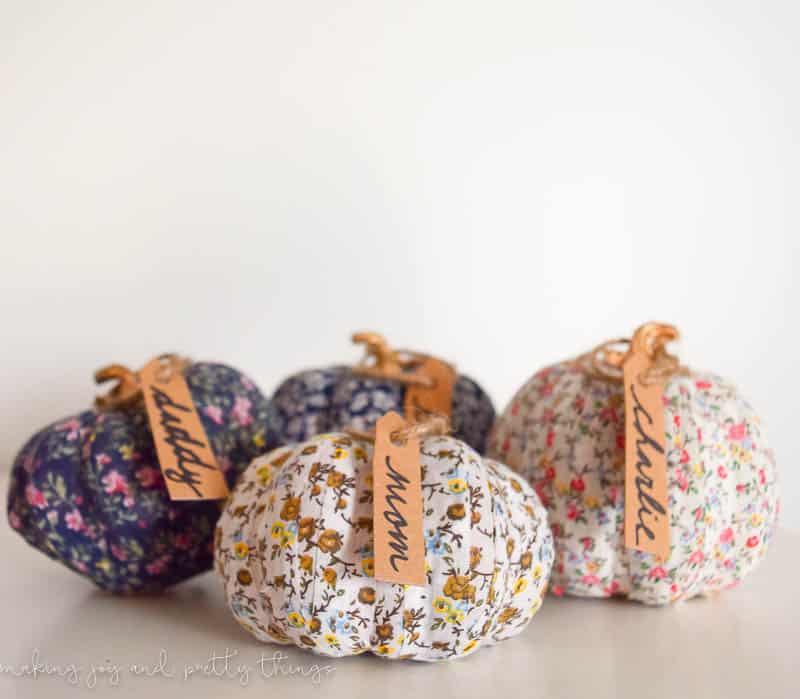
You guys, this may be my favorite DIY yet. I’m completely obsessed with the little pumpkins. They would even make great gifts, too!

Fabric Washi Tape Pumpkins
Take your dinner party to the next level with these adorable fabric washi tape pumpkin placecards! Just a few rolls of washi tape transform little craft pumpkins into farmhouse-style placecards.
Materials
- Patterned fabric washi tape (1 roll for each pumpkin)
- Small craft pumpkins
- Tape
- Gift tags
- Twine
- Scissors
Instructions
- First, place a piece of washi tape at the top of the pumpkin by the stem.
- Then, peel off the paper backing and smooth the washi tape over the side of the pumpkin.
- Cut off the washi tape at the bottom and repeat until the pumpkin is covered.
- To add the name tags, simply write the person's name with a marker and attach the tag to the stem of the pumpkin with twine.
Finally, If you want to see other simple farmhouse decor, check out some of the projects I’ve completed in the past. And remember to check back the first Sunday of each month for a new simple farmhouse decor project.

DIY Chalkboard Family Farmhouse Sign

Mason Jar “Choose Joy” Display

Simple Summer Farmhouse Centerpiece
Wishing you a joyful day!


hey girl I just love these pumpkins! so cool!
Thanks Shawna! You’re so sweet.
These are ADORABLE. Love them! Pinning!
Aww thanks Lora! I absolutely love them, too. Thanks for stopping by 🙂
I love simple projects! When you have kids, simple is the magic word. You could use the washi tape to cover any kind of fruit/veggie that needs a little love.
Such a good idea! The kids would probably love to cover their own play fruits and veggies.