
Simple Farmhouse Frame
Learn how to transform a simple white picture frame into a gorgeous decorative farmhouse frame in 3 easy steps! A simple, stylish, farmhouse-style DIY.
Hello, dear friends! I’m so excited to be starting my first “series” entitled Simple Farmhouse Decor. I believe farmhouse decor is inherently simple, and that is what makes it beautiful.
This series will be all about bringing that gorgeous farmhouse style into your home through simple DIYs. You guys, I’m soooooo excited.
I packed the kiddos up and drove them to IKEA, my third favorite store behind Michaels and Target, of course 🙂 They have SO much great farmhouse decor at IKEA at a ridiculously low price.
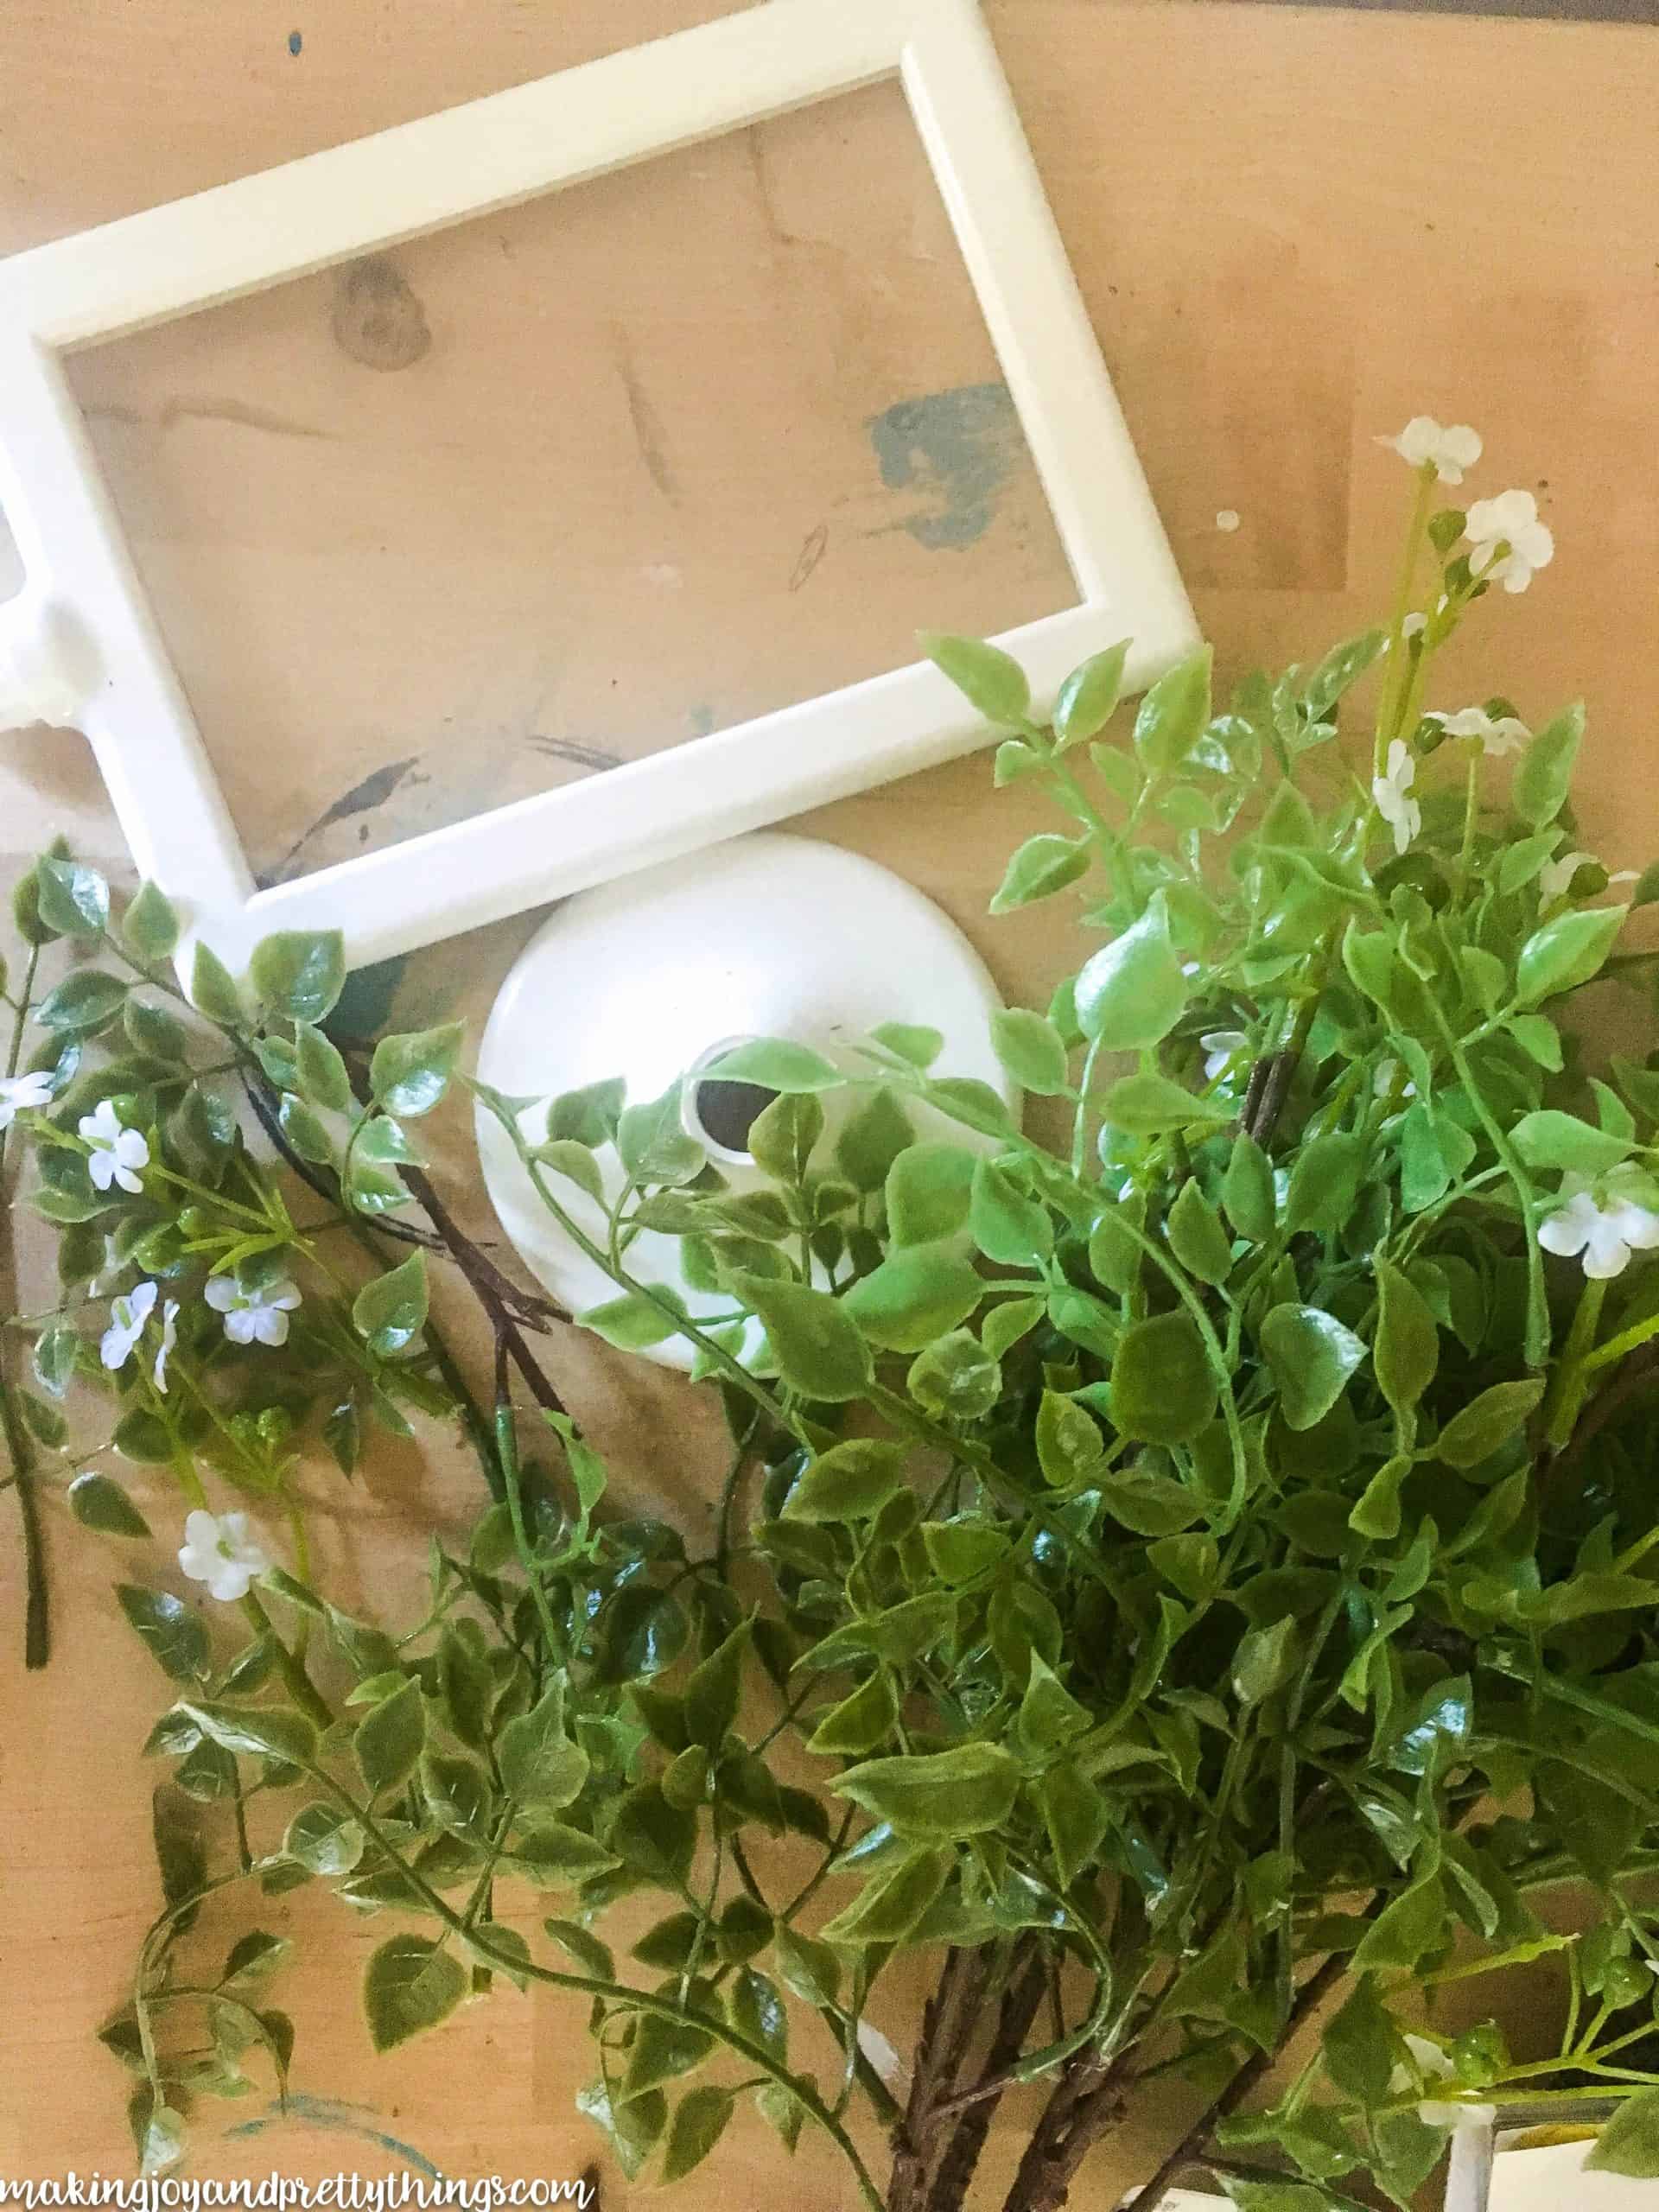
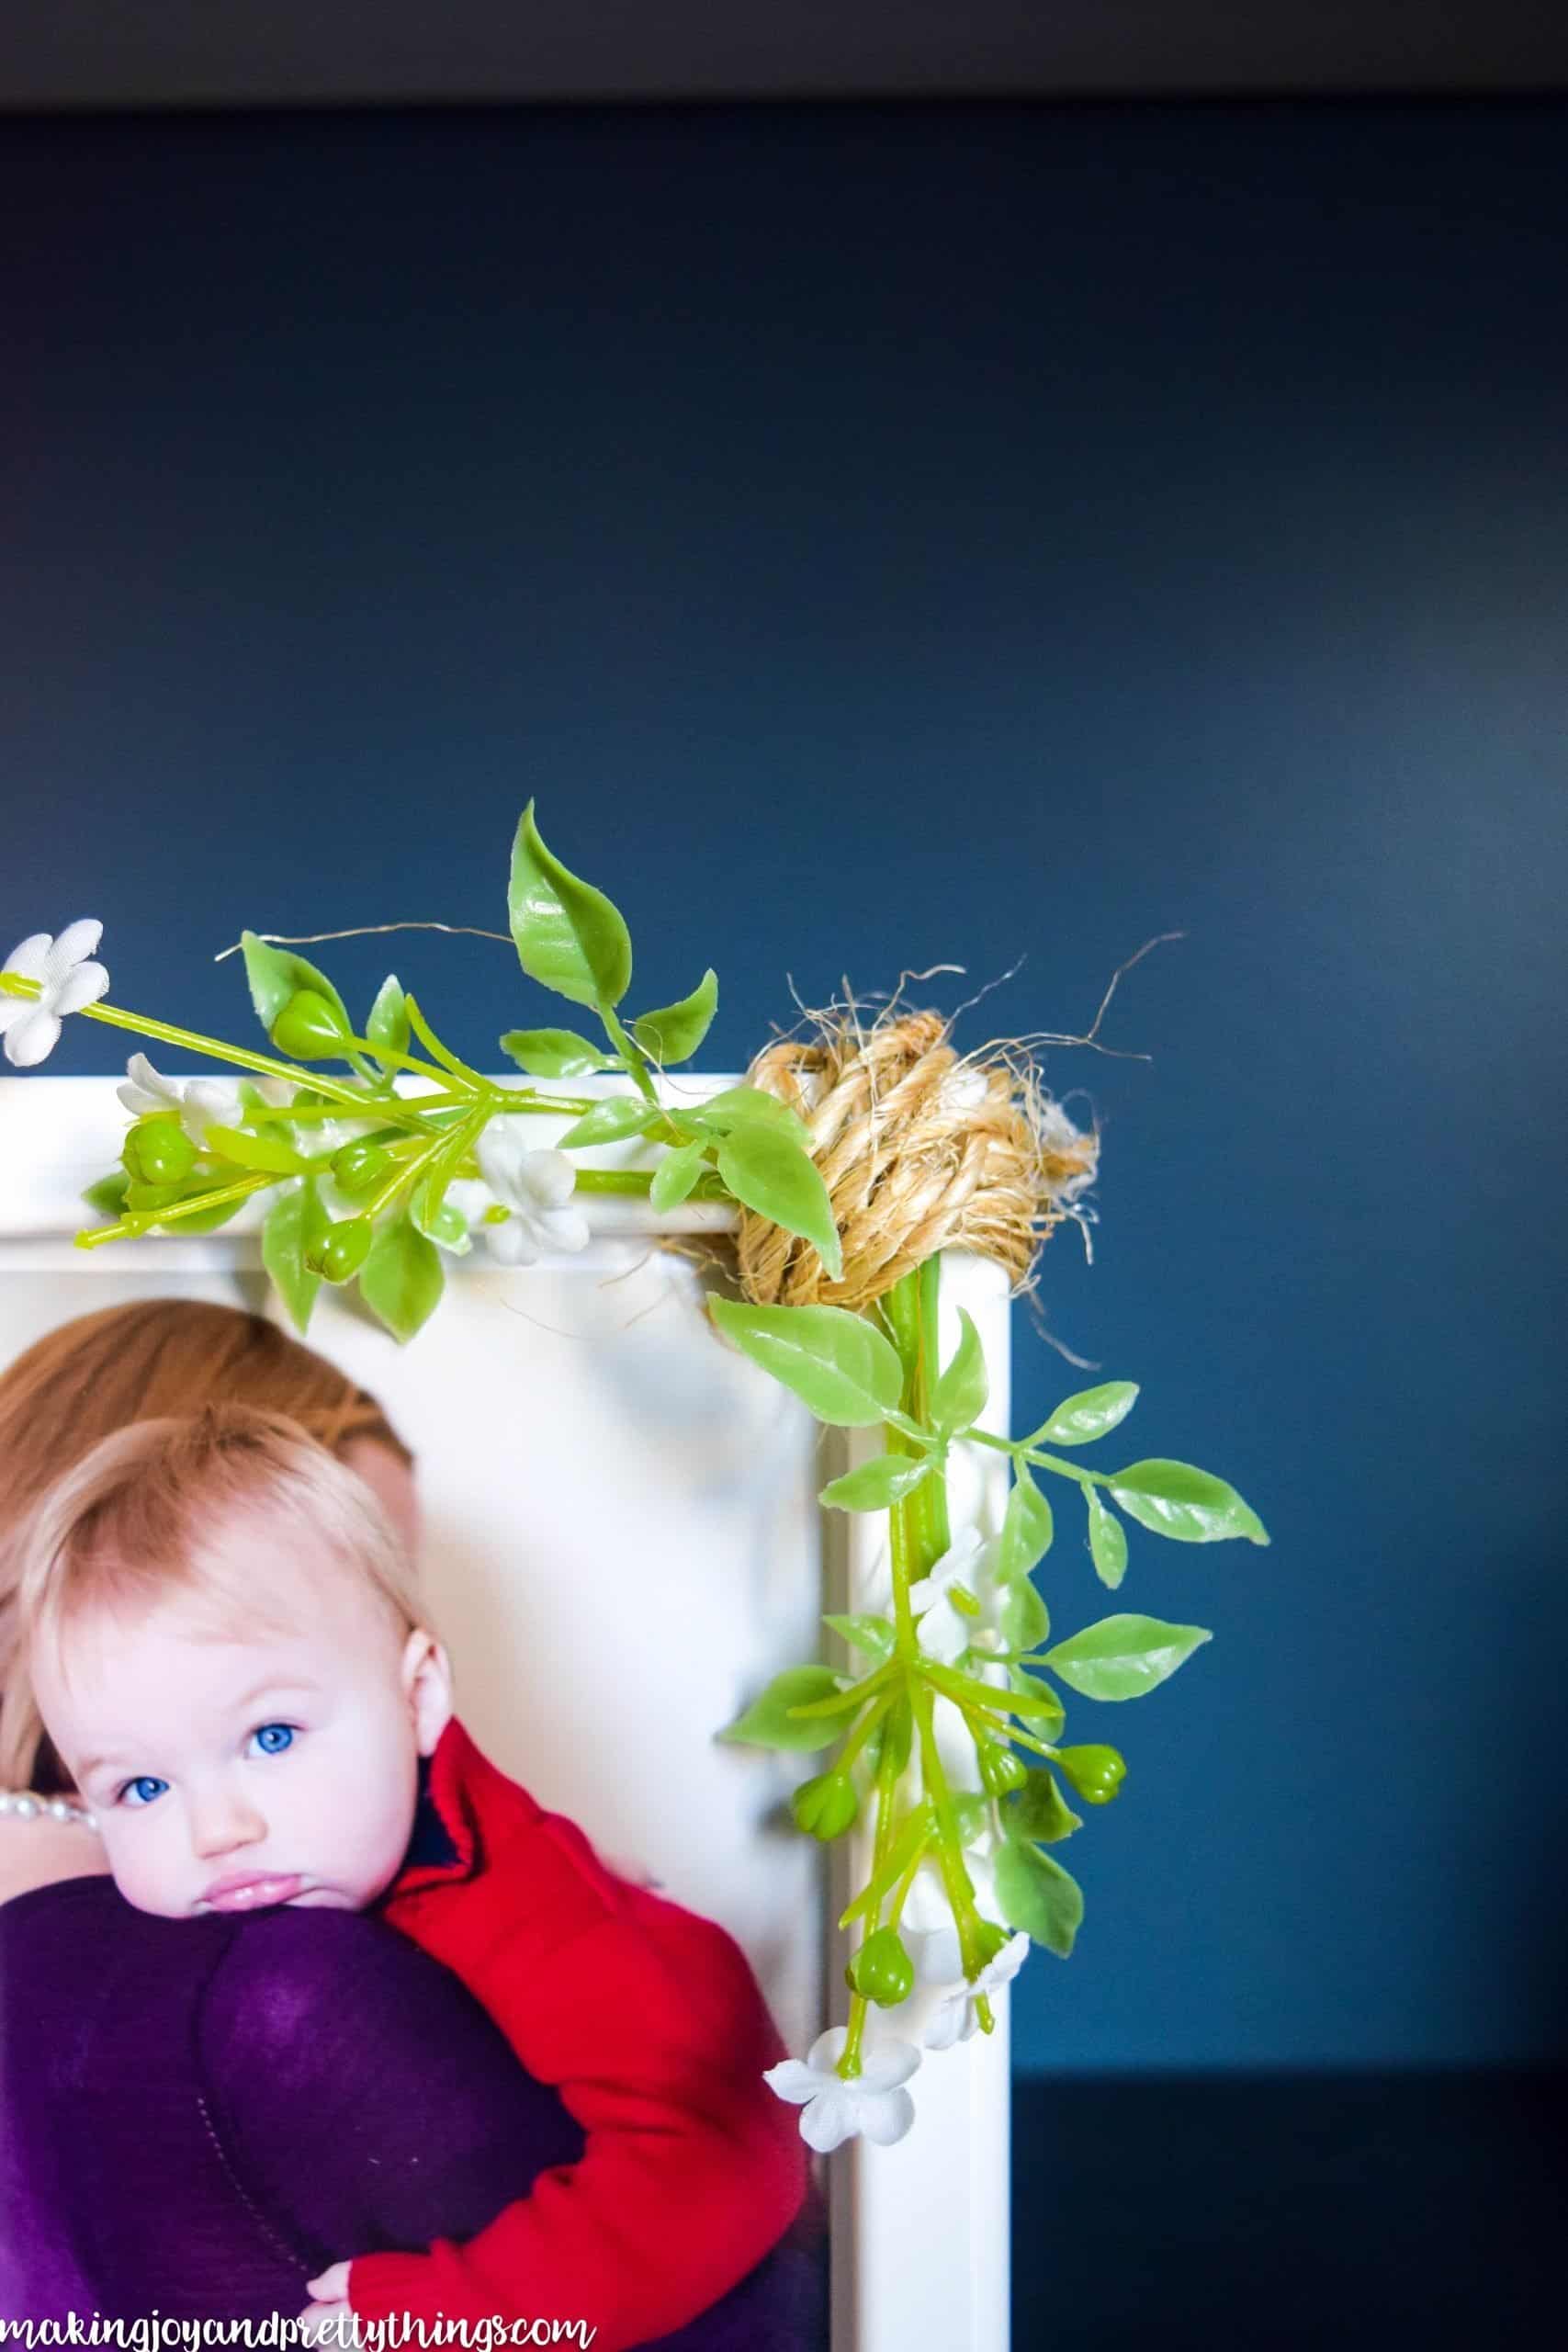
I picked up these simple white frames for $0.99!! I actually kind of like them as is, but I thought I could jazz it up a bit and make it look more “farmhouse-y”.

I’m making a guest post (omgomgomgomg) on Making it in the Mountains this week!! Eeekk!! I had some leftover greenery from that project which I thought would look perfect on this frame.

How to Make a Simple Farmhouse Frame in Minutes
This post contains affiliate links. Please, click here to read my disclosure policy.
Supplies you’ll need:
- IKEA picture frame
- Faux greenery and small flowers
- Twine
- Hot glue gun + glue sticks (or craft glue, super glue, etc.)
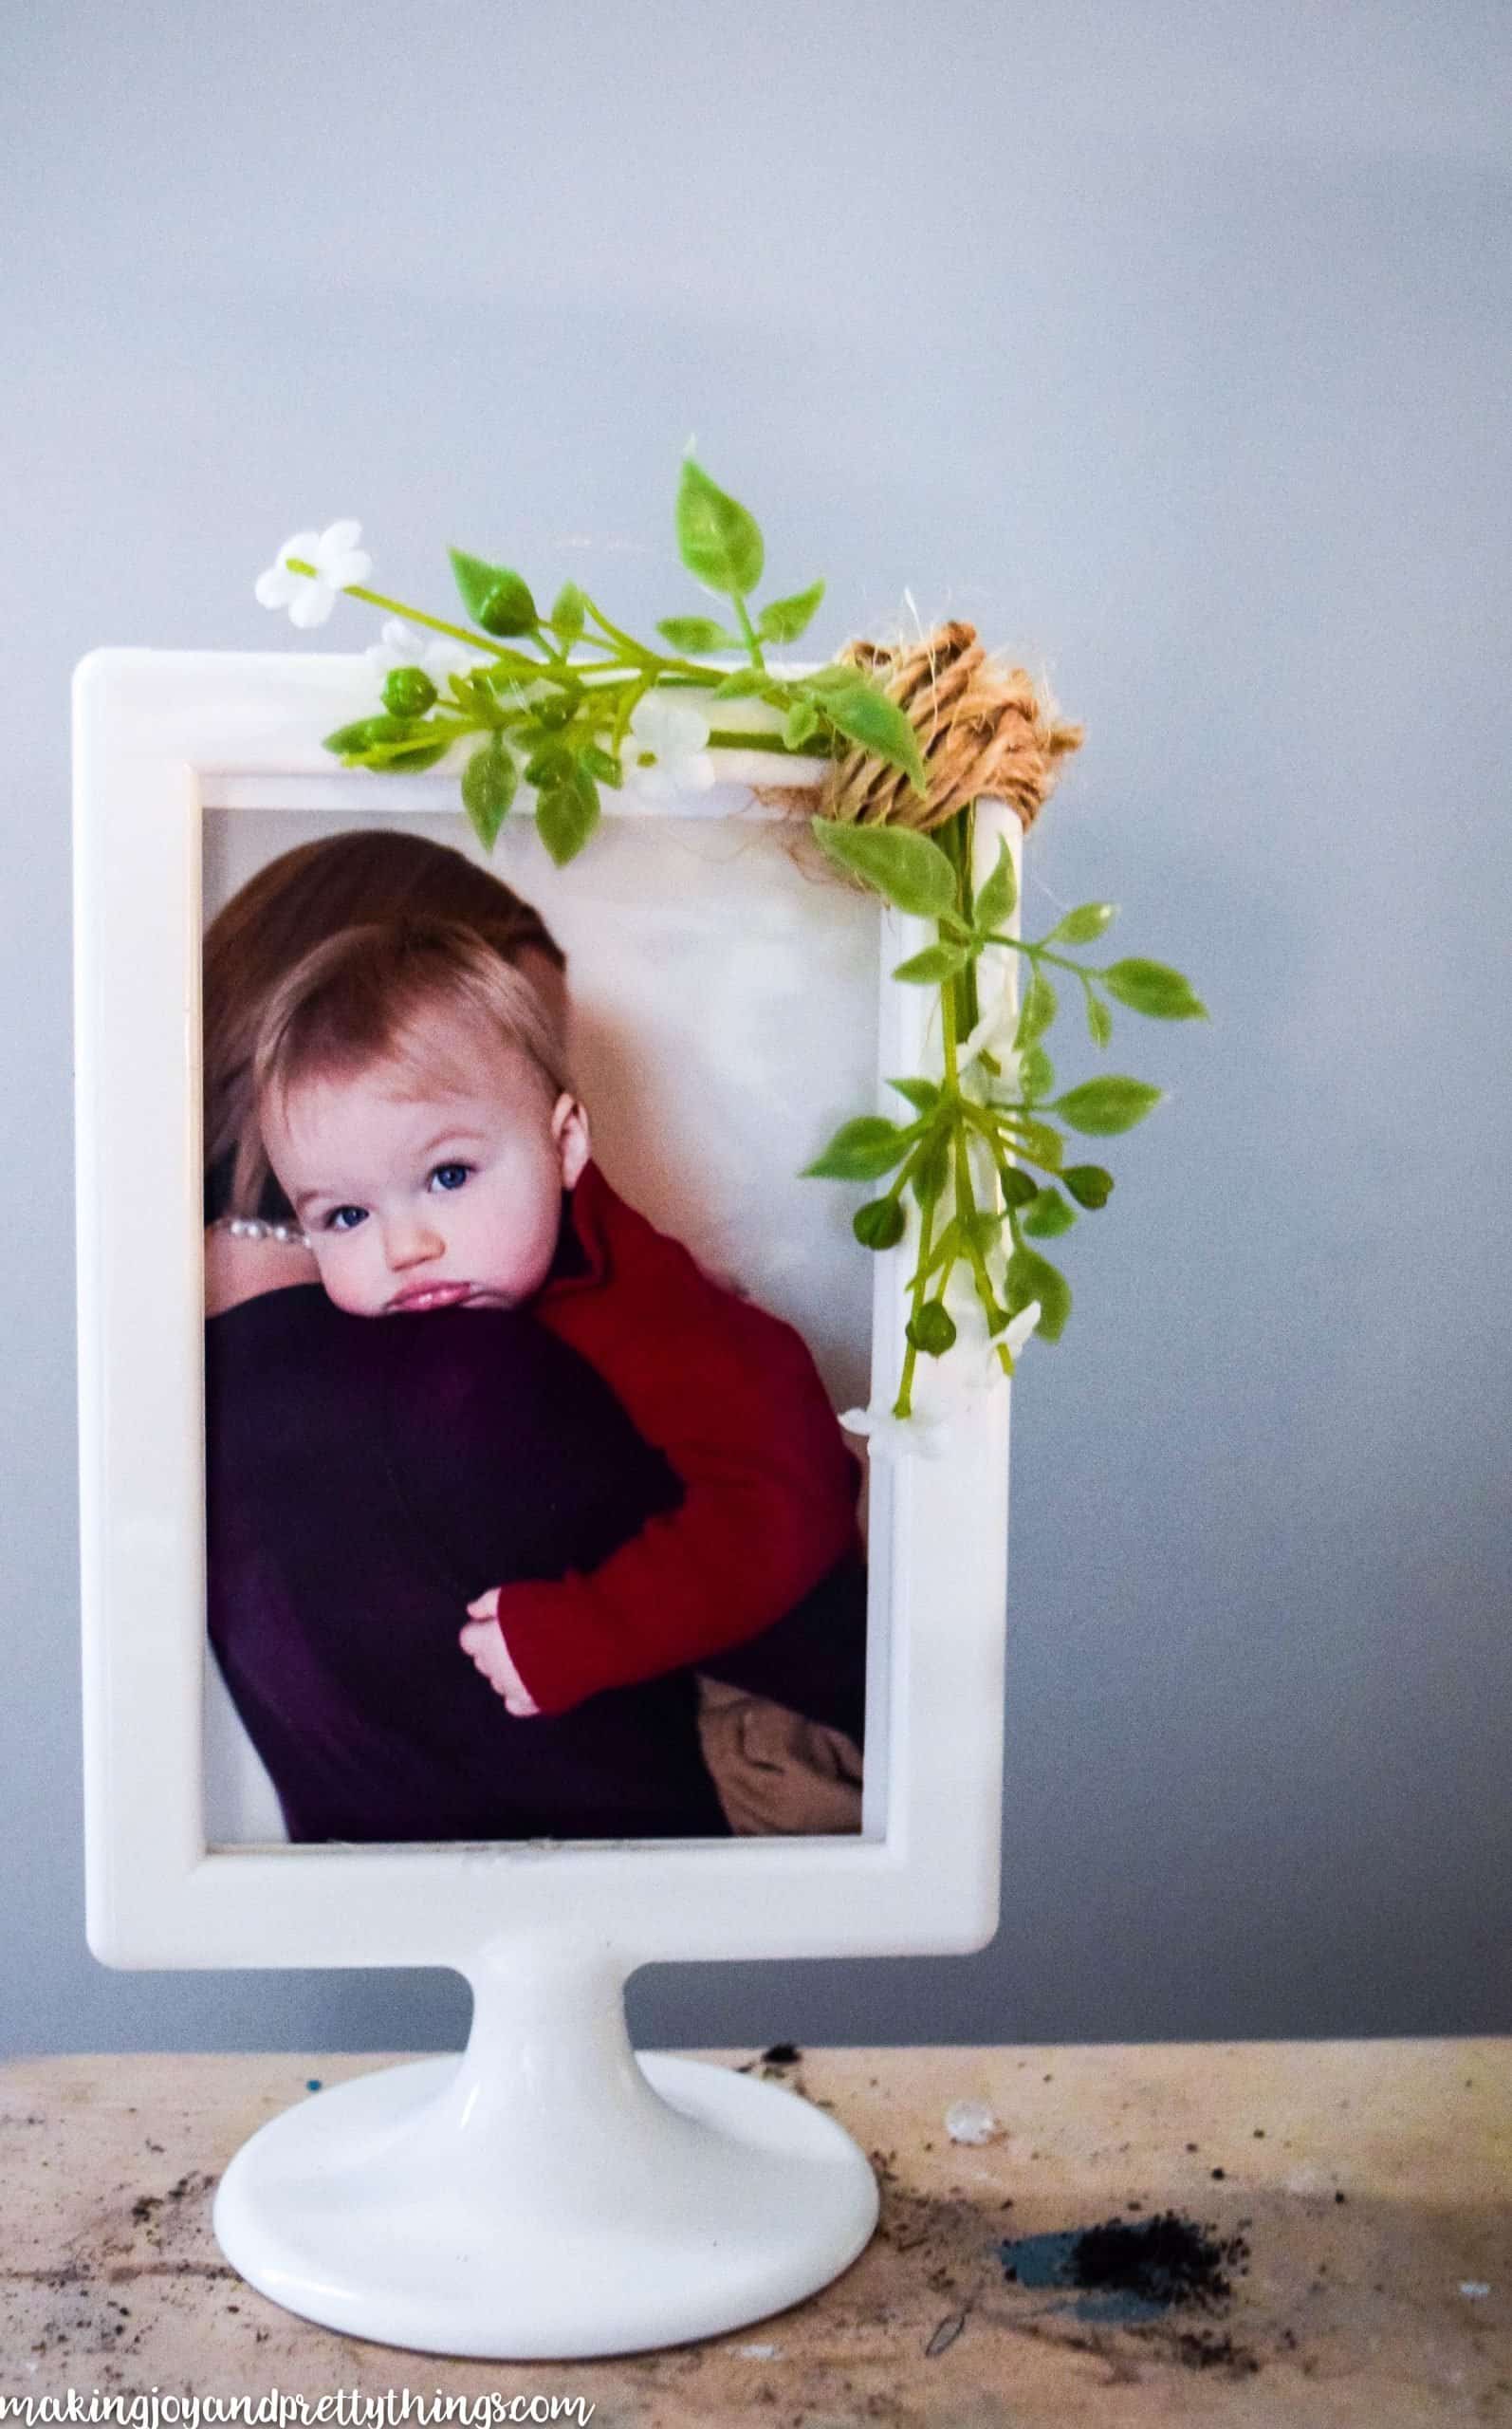
Isn’t it beautiful?? I’m obsessed. The simple greens and small white flowers. LOVE.
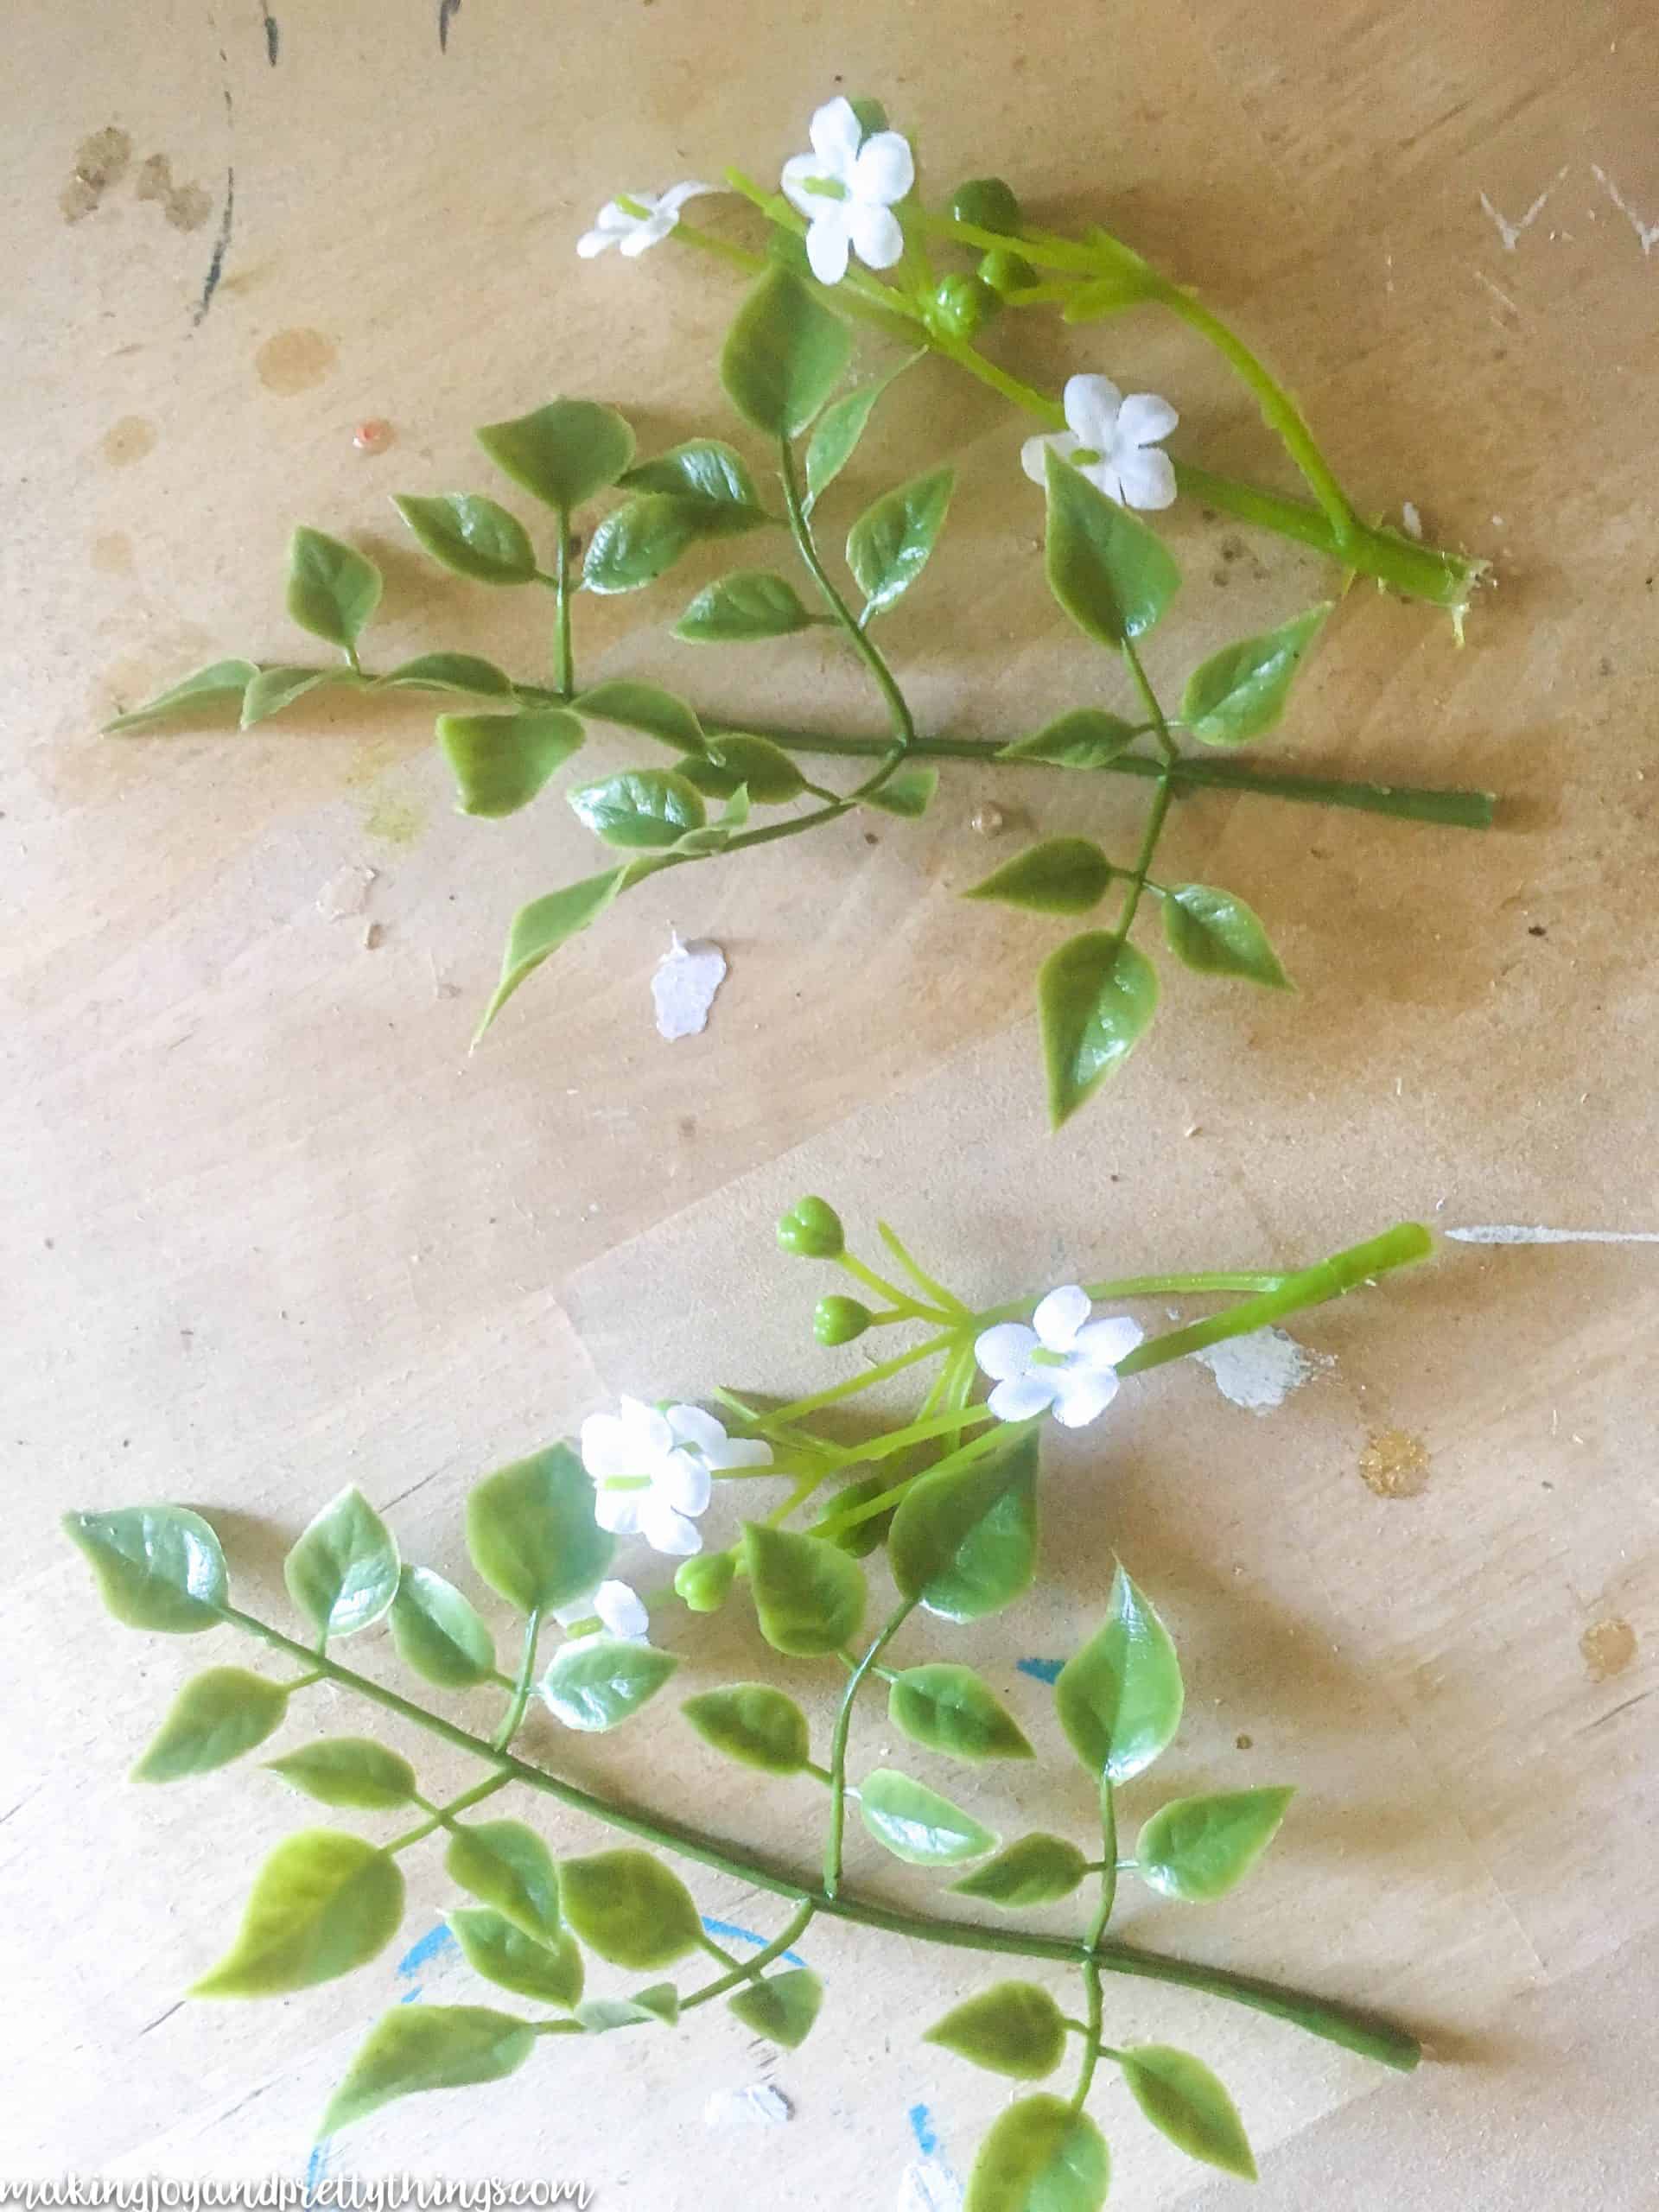
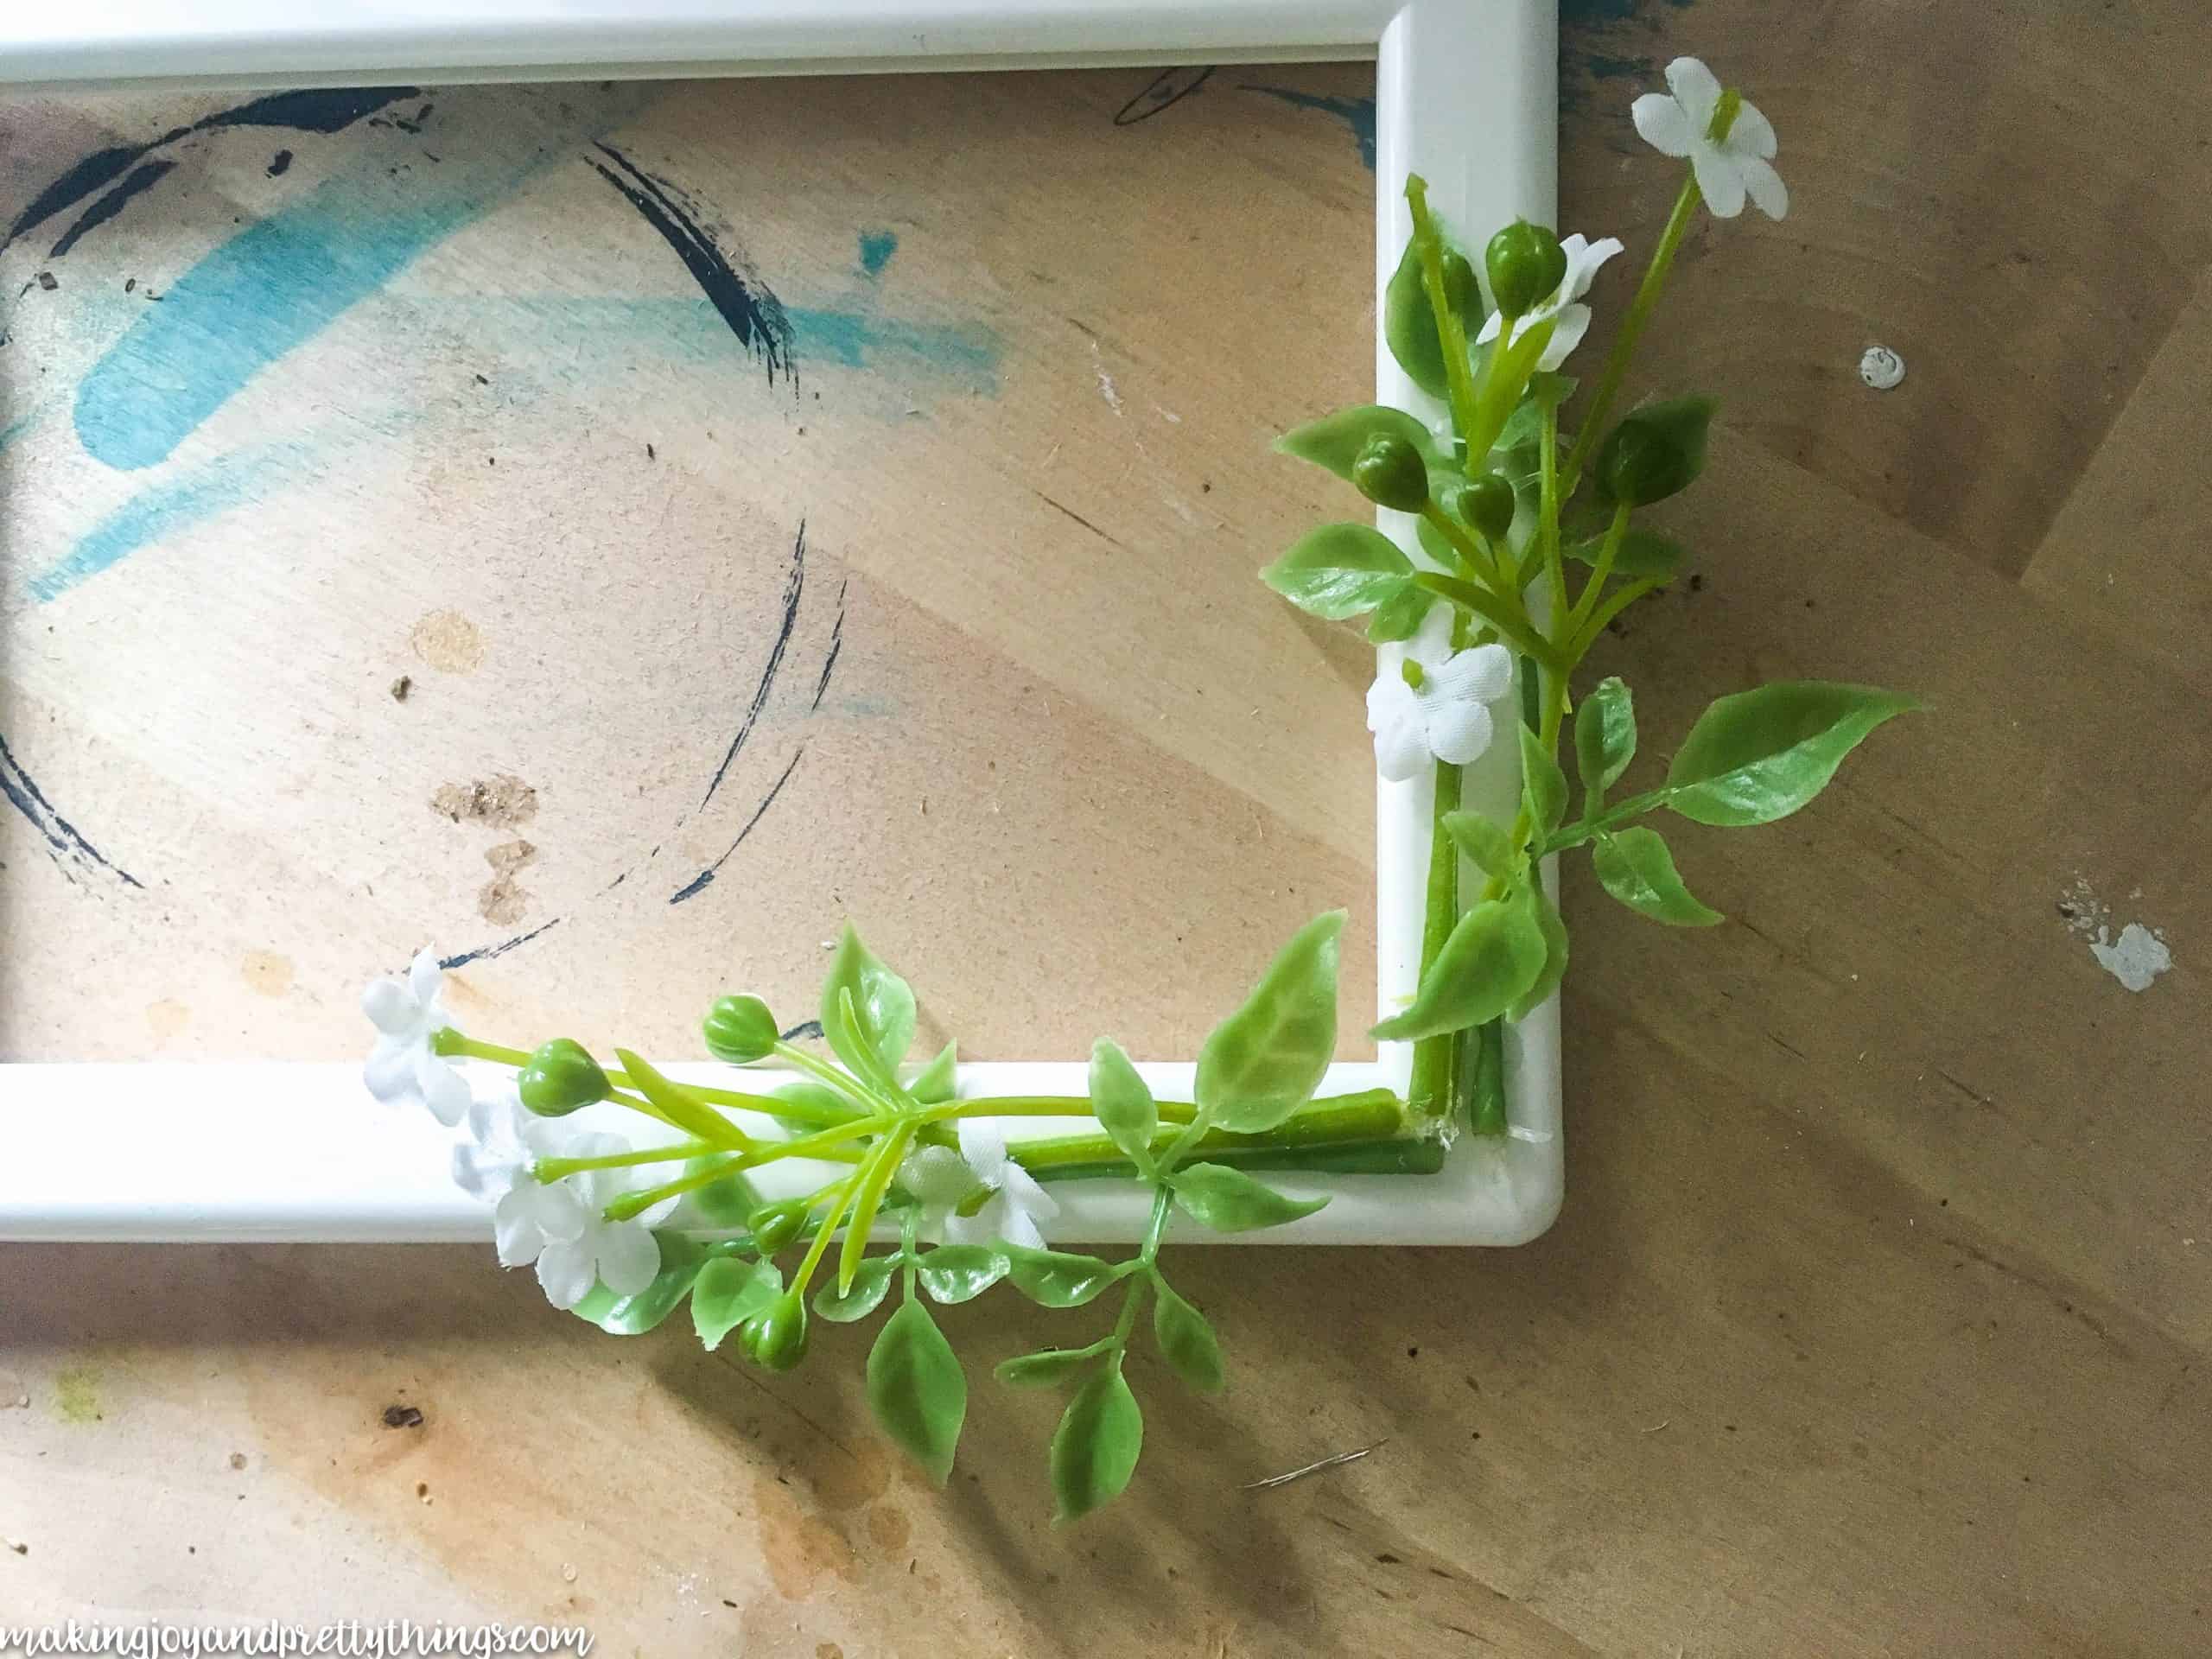
Step 1: Pick the greenery.
I picked off two *only green* stems and two *white flowery* stems.
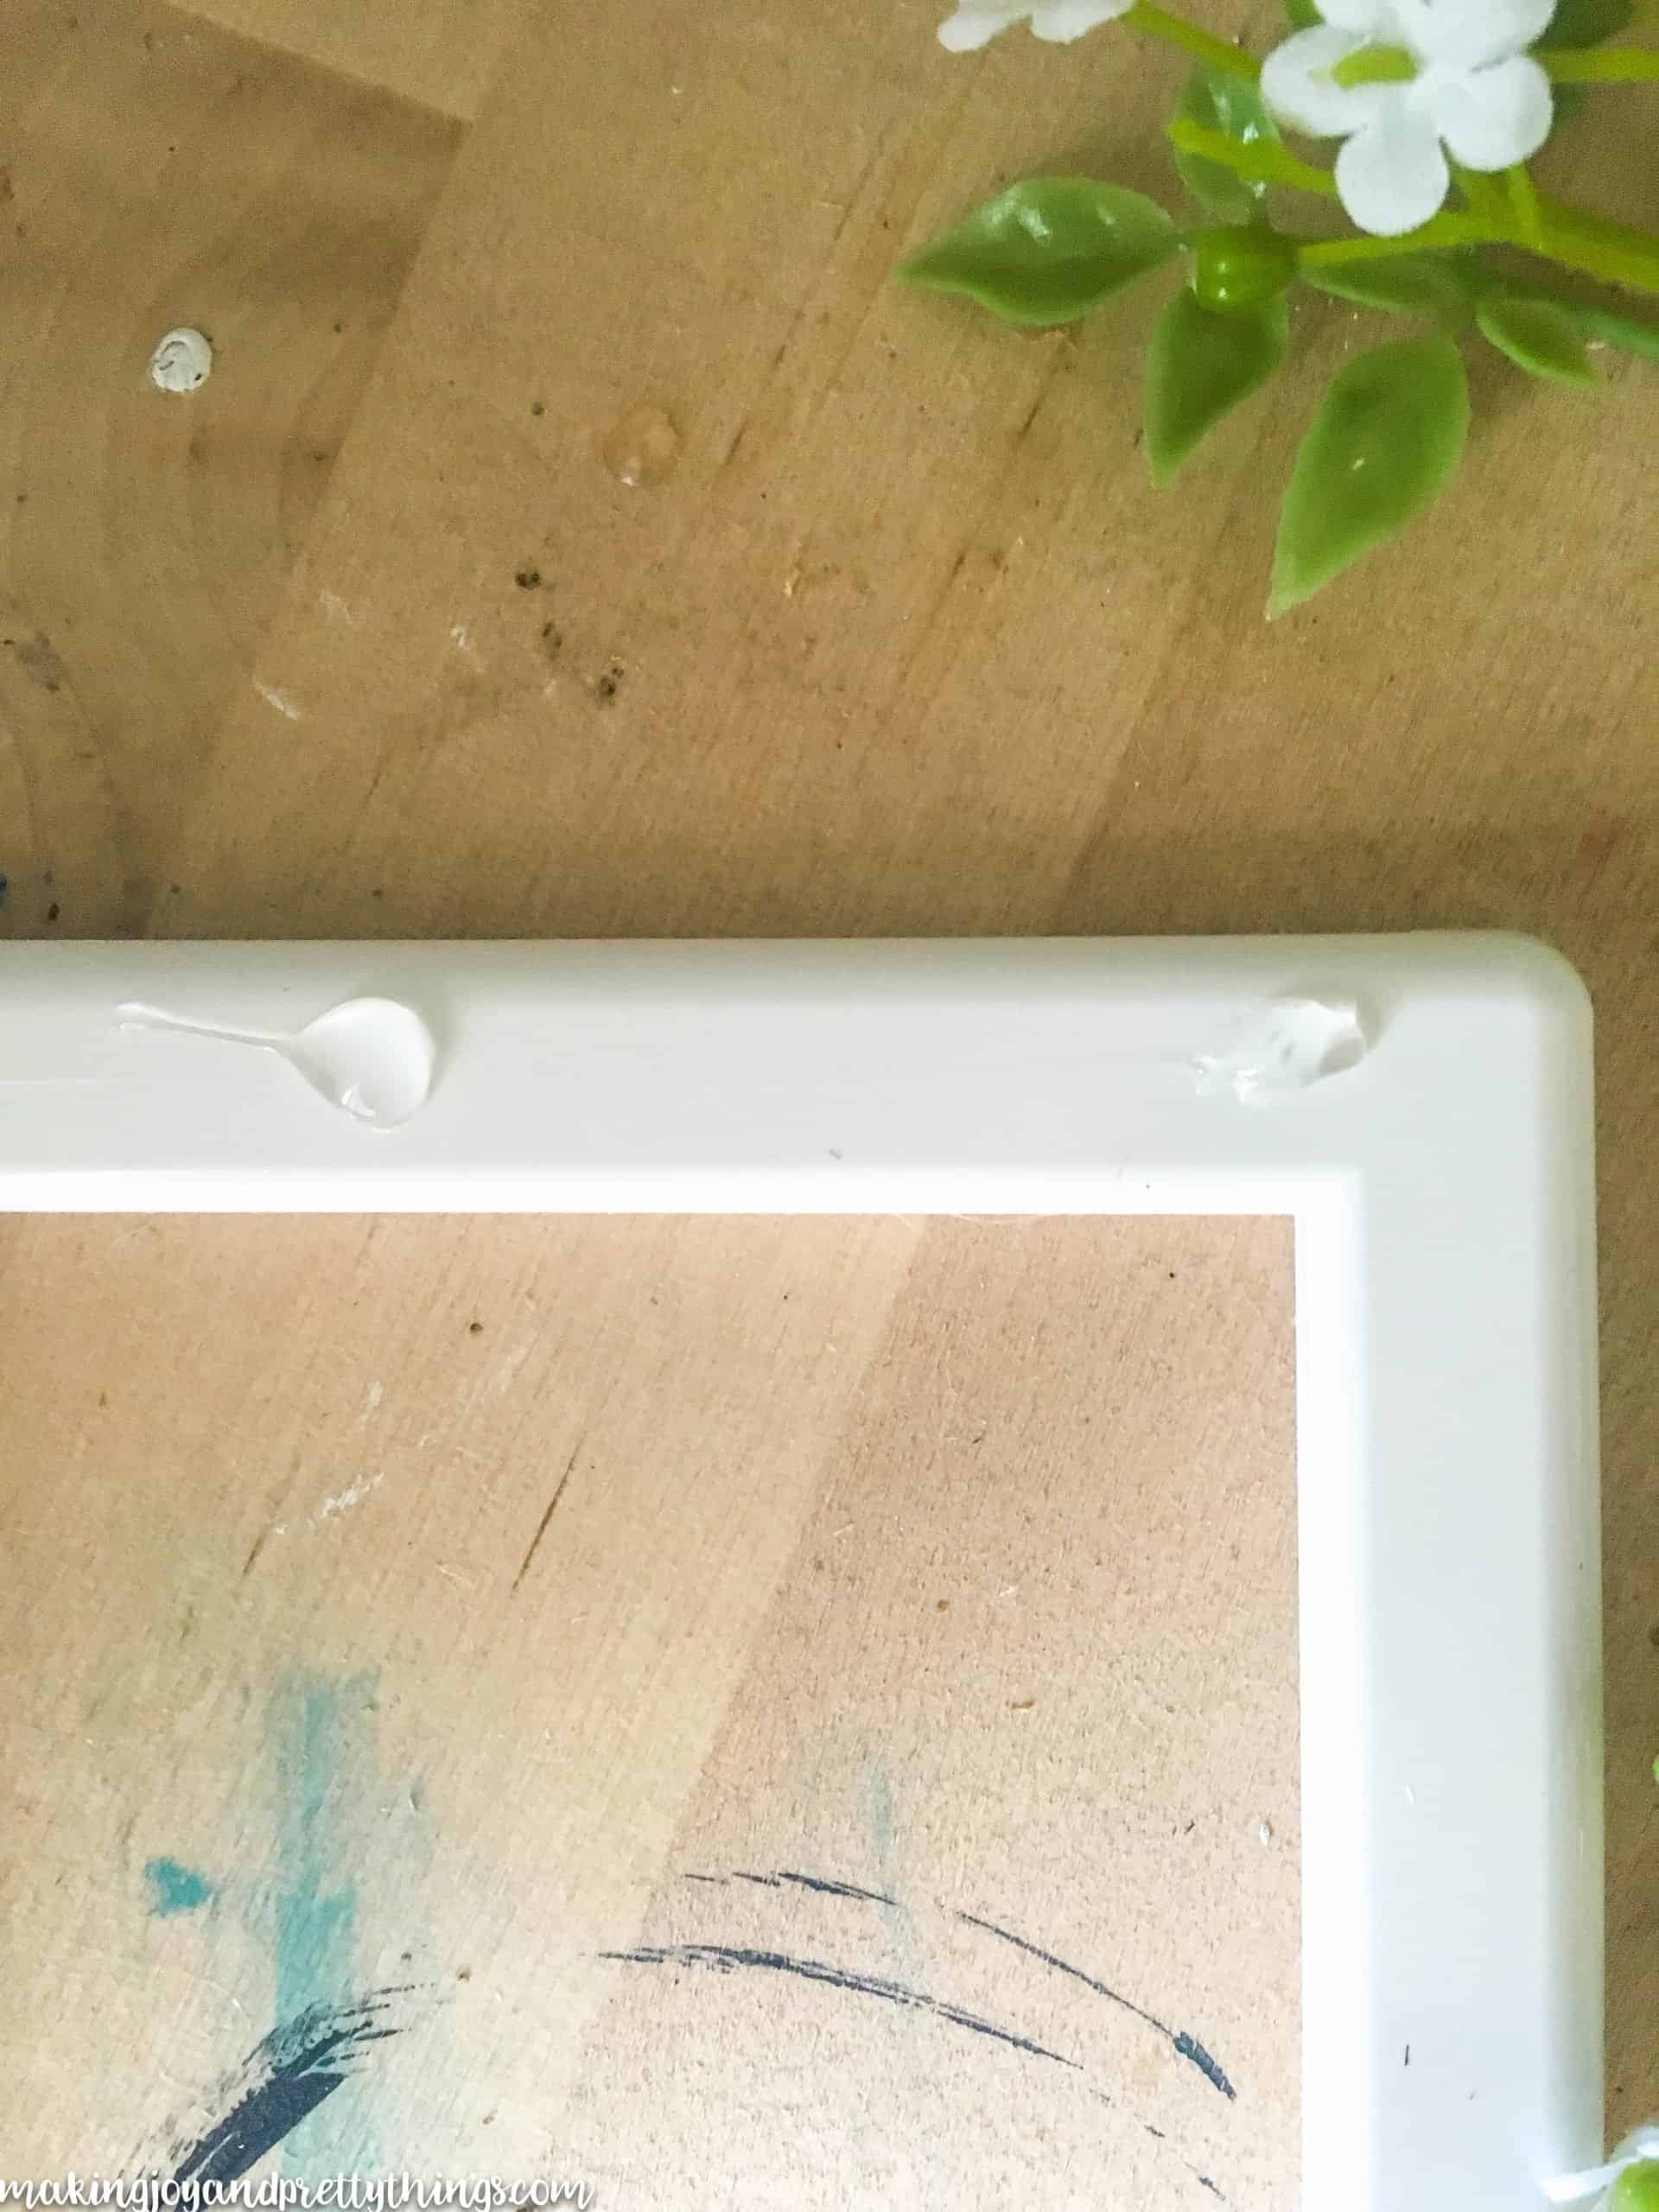
Step 2: Apply the faux greenery with glue.
I grabbed my hot glue gun and got to work. Working in the upper right-hand corner of the frame, I placed two small globs of glue about an inch apart going across the top portion of the frame and down the right side of the frame.
I placed the greenery only pieces down first. Be careful not to burn your fingers!!! (speaking from experience, of course 🙂 )
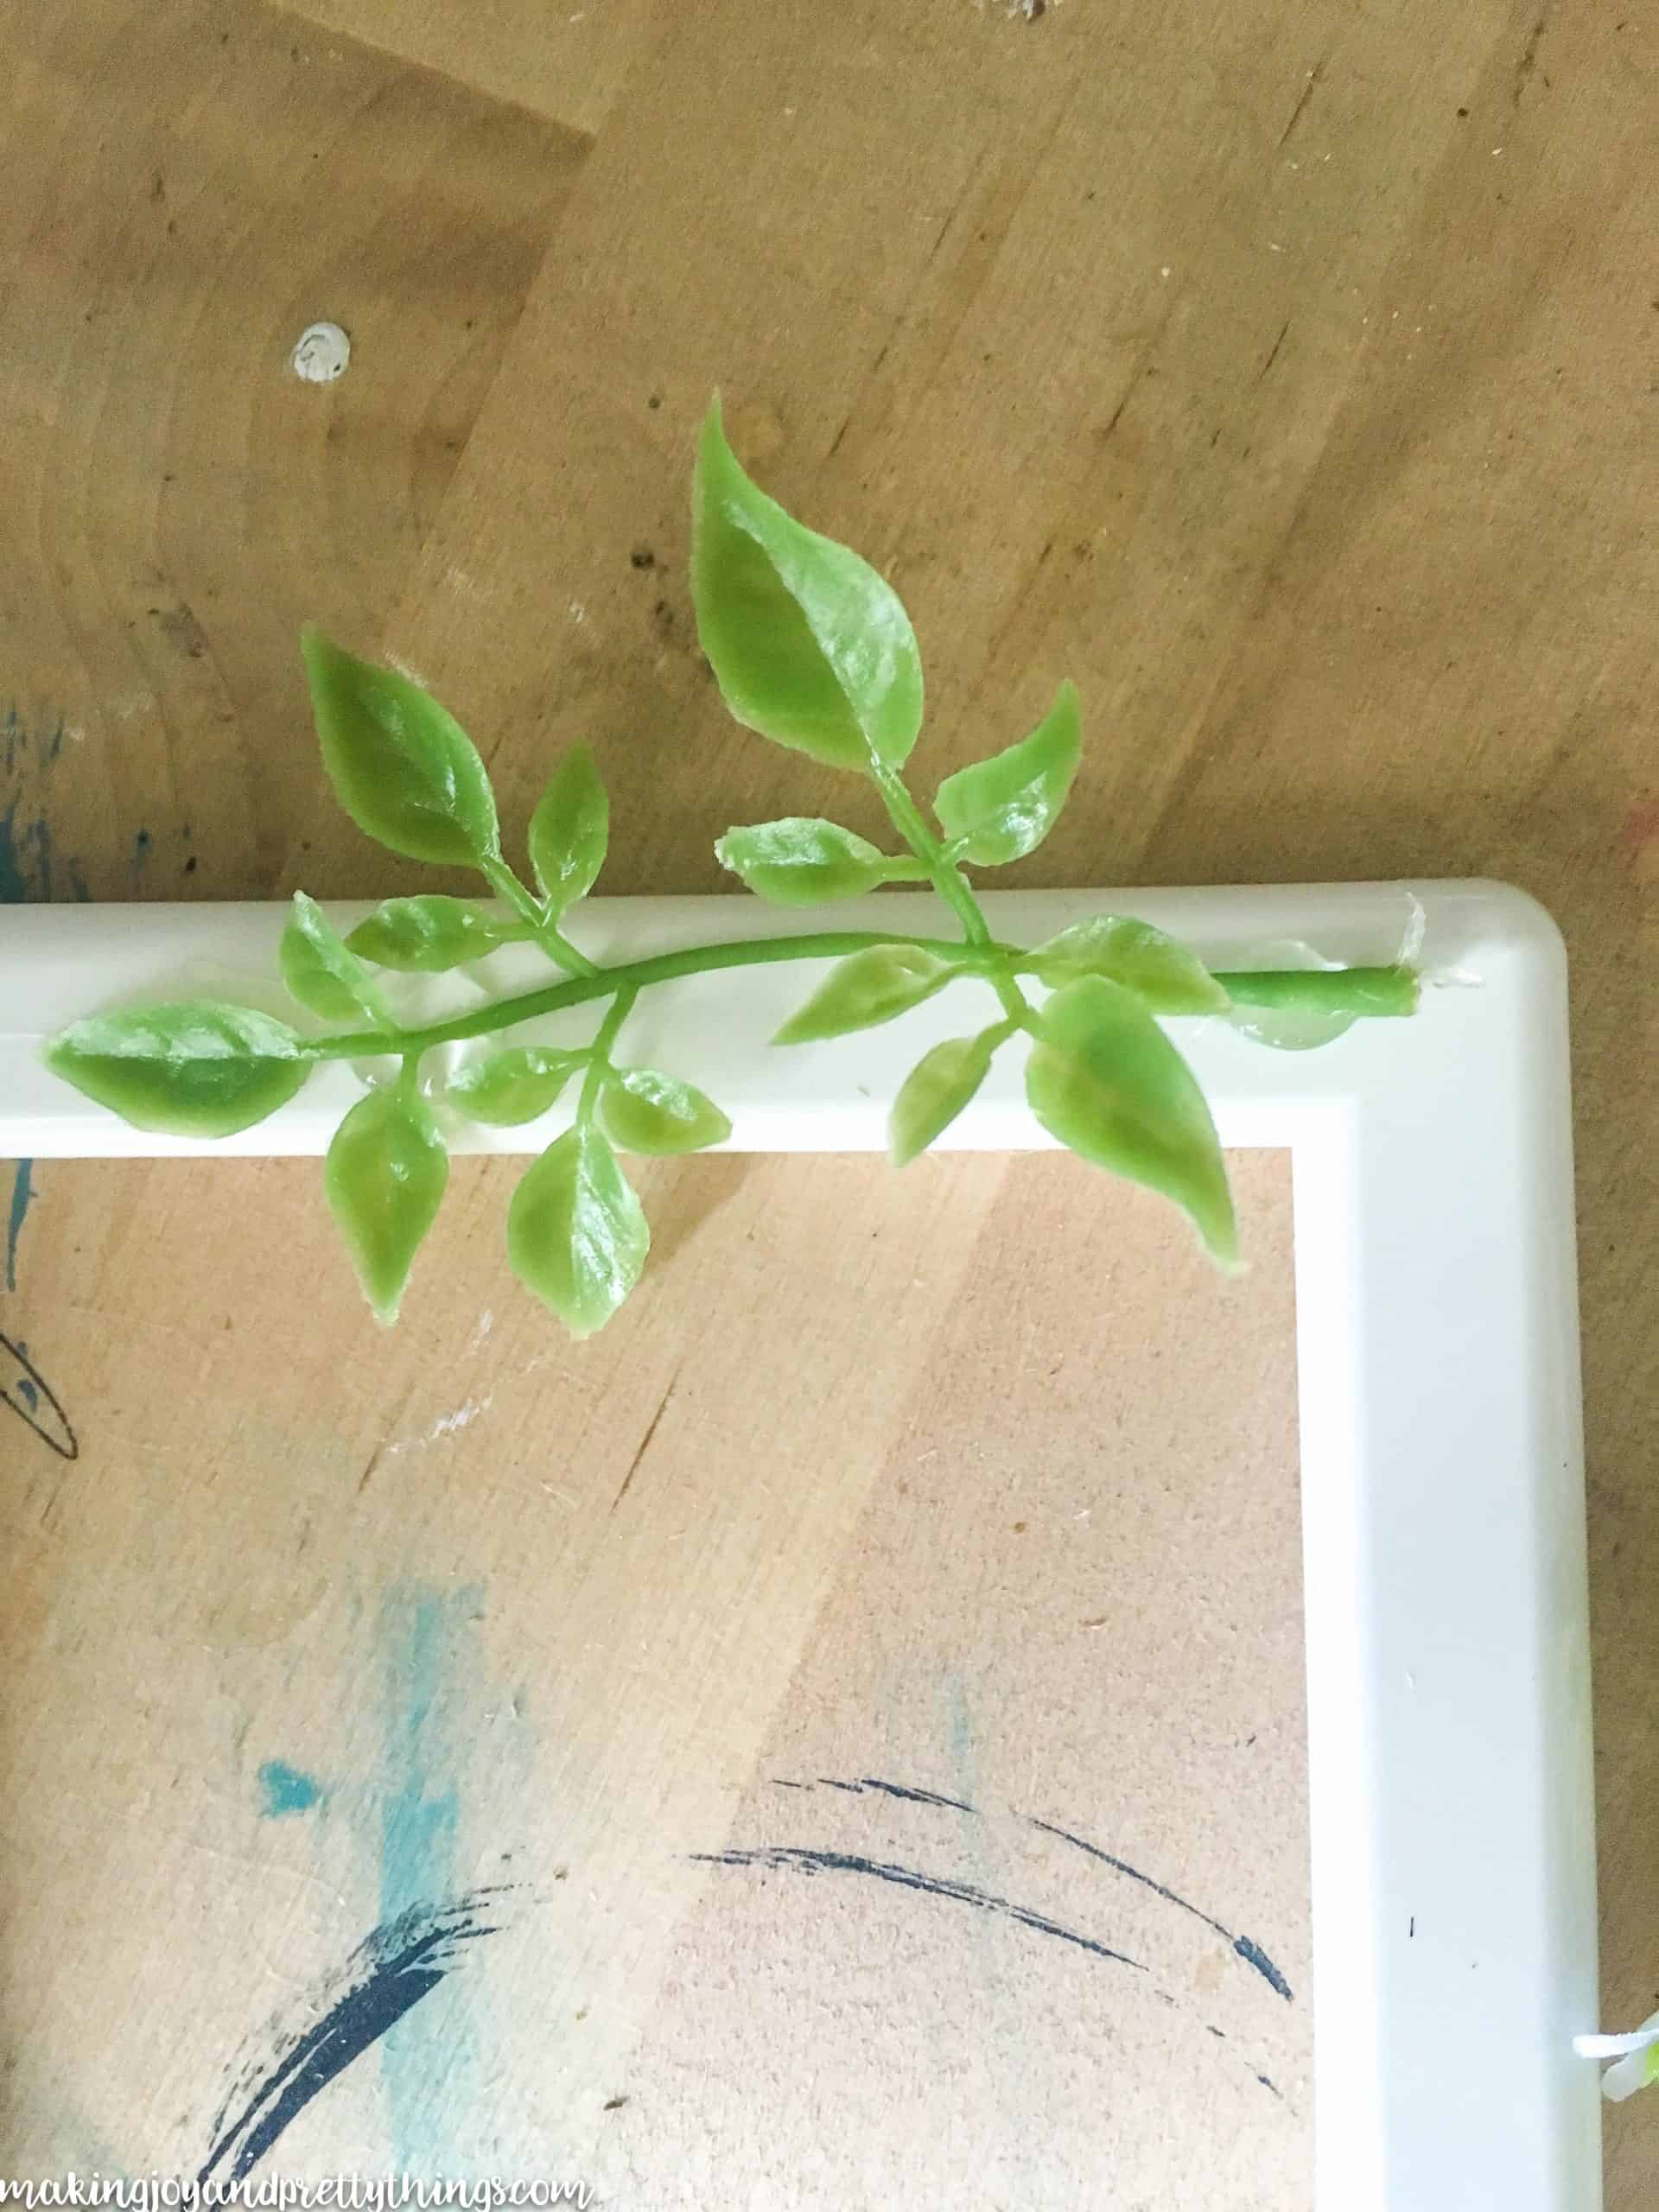
I actually did this step quickly enough that I didn’t need to apply any more glue. I simply placed the white flowery pieces over the greenery-only pieces (sorry for these weird names), and there was enough glue to hold them as well.
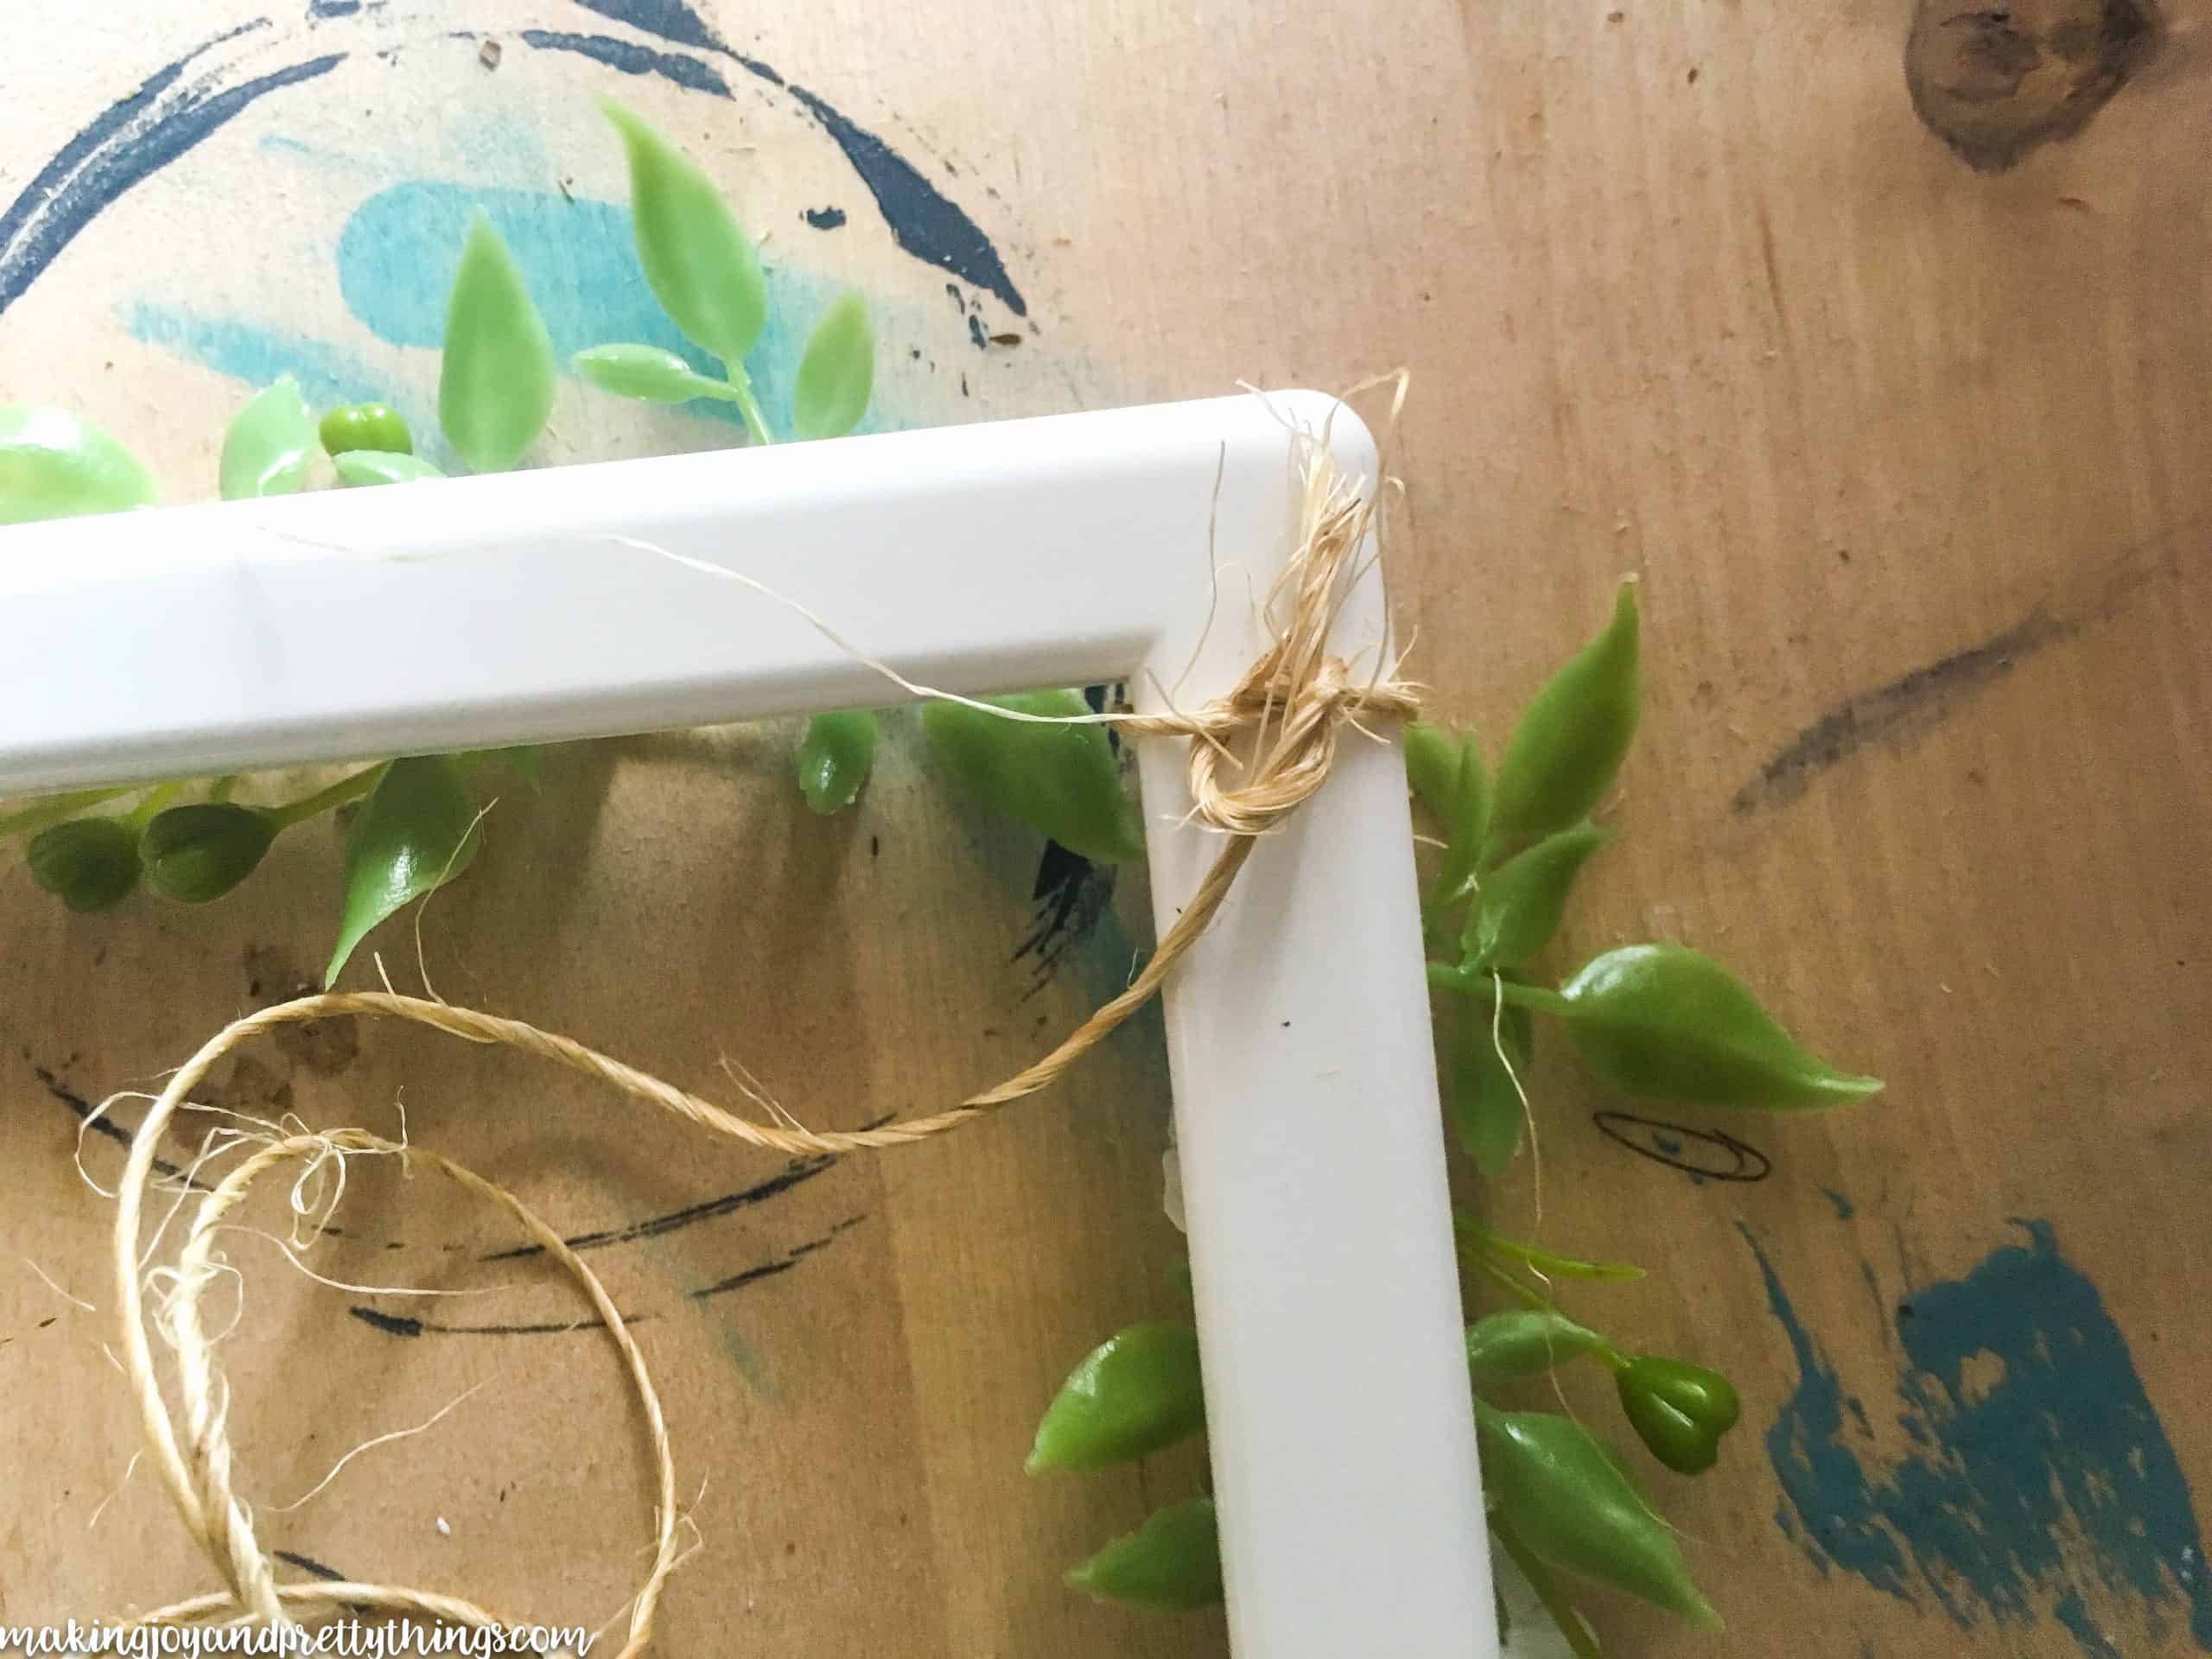
Step 3: Add twine to hide the bare stems.
I loved how the flowers looked, but, not necessarily the bare stems in the corner. I decided to wrap the end in some leftover twine I had from a previous project.
I wrapped the twine around the corner and tied a simple knot.
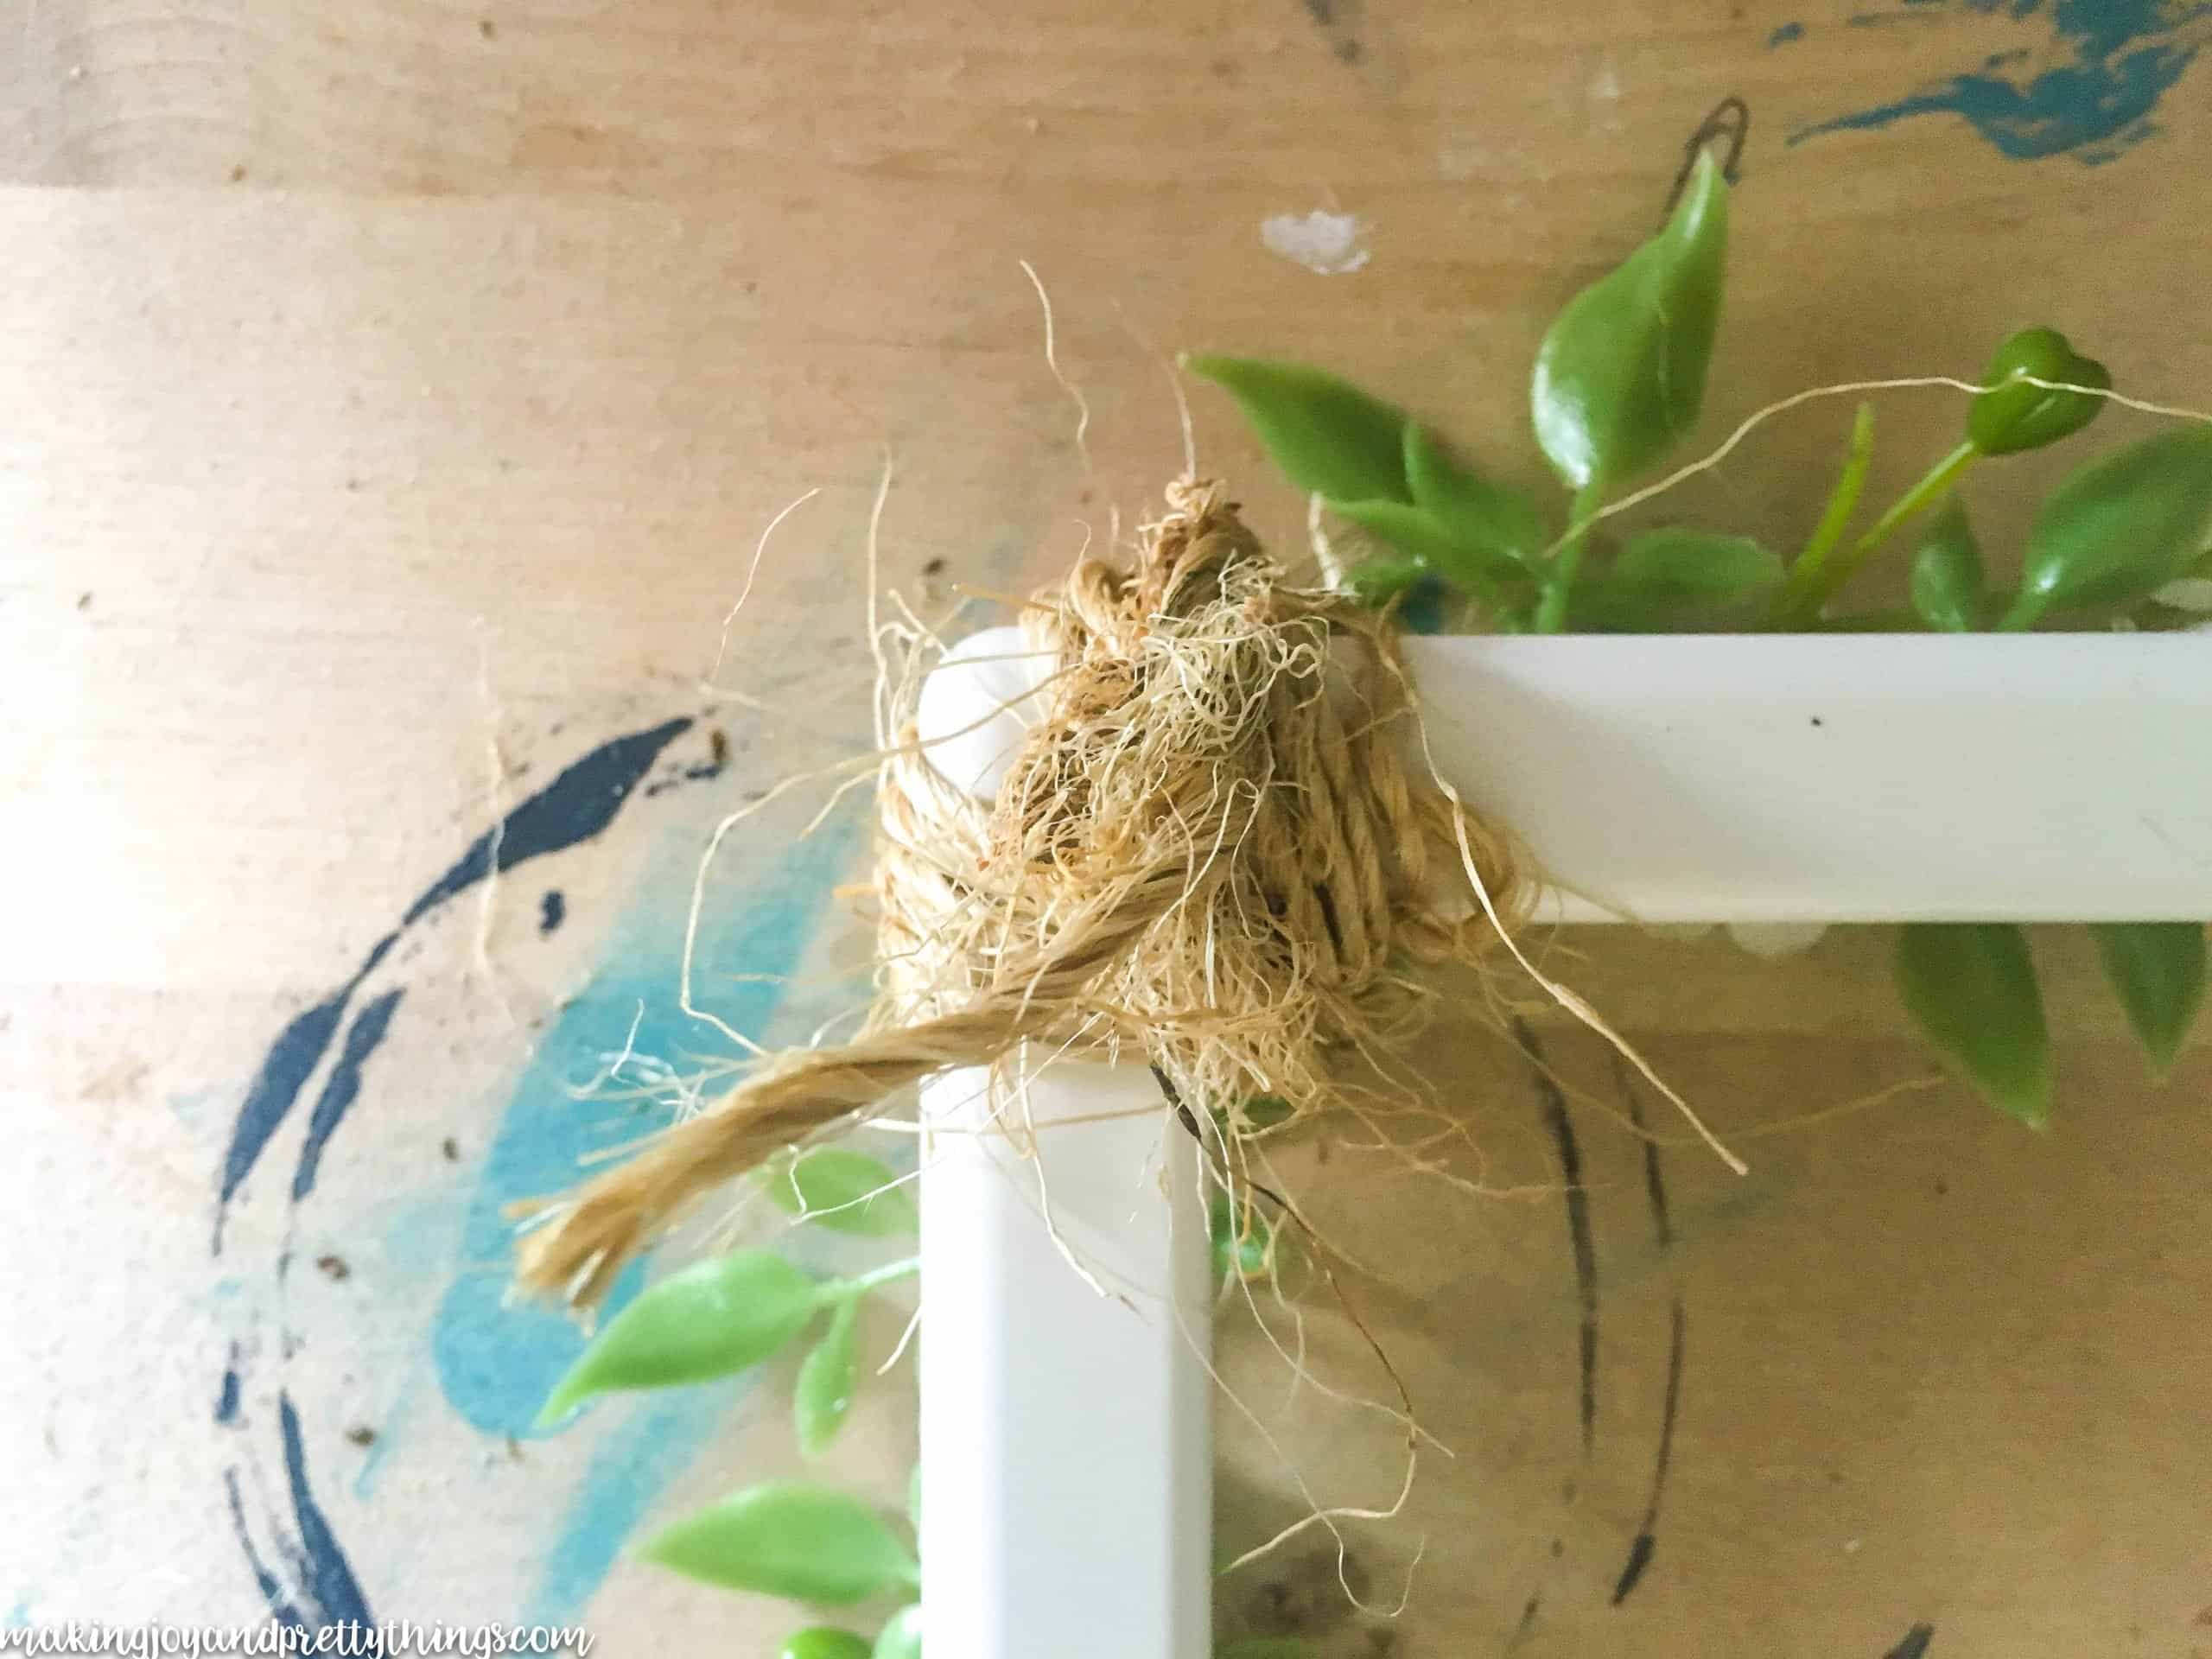
I wrapped it around the corner about 10-15 times until I thought it covered the white part of the frame and stems enough.
And that’s it, my friends! I love how it turned out! So simple, yet it gives the perfect farmhouse feel in barely any time at all. Plus, it’s super budget-friendly!
The finished product: a simple, decorative farmhouse frame!


I’m so excited to continue with my “simple farmhouse decor” series. Find more simple farmhouse decor and crafts here:
- Farmhouse Style Upcycle: Painting Silver Trays
- Simple Farmhouse Decor: How to Make your own DIY Wood Bead Garland
- Simple Farmhouse Decor: Mini DIY Basket Labels
- Simple Farmhouse Decor: Upcycled Frame and Wreath
I hope you guys enjoy the series! Have a wonderful week!
Simple Farmhouse Picture Frame
This basic white picture frame is upgraded into simple farmhouse-style decor in minutes with some greenery and twine!
Materials
- White picture frame
- Faux greenery
- Craft twine
- Glue gun + glue
Instructions
- Separate out the greenery. You'll need 2-4 sprigs of ONLY greenery (no flowers), and 2 sprigs of greenery with flowers.
- Apply two dots of hot glue to the upper right-hand corner of the front of the picture frame, about two inches apart from each other.
- Apply the sprigs of greenery--the green-only ones first. Use another dot or two of glue to apply the rest of the greenery-only sprigs.
- Add the white flower sprigs on top of the plain greenery.
- To hide the bare stems, tie a string of twine around the stems, then tie off in a knot around the back of the frame.
- Insert your favorite photo, and you're done!


SUCH a cute idea!!! And I’m definitely looking forward to following along with this brilliant new series!
Thanks, Kristi! I’m so very excited and have a ton of ideas! So glad you will follow along 🙂
Ha, this looks so easy. I love the farmhouse touch. It is amazing how simple things can add beauty to a home.
Thanks, Zan! I’m a huge fan of the simplicity and beauty of farmhouse decor. You could probably label it an “obsession” 🙂
Even though I’m not a farmhouse decor kinda girl (I know I’m like a leper haha) these are simple and sweet and would look cute in any type of decor!
You are the first leper (haha!!) I’ve met you doesn’t love farmhouse decor! But, thank you 🙂
Very pretty, Sarah! I have several of these little frames that I use for parties and showers, this is a perfect way to dress them up. Pinning!
Thanks Lora! I feel like everyone has one or two lying around their house. When they’re only $0.99 it’s hard to pass up! Thanks for the pins 🙂
Love that you’re doing this DIY blog! Love the farmhouse stuff so far!
Ahhh thanks Meghan!!! I’m so happy you found my little corner of the blog world. I’m completely obsessed with farmhouse stuff, so you can expect more of that. I hope you and your cute little family are doing well!
These are so cute! Question: how do you get the picture in once you’ve wrapped the twine? It’s wrapped around the frame, right? I can’t figure out how the picture will make it past the twine… unless I’m missing something – which is a good possibility ?