
One Room Challenge {Week 4}: How to Install Cement Tiles
Are you interested in using cement tiles in your next project? Check out everything that we learned while installing cement tiles during our shared boys’ room renovation.
I cannot believe we only have 2 weeks left in the challenge!!! We are actually right on schedule to finish on time – I’m so relieved.
We have tackled almost all of the big projects and mostly just have finishing work to do.
Honestly, I’ve been completely slacking with some of the design elements these past two weeks and really need to pull it together. What good is a finished room with no decorations??
If you’re just stopping by today or if you want a quick refresher on what we are doing, head over to the previous weeks to see where we started and the progress we have made so far!
Catch up on the boy’s room renovation here:
Week One // Week Two // Week Three // Week Four (you’re here) // Week Five // Week Six (Reveal)
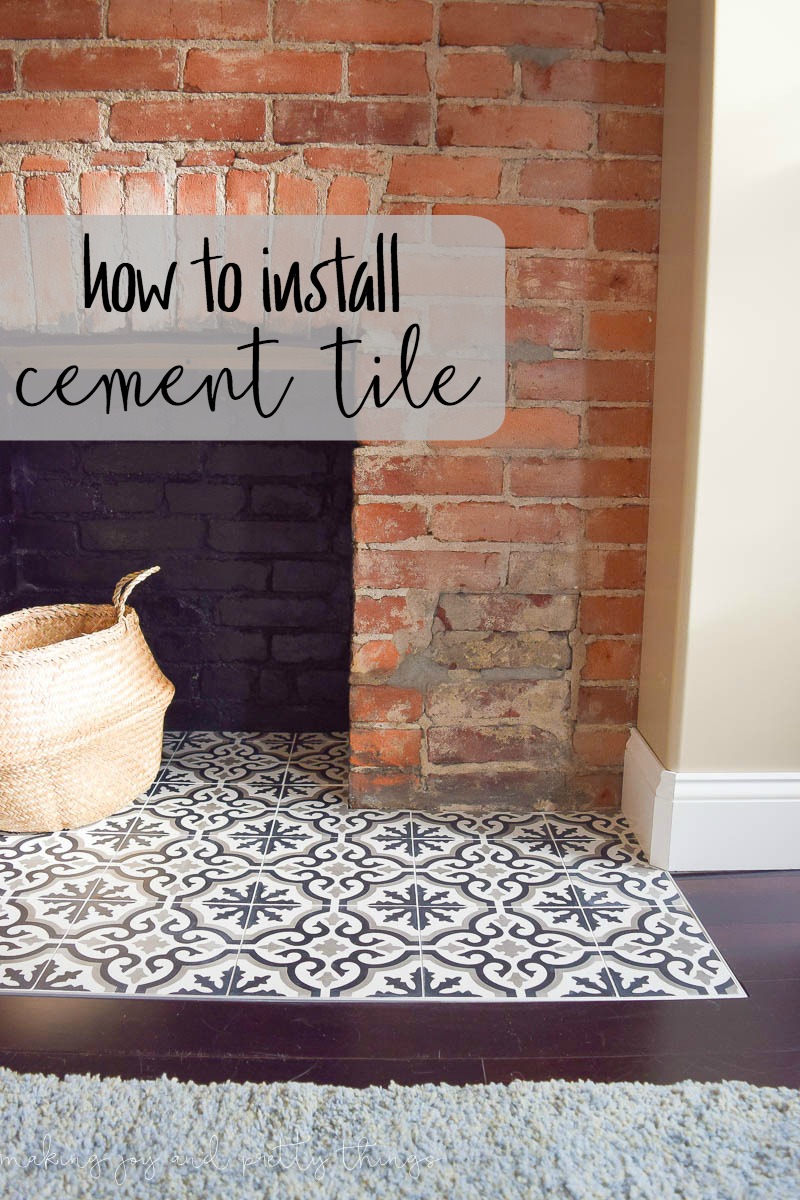
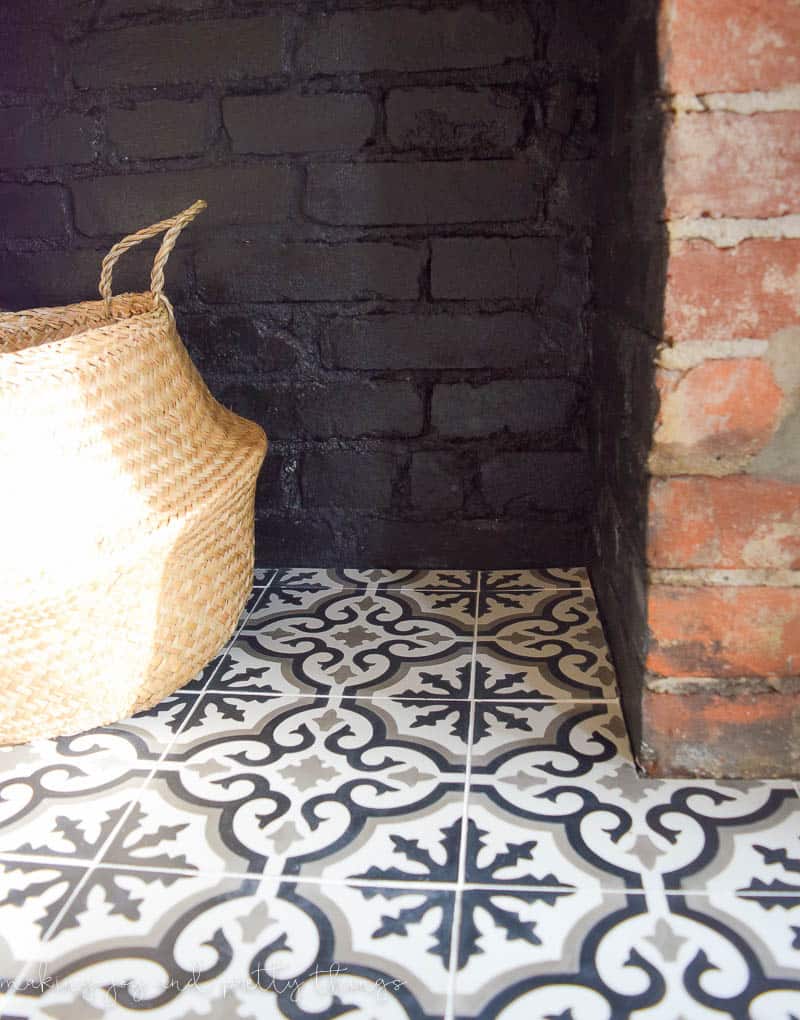
This week was all about finishing the interior of the fireplace and installing the cement tile hearth.
I posted earlier this week about my newfound love for cement tile (and where to use it in your home). Well, I thought I loved the tile when it was just in the box.
I’m completely blown away by how it looks installed and finished. This little unfinished area has been bugging me since we moved in almost a year ago. I can’t imagine a more perfect tile for the space. I may even sleep right there on it.
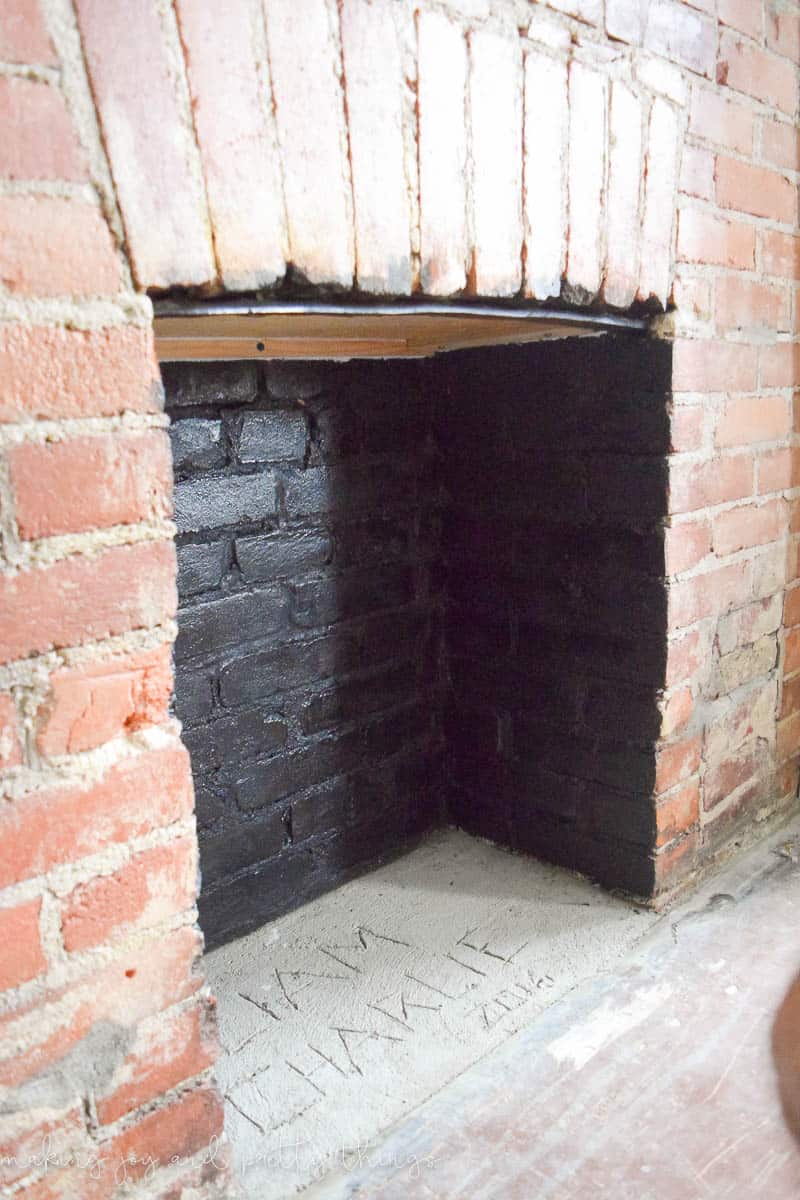
Let’s back up. Here is what we started with:
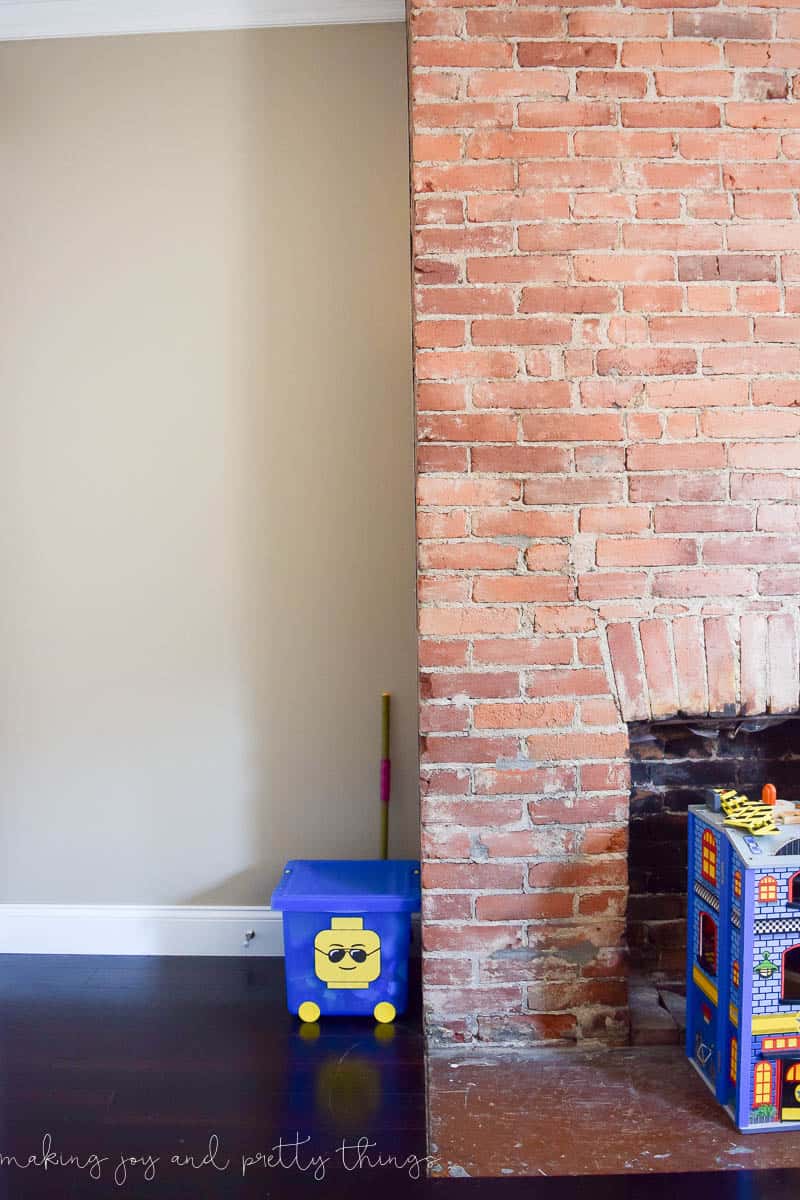
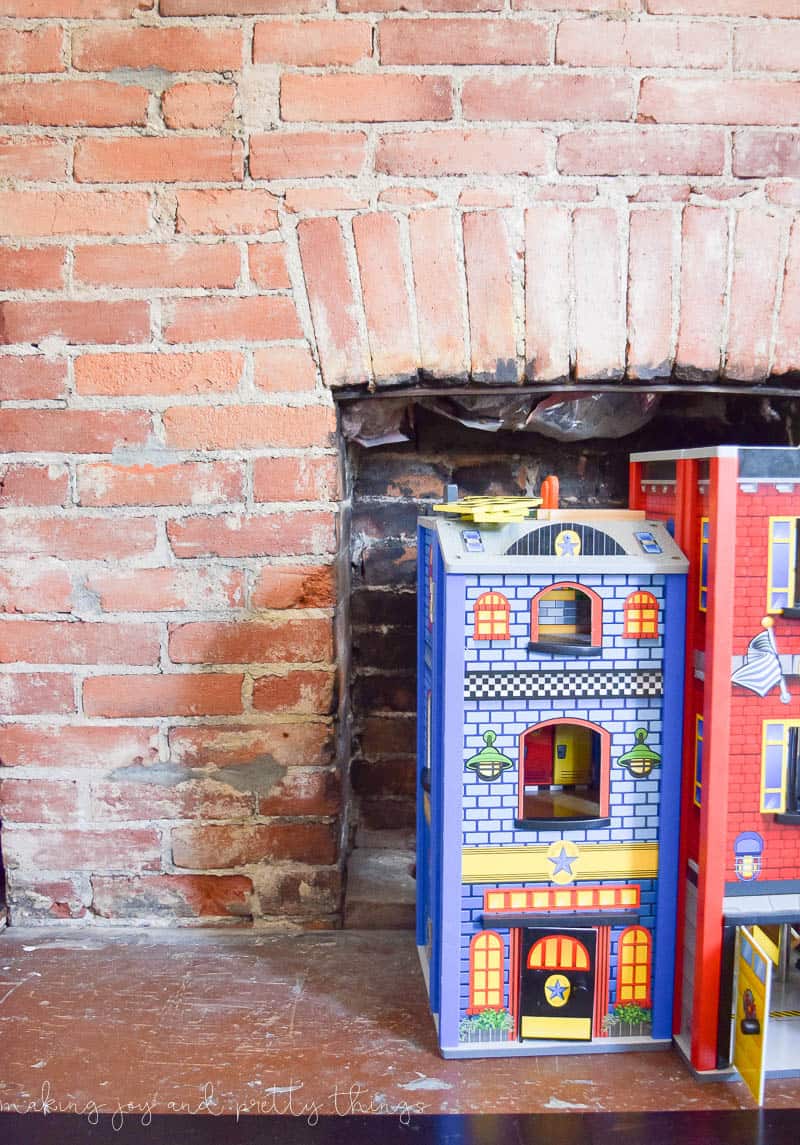
Yes, that is insulation falling out of the top. Scary, right?
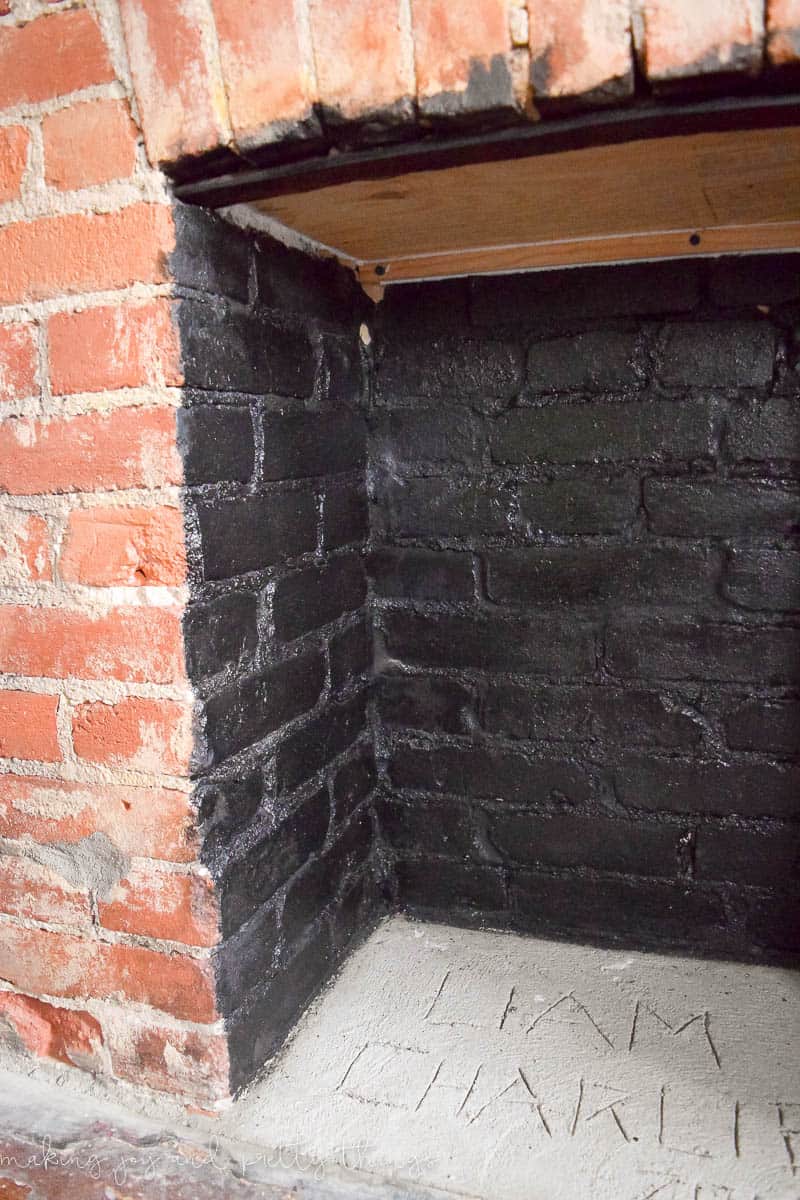
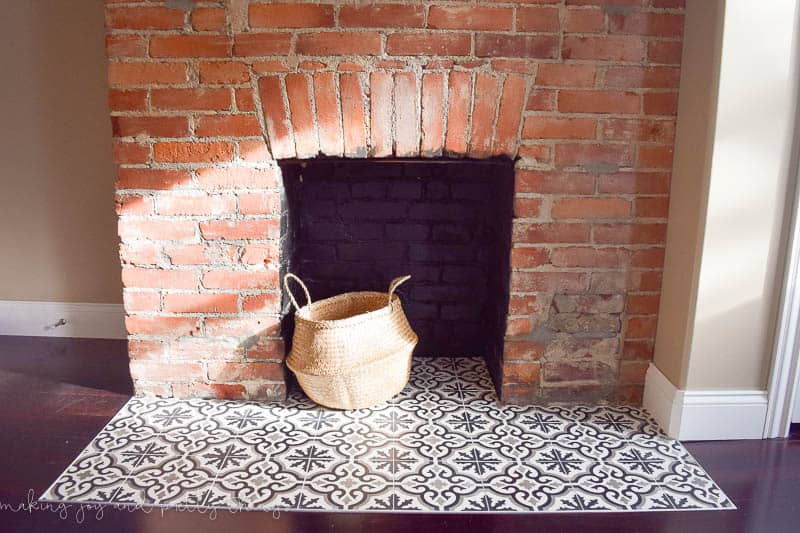
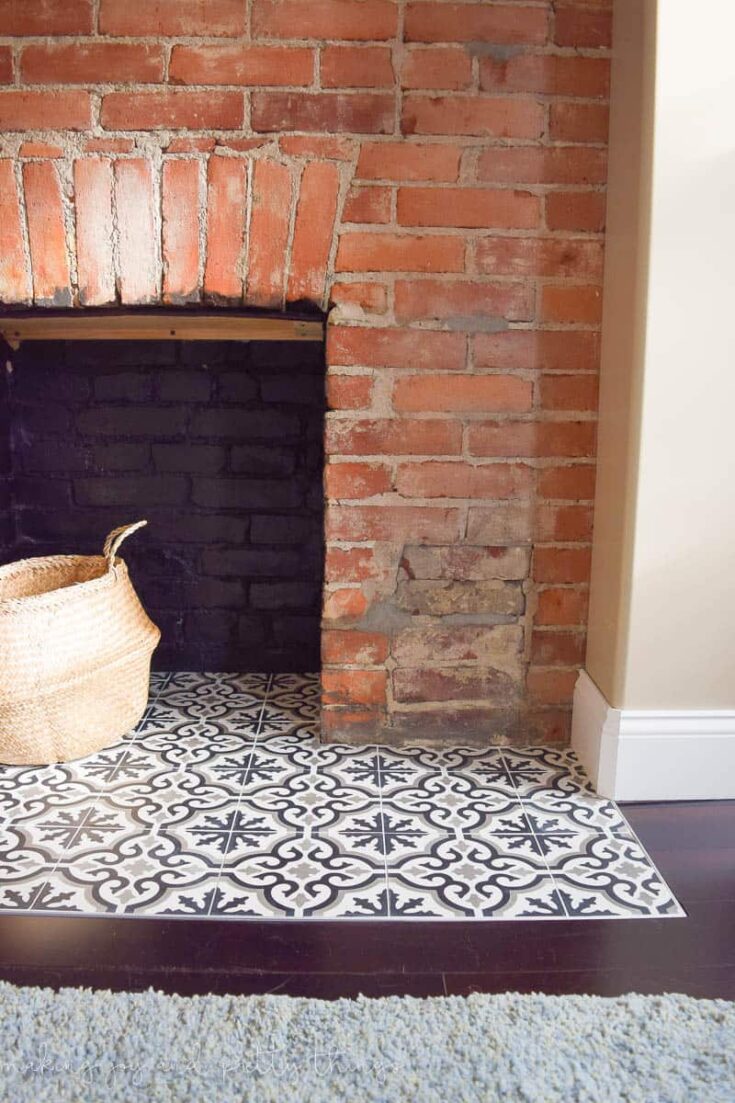
Here is what it looks like today:
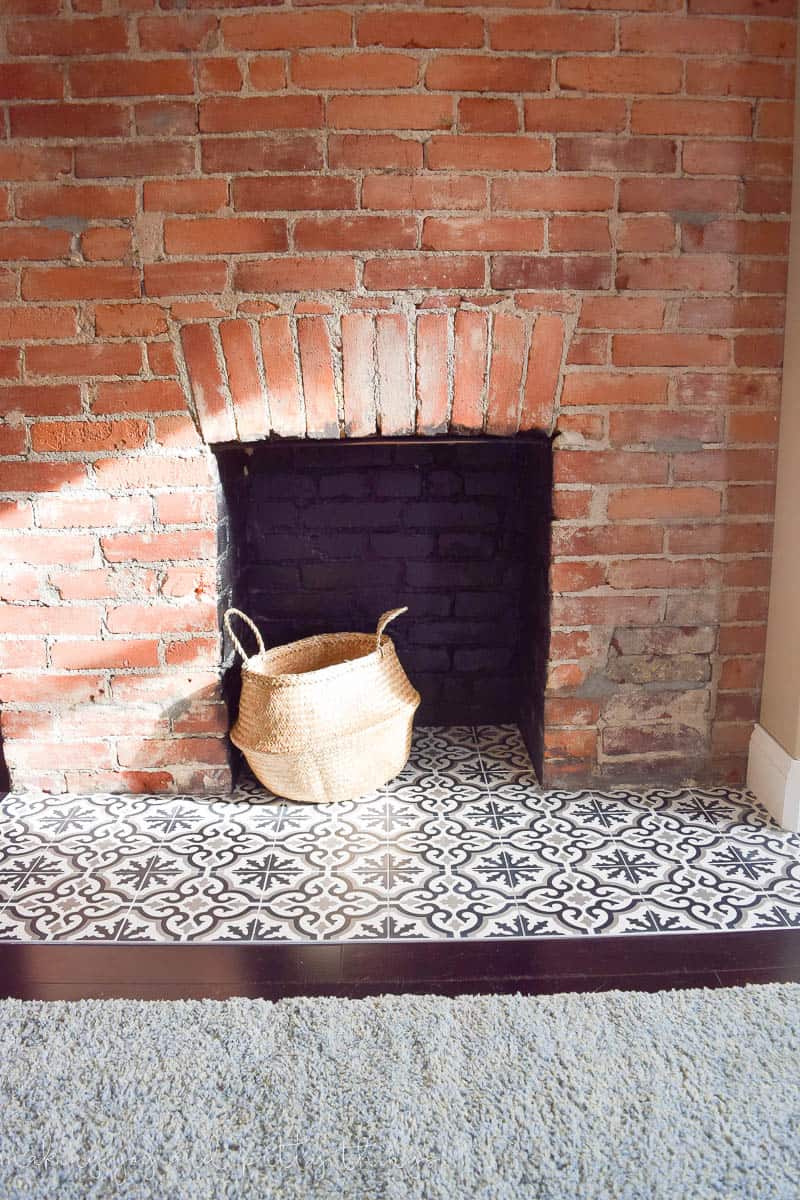
ALL the heart eyes, my friends.
If you know the general process of installing tile and want to just know specific tips for installing cement tiles, skip to the bottom of the post 🙂
This post contains affiliate links. Please, click here to read my disclosure policy.
How to Install Cement Tiles in a Fireplace Hearth
Supplies for installing cement tiles:
Step 1: Prep the Fireplace Hearth
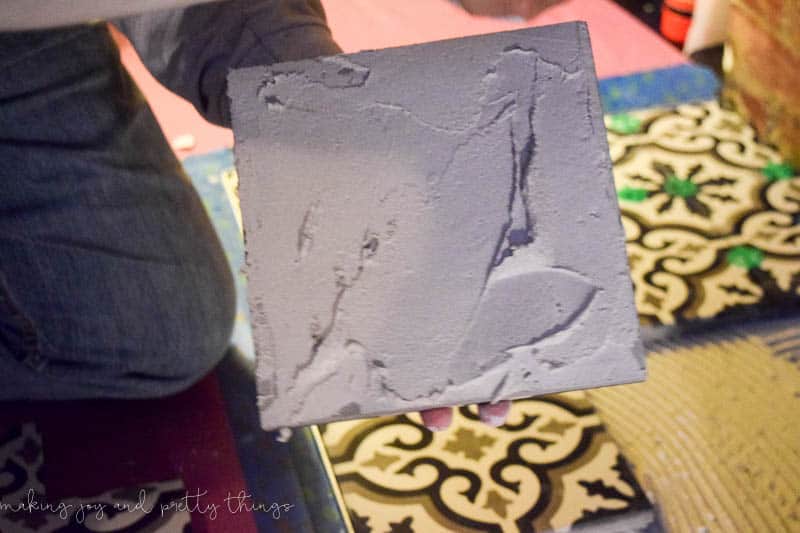
First, we started by creating a level surface from the hearth to the inside of the fireplace. Since the hearth was already concrete and level, we used quikrete to level the inside of the fireplace with the hearth.
I found this full guide on how to use quikrete which seems pretty extensive. For our purposes, we poured in the concrete and used concrete tools to level the surface.
Next, we painted the interior bricks with a satin black enamel paint. The bricks were so damaged we couldn’t clean or salvage them. Luckily this paint only required one coat!
Lastly, for the prep work, we used a piece of plywood to fill in the opening to the top of the chimney to hold up all the debris and keep the kids from trying to climb the chimney looking for Santa. {This still needs painted black}
Already doesn’t look like it’s straight out of a horror movie anymore!
Step 2: Prep the Cement Tiles + Measure
Next, it was time for the tile!
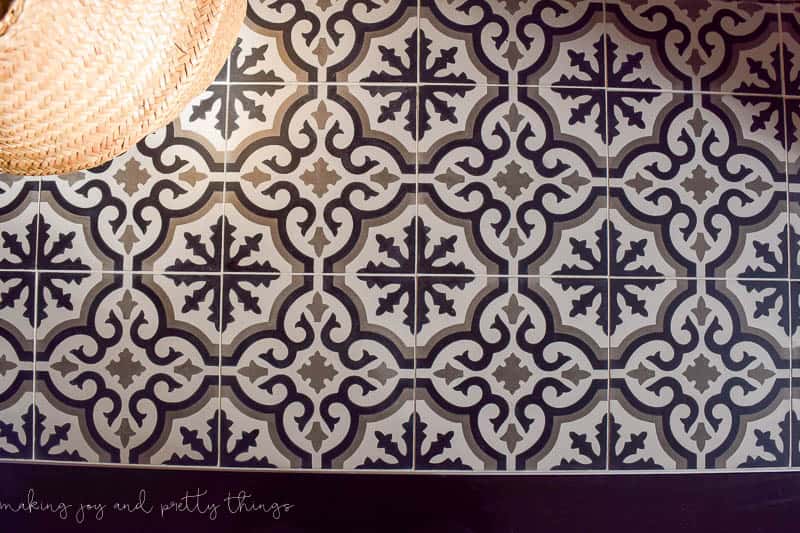
We chose this gorgeous tile from The Tile Shop! I wanted something that looked as though it could have been original to the house – so something a bit more traditional looking.
{But, if you aren’t a fan of that tile, I linked to TONS of other cement tile styles in this post to choose from}.
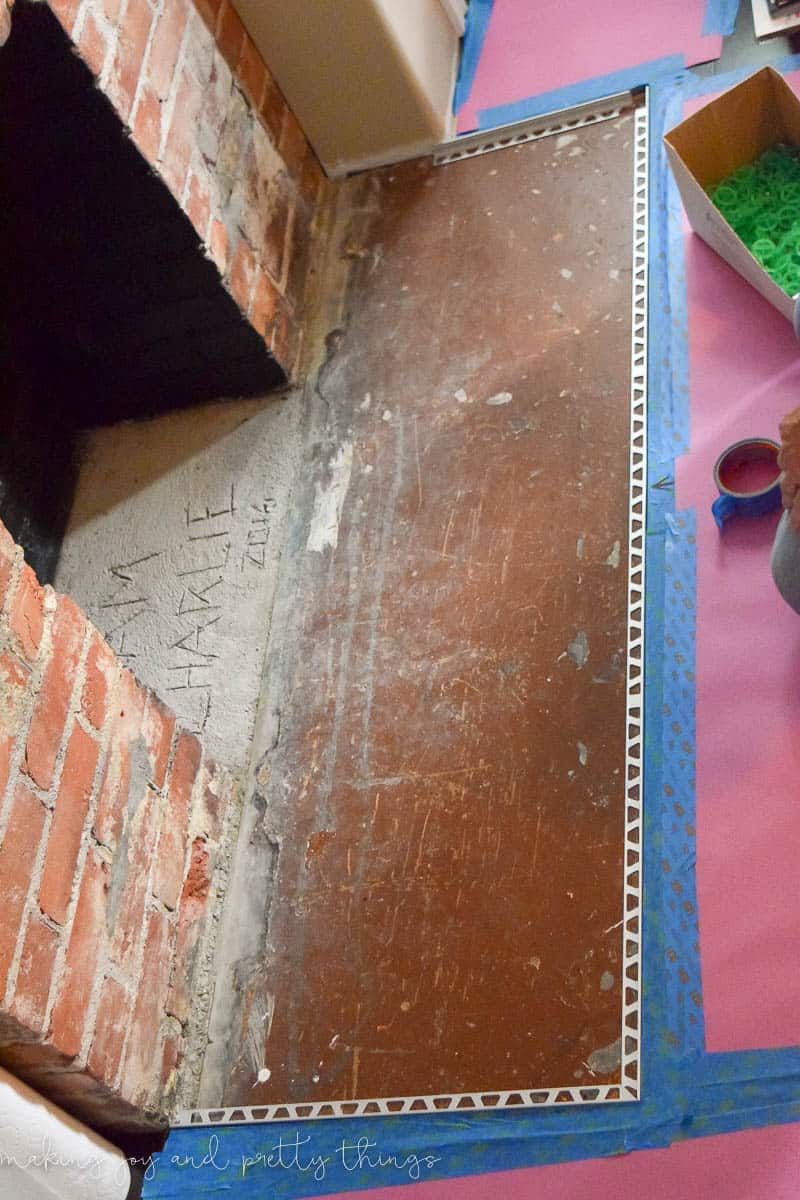
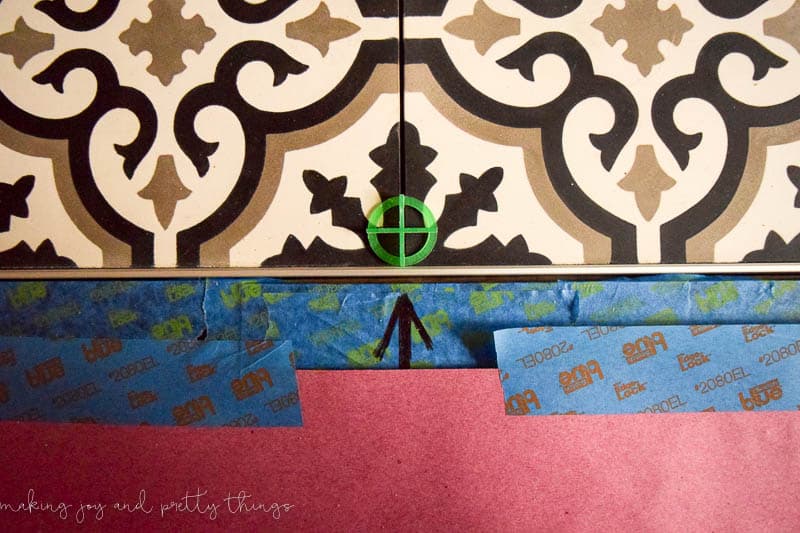
The tile came in, and we were all set to install it when we realized we needed tile edging to separate the tile from the wood.
There are several ways you can separate tile and wood, but we went with an aluminum edging trim that of course had to be specially ordered.
We liked this specific trim because it basically goes unnoticed. You probably didn’t even see it in the picture from above. They make it in different colors and different “metal” colors, too.
Once we had the trim in hand, we measured the hearth and cut it to the correct length. We ended up with three pieces: two short ones for the sides and one long one for the front. Make sure you cut the trim at a 45-degree angle for an interior corner so the pieces don’t interfere with each other.
We started by laying out the tile to see what arrangement looked the best and also measured which cuts we would have to make.
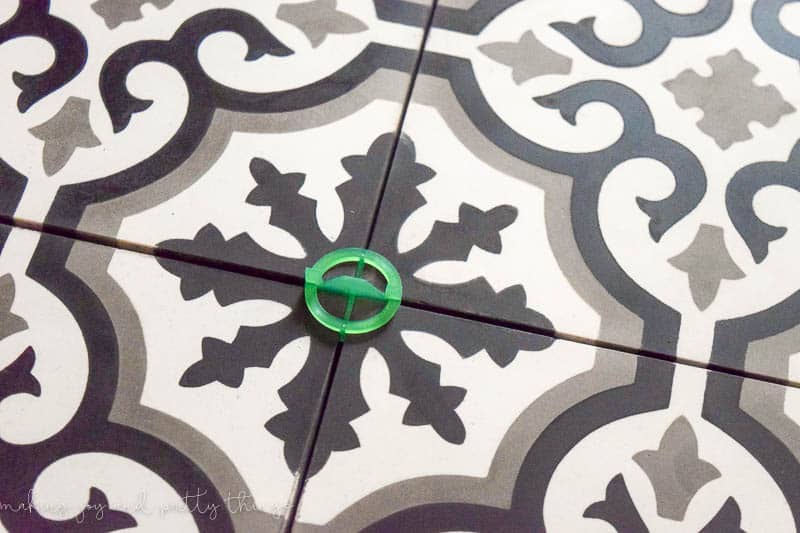
We used these spacers in between the tiles.
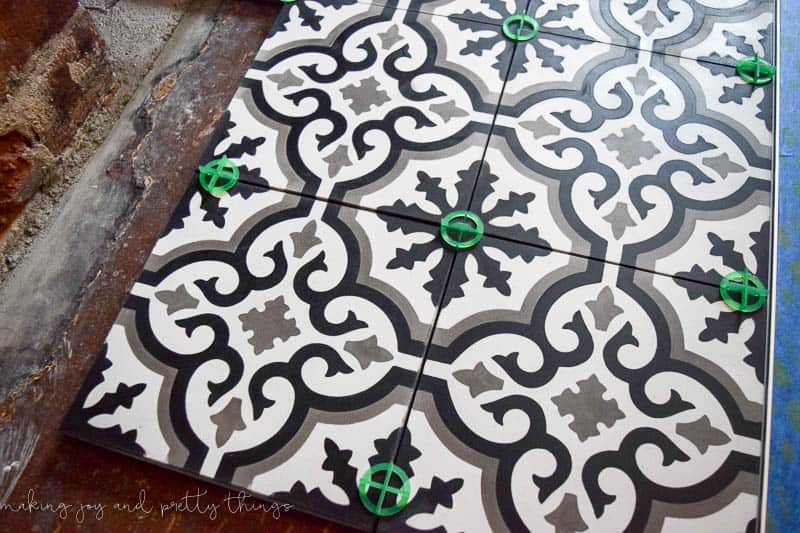
Then, we removed all the tiles and used a wet tile saw to cut the tile to fit around the edges.
We marked where the middle was so we didn’t forget!
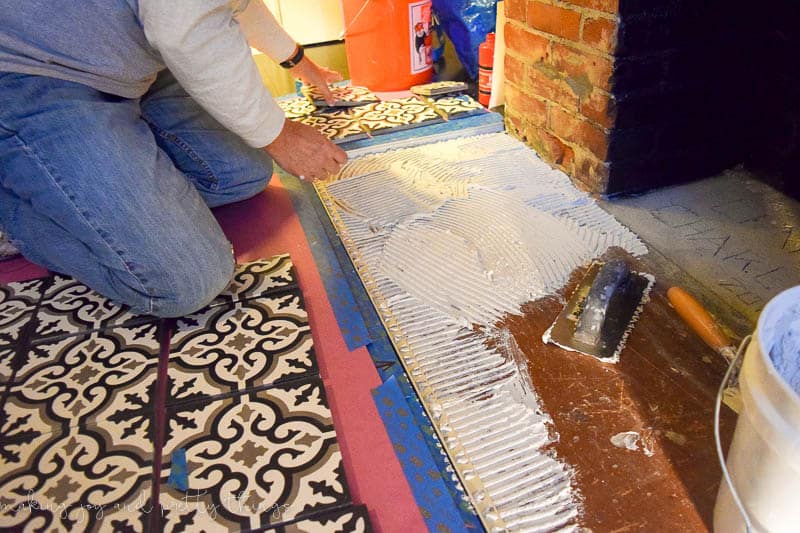
Step 3: Lay Down the Mortar & Install the Cement Tiles
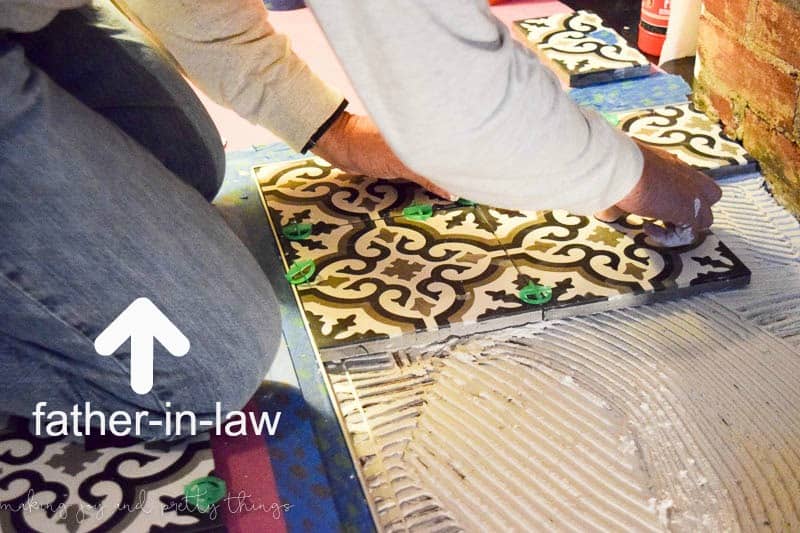
Next, we installed the tile using Thinset Mortar and a square notched trowel to spread the mortar. Apply an even layer to both the surface and the back of the tile.
Remember to place the tile spacers back in between the tile!
We didn’t need to lay anything under the tile since it didn’t need to be waterproof and the surface was already flat. You *may* need something if you’re using the tile in a bathroom or kitchen or on an uneven surface.
Rough idea of how much mortar to put on:
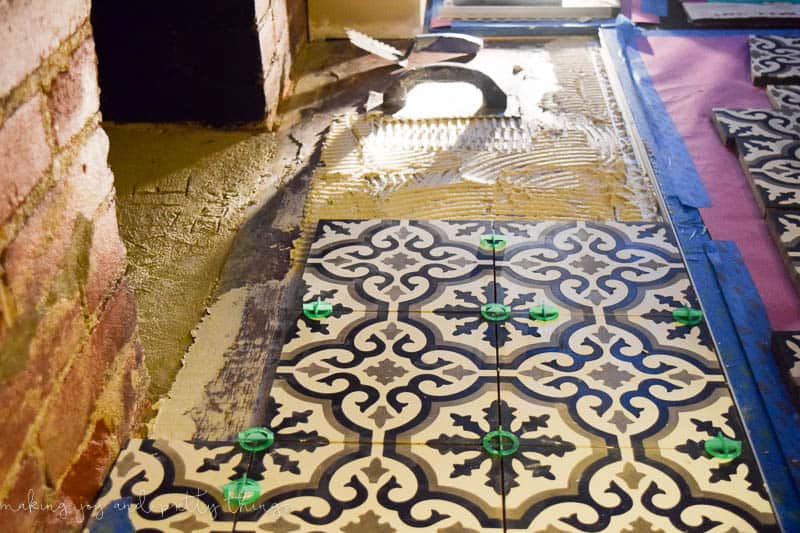
We wiped the excess mortar off the top of the tiles and let them dry!
Step 4: Apply a Tile Sealer
After a few days to dry and set in place, we applied a sealer over the tile.
We followed the manufacturer’s directions using a rag – wipe on, wait 5 minutes and wipe off any excess with a dry rag, then wait 30 minutes and reapply. We then let the sealer dry for a few days.
Finally, we grouted the tile! We used unsanded powder grout and a rubber grout float tool to apply the grout. Work in small sections and wipe off any excess with a wet sponge.
And …. ta da! Installing cement tiles wasn’t super easy or quick, but it sure made a huge different to the character of the room!
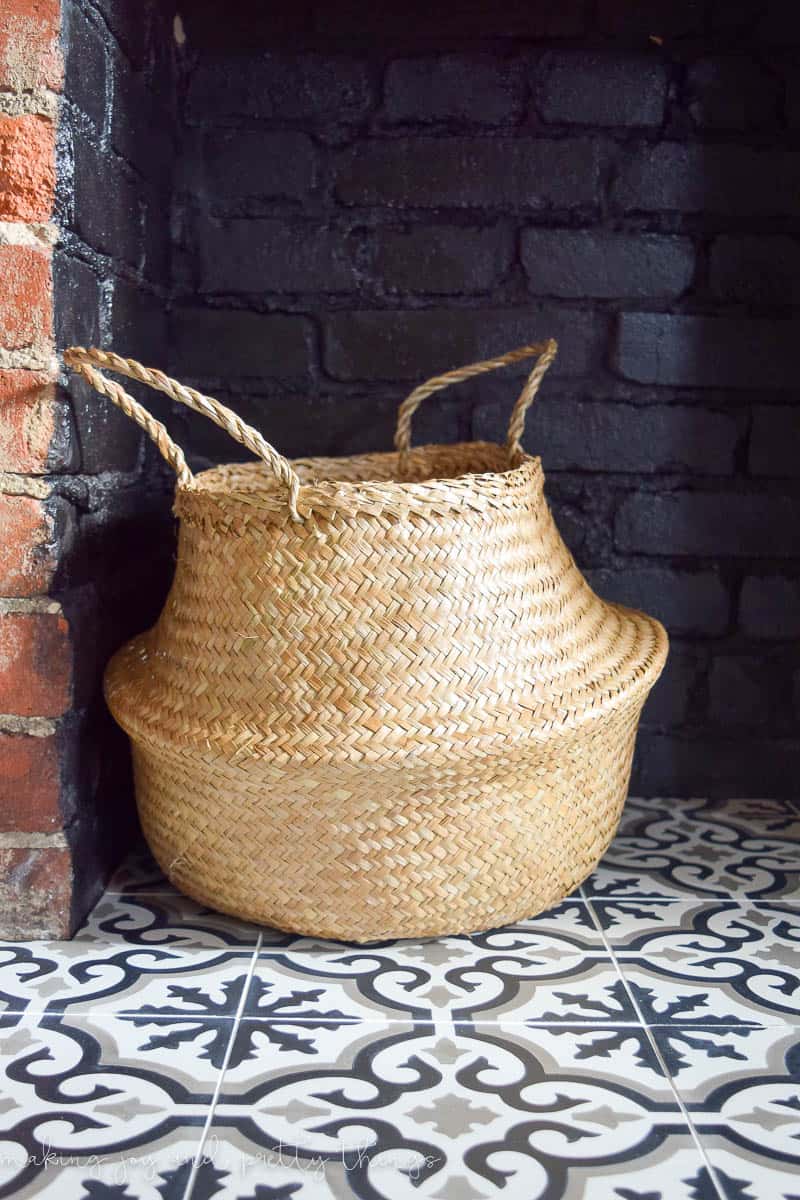
I. Am. Obsessed.
It came out perfectly.
Pro-Tips for Installing Cement Tiles Flawlessly
So, specifically for CEMENT TILE, here are a few tips we came across to help:
- Cement tile is NOT presealed so make sure you seal tile before grouting
- Use unsanded grout with a tight joint of 1/16″ – 1/8″
- Use white or light-colored grout (dark grout can permanently stain the cement tile .. yikes!)
- Find the nearest father-in-law to help (mine’s taken so find your own!) … but seriously he helped SO SO SO much, well, basically did the whole thing — THANK YOU!
- Here’s a more detailed guide I found for using cement tile
Let’s review our One Room Challenge task list:
clean out room (toys,clothes, old books, etc)build under-bedtrain tablebuild shelves for closetadd storage and functional design to the closet– check out the mini DIY basket labels in the closet hererepaint dresser and add new hardwarebuild reading nook tent frame- sew reading nook tent
sew reading nook floor pillowsmake gallery wall for above dresser- design reading nook area (where books go, etc)
- add lights to the inside of reading nook
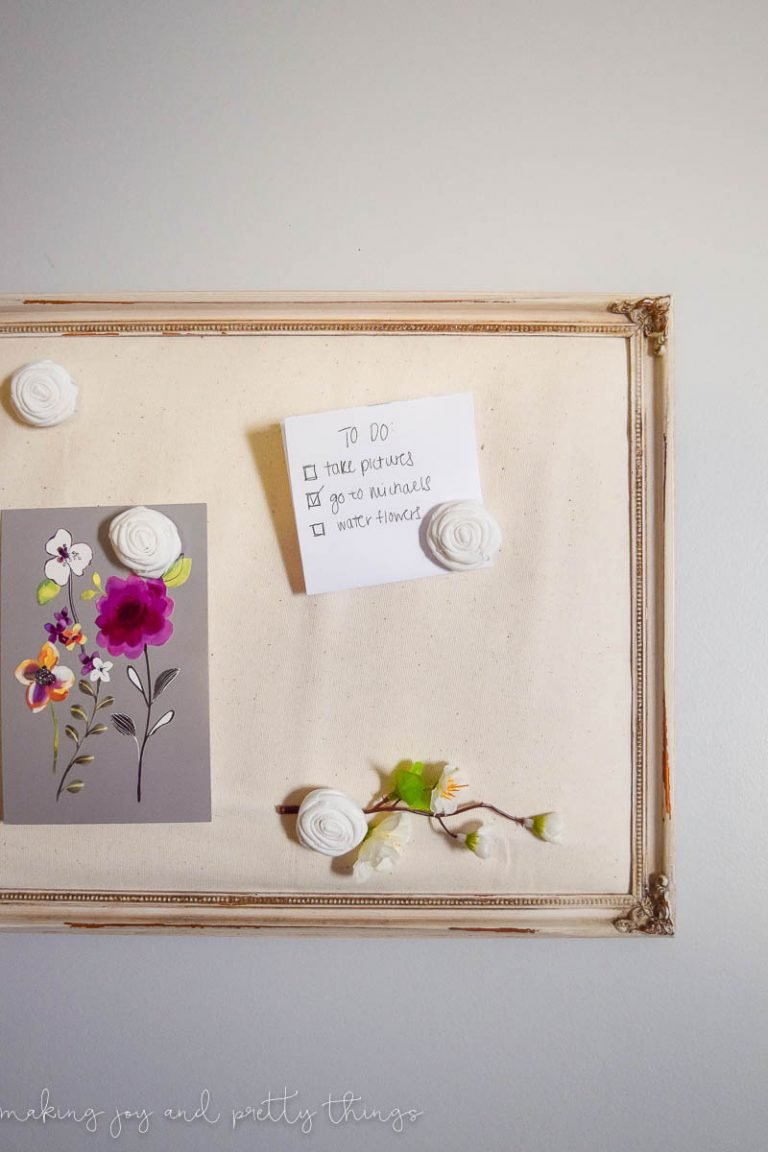
- build magnet board
- install buckets to hold magnets
make or buy curtain rod- hang curtains
install fireplace tilefinish interior of fireplace- make space felt board
- make name art for each boy
pick sentimental pillows/decor for each of their spacespaint/design letters to designate spaces- build craft table
- add craft table storage
buy craft table chairs- install wire hanging to display art work
disassemble old bed and assemble bunk beds
I’d say we are right on track! Which is pretty exciting.
On the plan for this week is finishing up the craft table and magnet board and start decorating! UPDATE: Check out the finished shared boy’s room here!
The reading nook tent is going to be the last thing we install and I cannot wait! Liam is already asking when it will be done so he can sit on the pillows 🙂 (not the point of the tent, kiddo!)
Remember to stop over to Calling it Home to check out the other One Room Challenge makeovers! I’m following so many blogger friends and I’m completely amazed at what they’re doing. Check it out!
I want to say THANK YOU again to our amazing sponsors! We are so lucky to have teamed up with some great companies!
Wishing you a joyful day!

Process for Installing Cement Tiles
Want to learn how to install cement tiles? Here's the step-by-step process we used to install cement tiles in our fireplace hearth.
Materials
Tools
- Concrete tools
- Wet tile saw
- Rubber grout float tool
Instructions
Step 1: Prep the Fireplace Hearth
- Create a level surface inside the fireplace and fireplace hearth. Since the hearth was already concrete and level, we used quikrete to level the inside of the fireplace with the hearth.
- Paint the interior of the fireplace with a satin black enamel paint.
- Lastly, for the prep work, we used a piece of plywood to fill in the opening to the top of the chimney to hold up all the debris and falling insulation.
Step 2: Prep the Cement Tiles + Measure
- Our hearth needed tile edging to separate the tile from the wood. We went with an aluminum edging trim that of course had to be special ordered.
- Once we had the trim in hand, we measured the hearth and cut it to the correct length. We ended up with three pieces: two short ones for the sides and one long one for the front. Make sure you cut the trim on a 45-degree angle for an interior corner so the pieces don’t interfere with each other.
- Lay out the tile to see what arrangement looks the best and also measure which cuts to make.
- Removed all the tile and used a wet tile saw to cut the tile to fit around the edges.
Step 3: Lay Down the Mortar & Install the Tiles
- Next, install the tile using Thinset Mortar and a square notched trowel to spread the mortar. Apply an even layer to both the surface and the back of the tile.
- Remember to place the tile spacers back in between the tile.
- Wipe the excess mortar off the top of the tiles and let them dry.
Step 4: Apply a Sealer
- After a few days to dry and set in place, apply a sealer over the tile.
- Follow the manufacturer’s directions using a rag – wipe on, wait 5 minutes and wipe off any excess with a dry rag, then wait 30 minutes and reapply. Let the sealer dry for a few days.
- Grout the tile with unsanded powder grout and a rubber grout float tool to apply the grout. Work in small sections and wipe off any excess with a wet sponge.


That tile is perfection! I would chose it in a heartbeat
Aww thank you Ariel!!! It was so hard to choose just one but we are thrilled with how it looks!
You guys did such a great job with this tile. It’s so easy to make tile look like a DIY job, which is why I don’t know that I could ever do it! I’m sure the spacers helped a lot. This looks amazing, and I love the tile you chose!
Aww thanks so much Brittany!! Thankfully my FIL is basically a professional so I give him all of the credit! I’m so glad you like the tile!
Sarah! That tile is SO amazing!!! I cannot wait to see how this all comes together in the end!
Thanks so much Kristi!! I’m so glad you like the tile we chose.
That tile is so beautiful! Wow! What a statment!
Aww well thank you!! I’m so glad you like it!
Sarah its GORGEOUS! I want that tile everywhere. I’m so jealous of your progress!!!
Thanks girl!! I do want to cement tile my whole house now. We are right on track – eek!! I’m so excited!
That tile is stunning!!!
Thank you!! We are really happy with how the tile looks!
Love the tile you picked!
Thank you!! I’m glad you like the tile!
I am obsessed too! That tile is stunning and you did such a great job!
Aww thanks Rachel!! We are thrilled with how the tile turned out!
Love this gorgeous tile!!!
Thank you so much!! We are so happy with the cement tile.
hey girl love those tiles! So cool!
Thank you SO much!! I’m so glad you like the tile, Shawna!
OMG! That tile is seriously gorgeous!
Thank you Crystal!! We do love our cement tile 🙂
I LOVE the tile you chose! It looks absolutely fabulous!
Thanks Amanda! I’m so glad you love the cement tile 🙂
Love the tile and the old brick of course! Good job.
Ah isn’t that brick amazing??? We are so lucky to have 3 other exposed brick fireplaces in our house!! But only one with a hearth we can tile 🙂 Thanks so much for stopping by!
Ahhh, those tiles are gorgeous! My dad is a Masonry so I am familiar with how to lay cement tiles (although I have never done it myself). Looks like your list has gotten so small now and I know that table and tent will be the bomb. I agree with your kid, pillows in a tent are the best!!
HAHA! Darn kids don’t care about the tile though 😉 We are surprisingly right on track to finish on time – I’m so excited!
The tile is so pretty!
Thank you SO much! We do love the tile!
Very moroccan tile, but it can go with anything, love it s much
Maria
Thank so much Maria!! We love how the tile looks next to the bricks!
I love it! We used cement tile as the backsplash in our kitchen. It is a show stopper for sure. I really love your choice to use in the fireplace. It looks great with the brick.
Oh my I’ll have to go check out your kitchen! I want to cement tile EVERYTHING now 😉 I’m so glad you like the tile!
Yes! I pretty much want to use cement tile as much as possible. 😀
Right?! Cement tile the whole house!
That tile is amazing!! Seriously cannot wait to see the rest of the room come together. And well done for being on target (I’m not so much myself, but still hoping to pull a lot of it together this week).
Aww thanks Lizzie! I am so surprised we are actually on time – not normally our thing 😉 You’ll get it all done!!!
I LOVE YOUR TILE!!!!!!!!!!! That is all. 🙂
HAHA! Thanks, Sarah!!
Oh wow!!! That looks amazing!! What a great upgrade! Pinning :).
Thanks, April!! The cement tile really makes the fireplace look amazing!
That tile looks amazing! What a transformation of that fireplace. Looks stunning!
Aww thanks so much, Erin!! The tile really did transform the entire fireplace area. I’m SO glad you like it!
Oh I love what you chose! The tile is stunning.
Thanks so much, Amy! We are thrilled with how the tile looks!
Beautiful Tile pick. Love the look.
Thanks so much!! I’m so glad you like the tile we picked!
I LOVE that tile! I dream about it being in my kitchen or bathroom one day. SO beautiful!
Thanks so much, Lindi!!! Cement tile would look so pretty in your kitchen or bathroom!
Hi Sarah. Wow what a huge change, its fresh, bright and interesting now.
I look forward to your final reveal, very nice. Pinned.
Thanks, Leanna!!! The tile really did transform the space. I’m so glad you like how it looks 🙂
This is gorgeous!!! I love the tile you chose! We have such ugly tile by our fireplace, you’re inspiring me to change it out instead of just putting decorations in front of it to hide it, ha!
Aw thanks so much, Meg! Yesss you should using cement tile by your fireplace!! Though, I can understand just using decorations to hide it, too!
Oh wow this looks so pretty Sarah! The tile is so lovely!! I can totally see why you are so in love with it. I am so excited to see what the final room will look like!!
Thanks so much, Sabrina!! I’m so glad you like the tile – I’m obsessed!
LOVE the tile choice, Sarah! And I love it paired with the brick.
Thanks, Lora!! I do love how the tile looks with the brick.
Wow that turned out so good I love the rustic feel. Very cosy and homey now all you need to do is sit in front of the fire with a cup of pumpkin spice latte and enjoy it
Would love to except it’s not a working fireplace 🙁 I can pretend though, right? haha!
The tile looks amazing and I love how you painted the inner part of the fireplace black! Looks soooo good!
Aww thanks so much!! The black interior really helps the rest of the space pop, I think. I’m so glad you like the tile!
The tile is soo pretty, I love how it all came together.
Thanks, Katy!! I do love the tile – it’s my favorite part of the room!
I love that tile! Those boys are so lucky to have such a beautiful room, hopefully they don’t try to go looking for Santa LOL!
Thanks Kati! I wish I could sleep in their room haha. Hey, don’t ever count anything out with these crazy boys 😉
It’s looking awesome Sarah! That tile definitely adds character.
Thanks Shani! I love how the tile turned out.
Thanks Shani!! The cement tile is my favorite part!
Thank you for this great article. We wanted to let you know about our company, Tesselle, which specializes in exclusive cement tiles. Check us out!
This looks amazing! I’m about to start a similar project and this is so helpful. Silly question, but the tile edge needs to be the same thickness as the tile?