
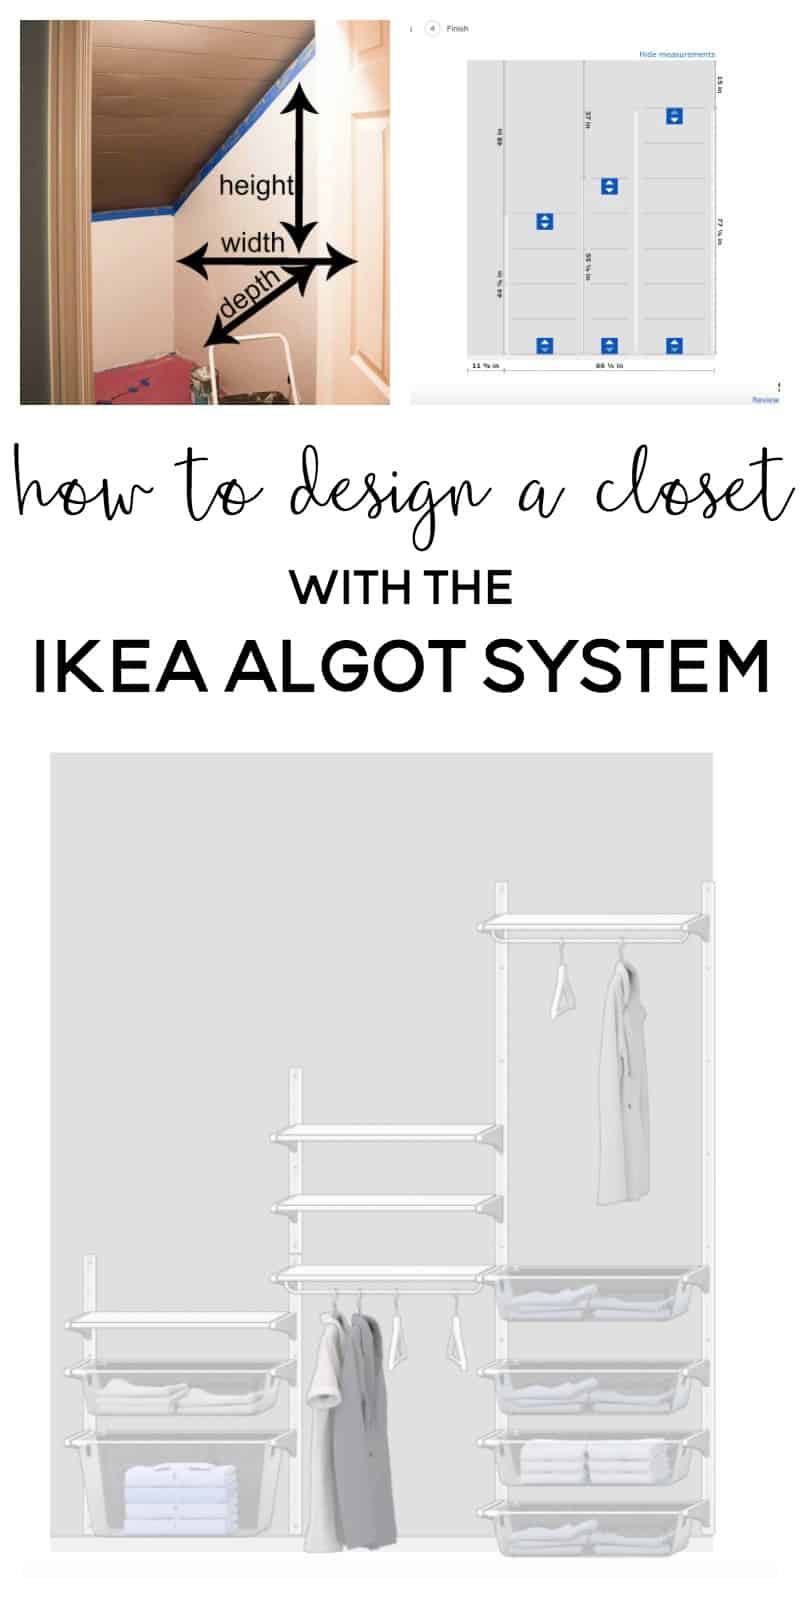
One Room Challenge {Week 3} – Designing a sloped ceiling closet using the IKEA Boaxel Closet System
We are tackling a sloped ceiling closet using the Algot Closet System by IKEA, which has been discontinued. You can replace with IKEA Boaxel sytem. Follow along for some serious inspiration as we go through week 3!
Welcome back for week 3 of the One Room Challenge hosted by Linda from Calling it Home.
We are halfway through our master bedroom sloped ceiling closet renovation and I couldn’t be more excited about the progress we my husband made this past week.
Catch up on the closet renovation:
In case you missed the first two weeks of our master bedroom closet renovation (design plan, cleaning, painting, and adding shiplap) check them out here:
week 1 | week 2 | week 3 (you are here) | week 4 | week 5 | week 6 (big reveal!)
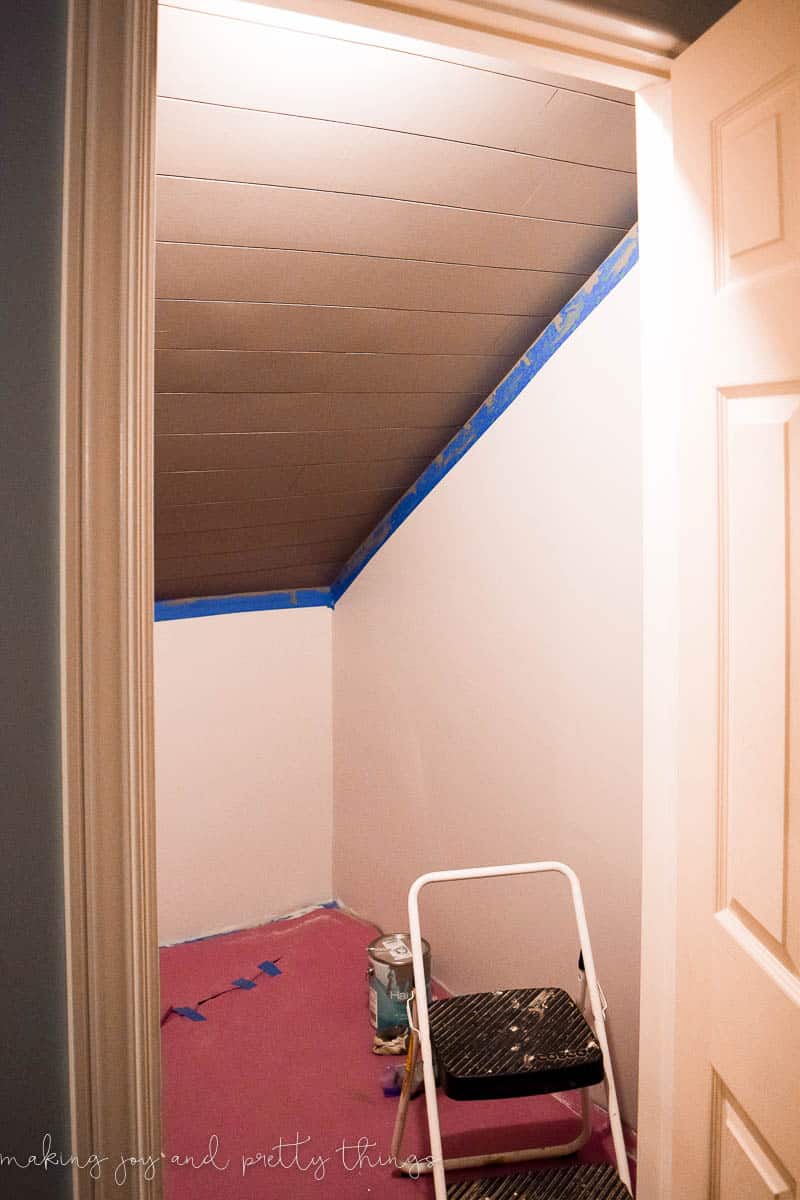
With the closet cleaned out, painted, and shiplap complete it was time to install the actual closet system!
Plan out your sloped ceiling closet with IKEA
I looked around for a while to try and find something that was both budget friendly and also functional/pretty in the space. Who knew closet systems were SO expensive?!
We also ran into problems with the size and shape of our closet. If you have a giant walk-in closet without a sloped ceiling, your options are pretty much endless.
But, given our tight space AND the sloped ceiling, there was almost nothing that would fit!
That’s when I stumbled upon the IKEA Algot system (which has since been discontinued, see note below). I loved all the customizable options, the price, and that it fits into our awkward space.
2025 UPDATE: IKEA discontinued to the Algot system, but it looks like you do something similar (with the sloped ceiling) with with the Boaxel line. So I’ve updated our blog post to reflect the similar BOAXEL verbiage, rather than “Algot”.
IKEA also offers the PAX System – which is a step-up in looks (and price) but wouldn’t fit in our closet because of that sloped ceiling. UPDATE: We ended up using the Pax system on our closet in our next house, check it out here!
How To Design A Closet with the IKEA Boaxel System
I’m going to walk you through how I designed our closet system so that you can do it, too!
Step 1. Measure sloped ceiling in closet
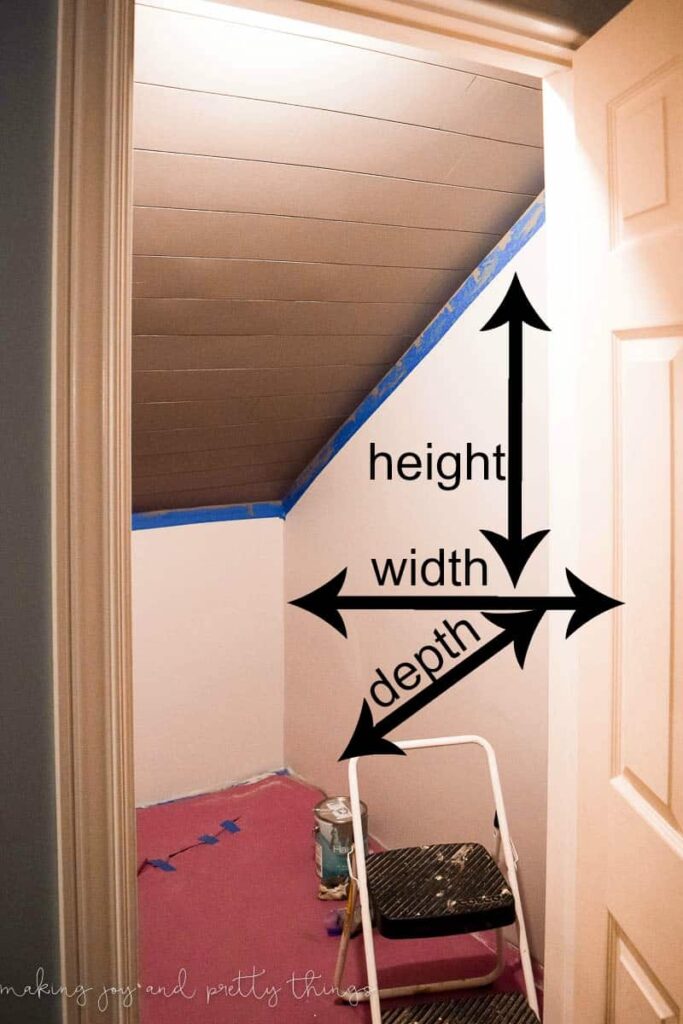
This is probably the most important part. You want to measure the width, height, and depth of your closet space.
Since I planned on using two walls of our closet for the closet system, I had two separate measurements and two separate designs for the different walls.
The height should be measured from the floor to the ceiling and the width measured from wall to wall (or however wide you want the closet system to be). The depth refers to how deep your closet is (i.e. the back of the closet to the front of the closet). There are a few things to keep in mind:
- What space can you actually use? For instance, if you don’t have a walk-in closet, the actual width of your closet may be wider than the doorframe. But, is the space between the doorframe and the wall actually usable space?
- IKEA has 3 different depths of products (7 1/8″, 15″ and 22 3/4″). When you measure the depth of your closet, keep those measurements in mind. We went with 15″ depth for ours because it’s a walk-in closet and the 15″ goes basically from the back of the wall right to the door frame.
- IKEA has 3 different widths for each of the closet sections (15 3/4″, 23 5/8″, and 31 1/2″). So, there are TONS of different combinations you can use in any space. I found that the best width for using most products is 23 5/8. The bins/baskets can’t be used in either the smaller or larger width.
- When measuring, look out for crown molding or baseboards. You don’t want to include those in your measurements (measure in between any molding).
(We will get more into the measurements in the next section!)
Step 2. Design your sloped ceiling closet on IKEA’s website
In true IKEA fashion, all of the “pieces” of the Boaxel system come sold separately. And there are 20 billion pieces, of course 😉 But you can also get a storage combination with all of the pieces sold together, however, you’ll probably need to customize it or “build your own” if you have a sloped ceiling, like we did.
Rather than try to design the space in stores with the kids trying to find something to break, you can design the entire closet (seriously the whole thing) on IKEA’s website.
Then, you can get a printable shopping list, go to the store and pick everything up! Amazing, right?!
So, start here –> Plan your IKEA BOAXEL Solution
At this point, they have you pick from one of their predesigned closet systems or you can start from scratch and make your own.
I actually found one pre-made option for a sloped ceiling closet that I chose to customize! But, definitely search through their options because it’s a good starting place.
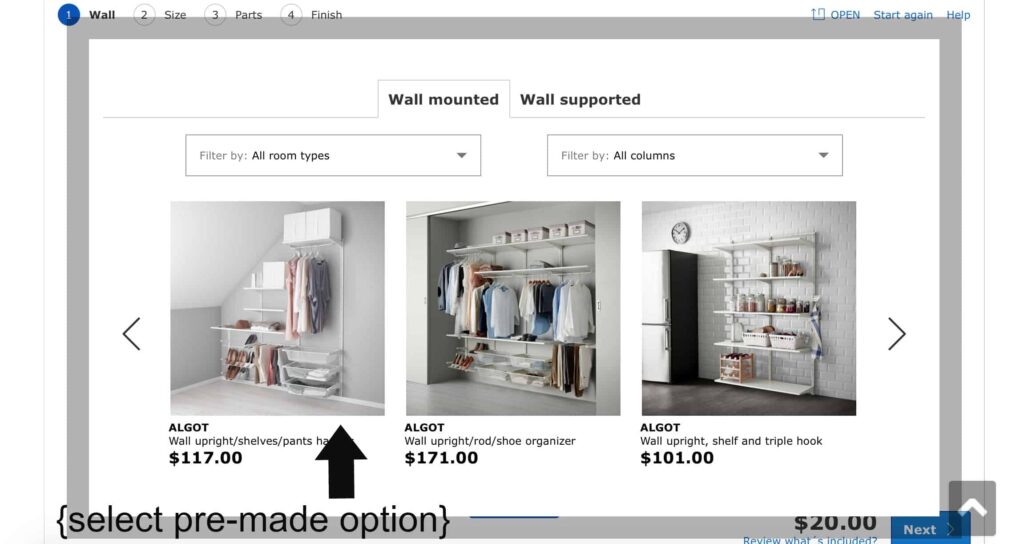
Once you select your option, you’ll be taken to a screen that looks like this.
Step 3. Add dimensions for your sloped ceiling closet on IKEA
You tap your cursor in the blue area and can change both the feet and inches for the width and height of your space. For our closet, I put our height as the highest point in the closet.

Hit the “next” button to begin customization.
Here’s where the width of each section comes into play. As I mentioned before, you can choose from 3 different widths for the sections of your closet.
However, not all of the pieces fit into each of the 3 widths. If you’re just looking for shelves and/or shelves with clothing rods (no baskets), you can use any of the 3 widths.
But, if you want to add baskets, bins, or shoe racks you have to use the middle width (23 5/8″) only. There’s no right or wrong way to go about designing your space from this point.
Step 4. Use IKEA’s planner to see which sections fit into the sloped ceiling closet
For our closet (and the fact that we were having closet systems on two walls), I chose to do two widths of 23 5/8″ with a smaller section in the middle for just shelves.

You’ll notice I didn’t take up the entire width we had. This is because the back wall was also going to be used for shoes. We couldn’t have the shoes sticking out 15″ from the back next to a wall completely filled to the end. It simply wouldn’t fit.
I LOVE how easy it is to visualize the space. You can see the gap that will be in place on the left-hand side of the shelves AND you can get an exact measurement for that space.
Now, remember our sloped ceiling. (Can you tell if you don’t have a sloped ceiling how much easier this would be?!).
The little up and down arrows in the blue with each column moves each section up or down as you need. I moved each section down and checked the measurements. (Click show measurements)

With the measurements shown, we were able to make sure each closet section would fit under the sloped ceiling.
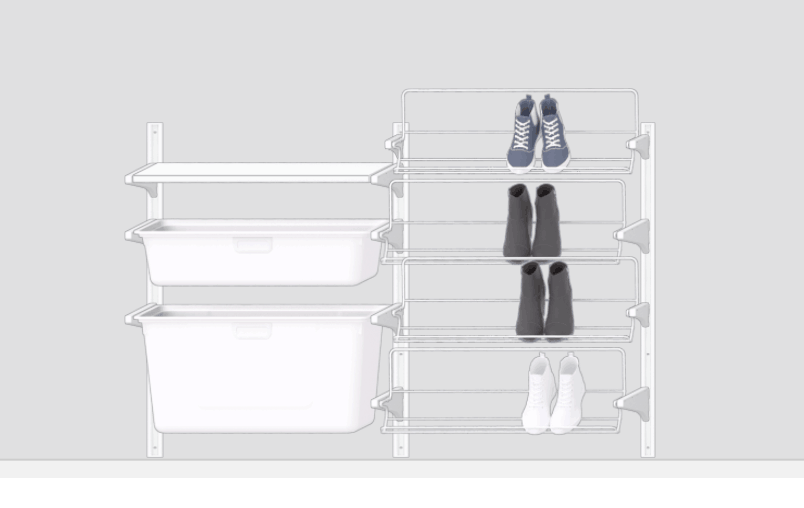
Step 5. Visualize the IKEA sections in the sloped ceiling closet by adding individual pieces
Again, this is absolutely a personal preference. I don’t have a ton of dressy clothes that need to be hung up so I didn’t put a lot of hanging space. I do have 75 million pairs of leggings and workout clothes so I added a LOT of bins.
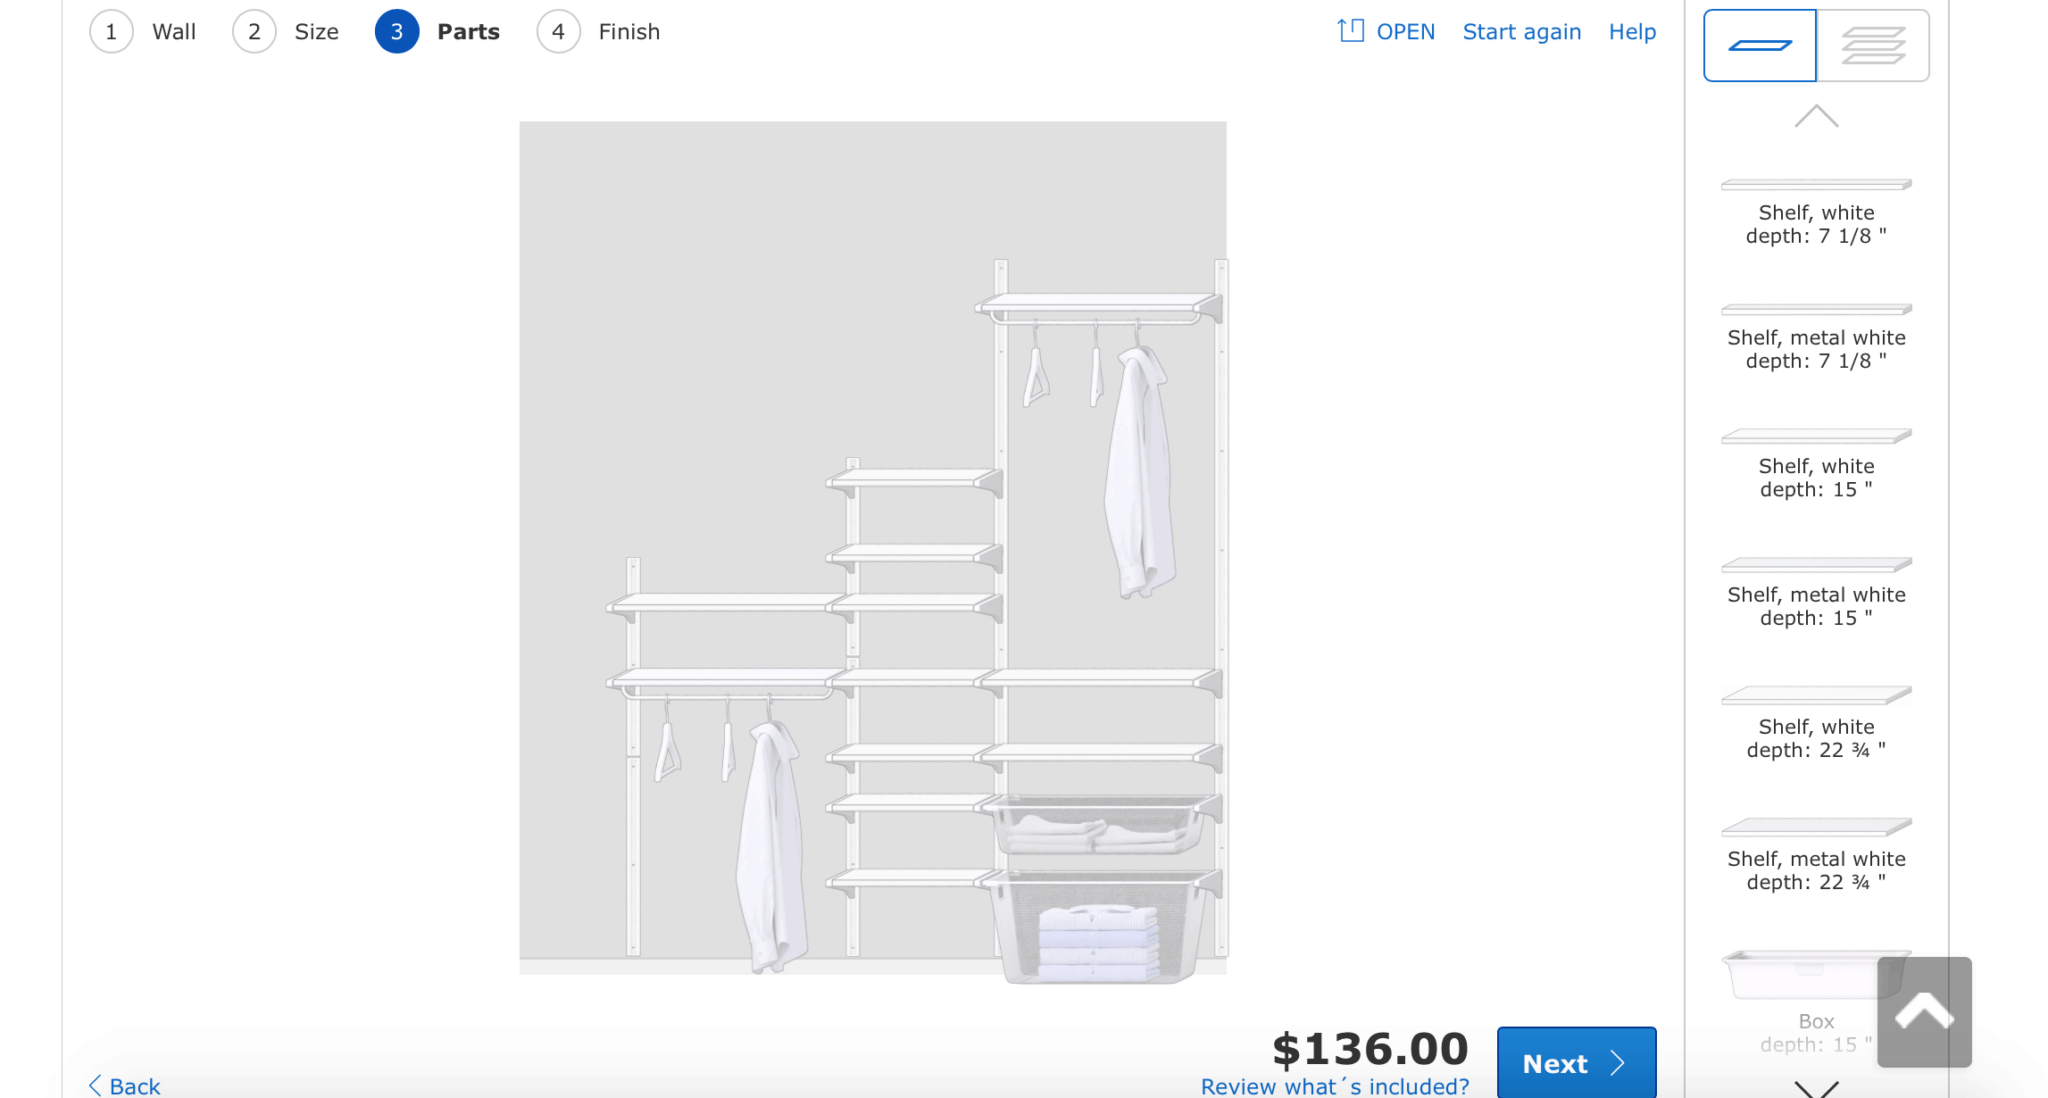
You just drag and drop the pieces from the right-hand menu. Once you select a piece, the design you’re working on automatically highlights open places where you can “drop” your piece.
Remember to pick the same depth!! (Hint: I wasn’t paying attention and selected two different depth shelves!!)
If a piece won’t fit or you don’t like the layout, simply drag and drop pieces from your design back into the menu on the right-hand side.
Hit “next” when you’re satisfied and see the finished result!

Step 6. Create a shopping list to purchase the closet pieces at IKEA
Hit “save to shopping list” and IKEA gives you your “Boaxel code”. This code can be used in stores on their computers in case you have any last-minute tweaking to do before picking everything up!
Save this code. If you want to work on your design again at home you can use the code to start from where you left off instead of guessing what you had chosen (Hint: I made this mistake!).

If you’re satisfied with your design and ready to buy, click on the “shopping list” above your code.
You will get an exact list of every single product you need to make your custom closet. If you print your shopping list, it gives you the exact Aisle and Bin for every.single.item at your local IKEA. I mean, it doesn’t get much easier than that.
For the back wall, I followed the same process as the sloped ceiling wall.
Step 7. Hang the IKEA Algot system in your closet space
The BOAXEL system from IKEA comes with very detailed instructions on how to hang the system in place. Be sure to follow any and all directions that you get from IKEA.
I’m so excited to have the IKEA system installed in my closet! I’m going to do a separate post on just HOW to hang the ALGOT system because like I said before, everything comes as separate pieces and it can be pretty intimidating (so my husband says, I just watched).
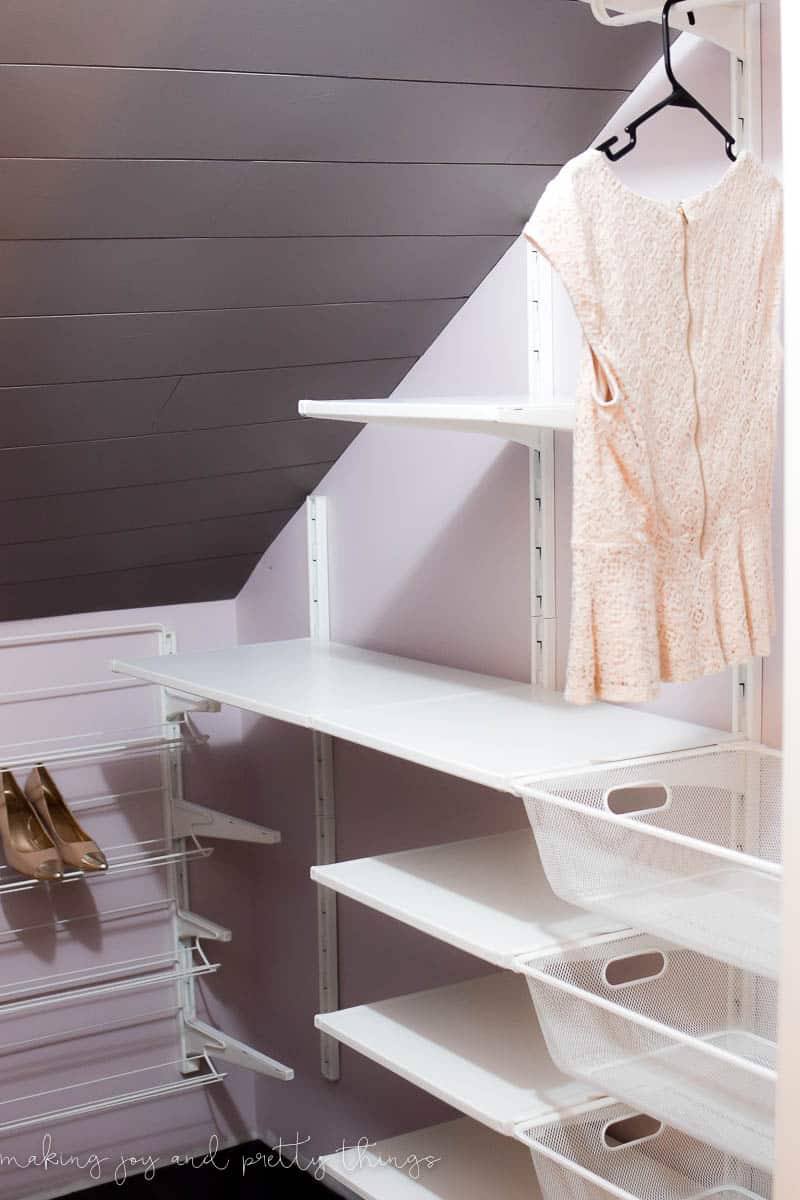
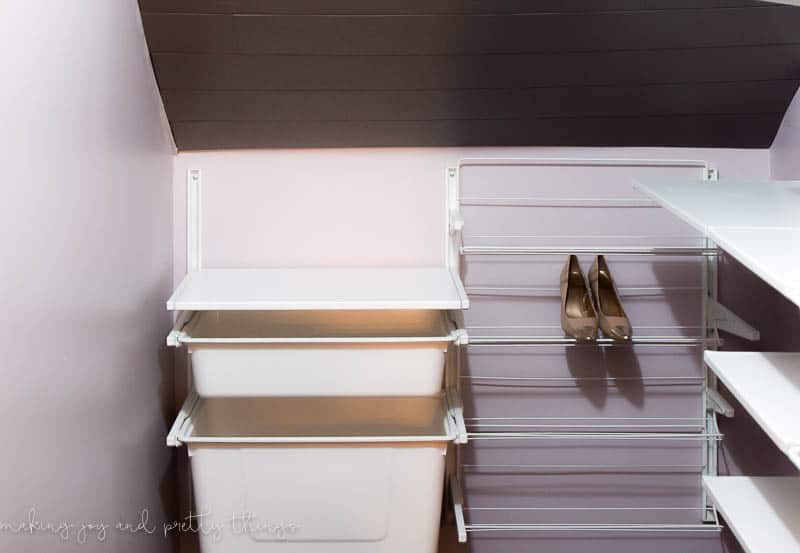
Here’s how it looks all installed!
(Sorry for the so-so pictures. Still trying to figure out how to photograph this tiny space with no natural light!!)
And as always, let’s see how we progressed this past week on the to-do list:
Clean out all the garbagePaint the walls and ceilingAdd a shiplap feature wall to the sloped ceiling- Design and install custom framing around the shiplap
Design and install a custom closet system that works with the sloped ceiling- Finish baseboards
- Find a rug
- Design and DIY an industrial lighting feature
- Add some character with DIY planters
- DIY a scalloped towel rack
DIY a trumeau mirror (or something similar)clean up antique mirror- Find and refinish an antique door or now cover the gross door with something DIY?
As you can see, we still have a long way to go! On the agenda this week is finishing up the baseboards and starting to find or DIYing lighting and the door!
I think I found the rug (I talked about the rug more in this post) but I’m keeping that a surprise until the end!
A HUGE thank you to IKEA Pittsburgh for providing the closet system.
Want to see more of our closet renovation?
Wishing you a joyful day!
How to Design a Sloped Ceiling Closet using IKEA

Design a sloped ceiling closet using IKEA to store clothes, shoes, and other accessories underneath stairs
Materials
Instructions
- Measure your closet space
- Design your sloped ceiling closet on IKEA's Website
- Add dimensions and adjustments for the sloped ceiling closet
- Use IKEA's planner to select sections that fit into the sloped ceiling closet
- Visualize clothing and other accessories in the plan
- Create a shopping list to purchase the closet pieces at IKEA
- Hang the IKEA closet system in your sloped ceiling closet space


That closet system is awesome! Makes me want to organize my own closet!
What a wonderful and informative post! My closets ate a wreck, but now I have hope I can get them organized. The IKEA system is fantastic. Thanks so much for sharing and making the process so easy to follow. Looking so forward to seeing your reveal! Susie from The Chelsea Project
Oh all of my other closets are a hot mess haha. I LOVE the IKEA system. Thanks for stopping by!
Thanks so much Kate!!
Love closet organization! Can’t wait to see how you installed it. 🙂
Thanks Kim!
You are so much more organized than I was when I tried to do our master closet. It ended up being a mess and my husband had to rework a bunch of the ikea stuff to make it fit. Whoops!! I will come back to this post if I ever need to do a closet again!! Oh, and I am struggling with photographing my dark bathroom too!!
Haha!!! Well, I made my fair share of mistakes when it comes to designing the closet system. Like we forgot to incorporate the baseboard measurements into it so he had to cut off some of the support length. Oops!!! Good luck on your bathroom!!
i love that system and could use it in my daughter’s room! one of these days!
It’s so easy to design and install! Thanks Cassie!
Wow!!! Who doesn’t love an organized closet?!!? I Love that IKEA lets you design online and then pick up the pieces – what a timesaver.
Also, where’s that baby?!!?!?
It’s SO helpful, especially with little kids. She’s apparently going to come out when she’s 3 years old….
The ship-lap looks awesome & thank you for walking us through the Ikea closet process! So helpful!
Aww thanks Jana!
Wow it looks great! Do you happen to have the measurements of your closet? It looks really similar to mine!
I don’t have all the measurements for this space because we no longer live in this house, but the wall that the closet system was installed in was 6ft 6in wide. Hope that helps!
My closet is shaped the same way with the slanted ceilings. This is a great use of the space!
Sloped ceilings are annoying, right?!
What a useful post!! I’m hoping to do something similar to this in an awkward basement crawl space next year. This step by step is great!
Annnnd… hooray for major progress 🙂
Thanks so much Erin!!! Definitely use the Algot system – it’s amazing! Especially in those awkward spaces.
Husband here… The closet system would have been MUCH easier to install in a newer house. I was dealing with drywall on top of plaster and lath so it was way more annoying than if we had a newer house with drywall-over-stud construction. If you’ve ever hung something on a wall with two all anchors (and it was level when you were done!) you can install this closet system.
Excuses excuses …. <3
Such a great tutorial! I love my Algot closet as well. I definitely wish I would’ve known about the online designer. It would’ve saved us a ton of time. You did a great job laying out how to design a closet with this system. Nice work 🙂
the online design tool is the best part haha! Glad you liked the tutorial 🙂
What a handy system… perfect for staying organized! Your closet is looking SO good, Sarah!
Aww thank you SO much Kendra!!
That closet system looks amazing! I’m so shocked at how much you organization you were able to fit in that small and awkward closet space! The website looks like it really makes it easy to design your closet!
It was SO easy (and fun) to design. I’m actually shocked myself how much I’m going to be able to store in there!
LOVE those ikea systems! They look soooo pretty in place! Can’t wait to see the whole closet filled with clothes 🙂
Thanks Lindi!!!
Looking awesome! We’re hoping to redo our walk-up attic (at some point) into our master closet. I’m looking into the Ikea system and can’t wait to see your final reveal!!
Thanks Jessica!! Yes, definitely utilize IKEAs closets. Even if you get the nicer kind, you can still design online.
Your closet is coming along and looking great, especially with the Ikea system!
Thanks so much Carol!
Everything is coming together so nicely! You really maximized the space and I look forward to seeing it complete.
Thank you SO much Katie!!
That’s awesome girl!! Looks so great and how EASY is that system?! Gosh I love IKEA.
Can’t wait to see more & the final result!!
Gotta love IKEA!! Thanks, Lauren!!
This is very informative! You know we can all use pointers on designing a closet system! Thanks for sharing and I can’t wait to see how your closet turns out!
Thank you SO much Tee!! The closet is coming together 🙂
I love Ikea for flexibility and customization — especially since I’ve lived in older homes. It’s a great way to get “new build” features with affordable products.
It’s the BEST for older homes. Our house is 100 years old and there isn’t a straight wall/floor anywhere! You can’t tell with this system 🙂
Great post outlining using the Algot system! Pinning for future reference. 🙂
Thanks for pinning Brittany!!
Great progress on the closet! I love IKEA – that’s such a cool tool to pick out exactly what you need!
XO, Vanessa
Isn’t the online planning tool great?! Gotta love IKEA 🙂
Its looking great. Nothing like a funtional and attractive closet. Can’t wait to see more next week. Thanks for all the information
Thank you!!!
This seems like the perfect solution! I just had an extra walk-in added to my bedroom and this looks like a great fix for me too! Thanks so much for sharing!
It’s great you can get the ALGOT code, but WHERE do I put it in to resume my session then? I can not find it nowhere, google also no help.
WHere are the clothes?
You can see the finished closet here: https://www.makingjoyandprettythings.com/farmhouse-industrial-master-bedroom-closet-reveal/
FYI you should add a disclaimer to the top of this article that Ikea discontinued the Algot system.
Thanks for the heads up, I had no idea!
I would sooooo love to do this in our home! We only have 3 tiny closets and they are ALL like this (1940’s era home). Has anyone installed a system like this in a closet that has plaster walls (not drywall)? I worry about trying to drill into the plaster and having it crumble AND about whether the wall structure would support the shelves, etc. Thanks for any advice!
I haven’t done this on plaster, but maybe someone else will chime in?